
Creating a Workflow
Getting Started
To create a new workflow, log into HR Manage Online, click on the Site Menu Button, expand the Workflows item and click on the Create New item. This will open up the Start Workflow Wizard.
Step 1: Select a Workflow Template
On the first step, we’ve tried to make it as easy as possible to get started quickly. See the following screen prints for reference.
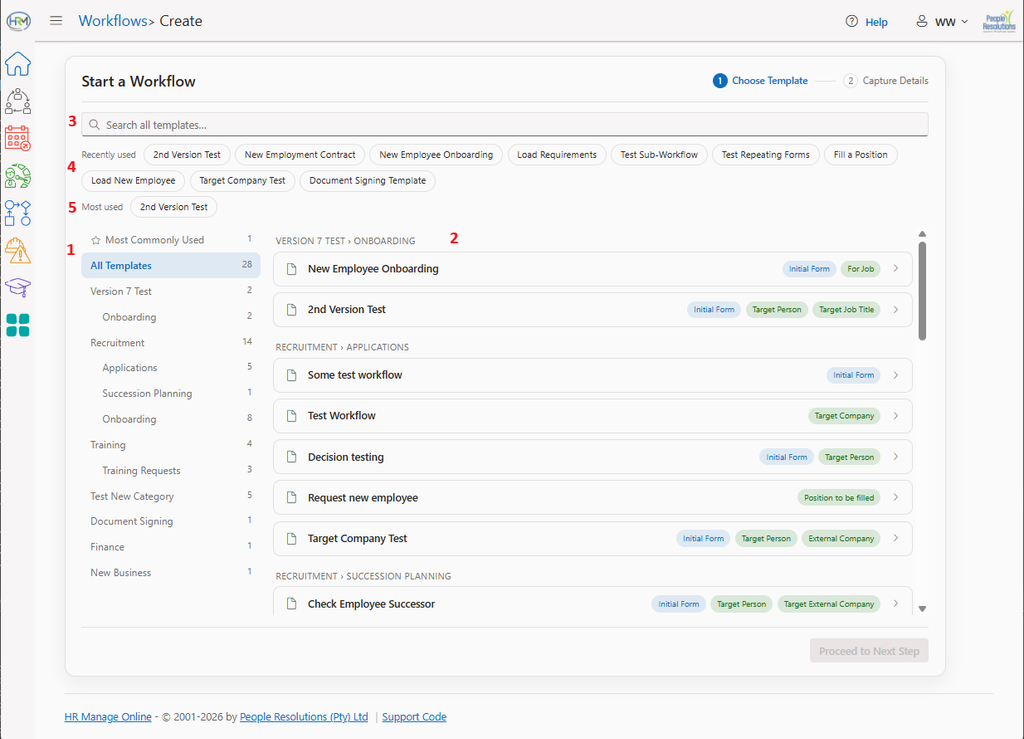

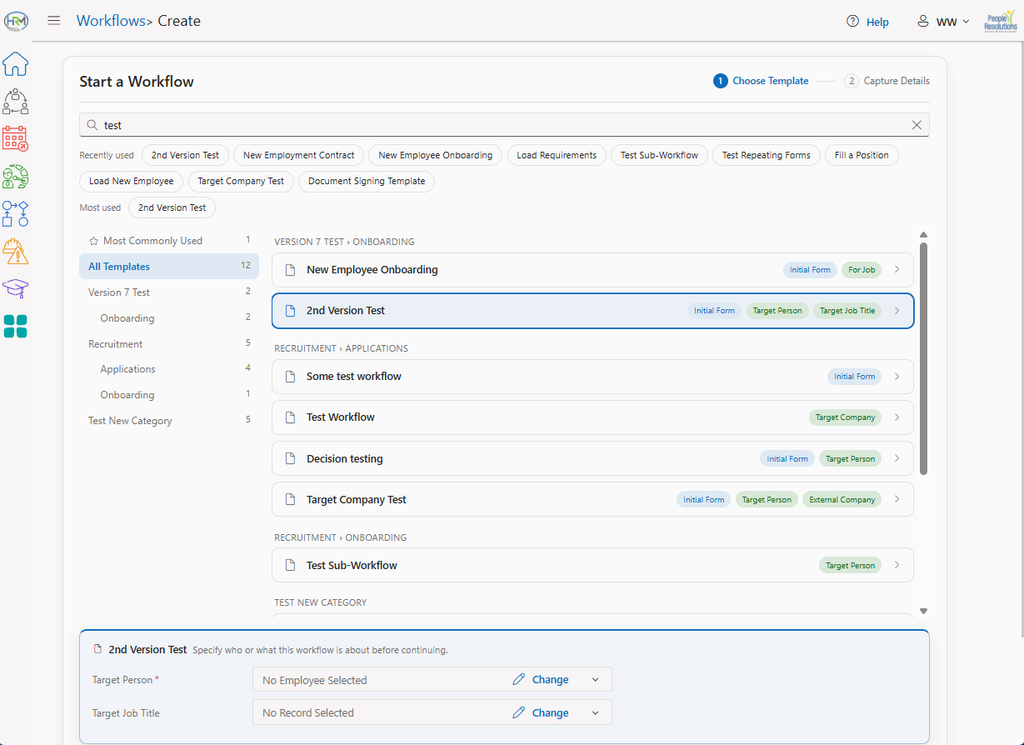
Page Overview
The page consists of the following elements:
- Workflow Categories: Simply select a category on the left tree to show only workflow templates that belong to that category. The 2nd screen above shows an example of this.
- Workflow Templates: On the right of the categories, you’ll see a list of Workflow Templates. You must select the template you wish to create a workflow for. The list will display the Template Name (and Description if captured) and it will indicate what additional information will need to be specified to create the workflow. This could be completing an Initial Form (additional fields / questions), specifying a Target Person and/or another record in HR Manage.
- Search Bar: This allows you to quickly filter all the available workflow templates. The categories and templates will filter as you type and only workflow templates (and the categories they belong to) will be listed that contains the search phrase.
- Recently Used: The last 10 types of workflows that you’ve created will be listed here for quick access in case you want to create another. Clicking a shortcut pill will instantly select the template in the browser.
- Most used: The 10 types of workflows that you most commonly create will be listed here. Click on one of the pills to select it instantly.
Selecting a Target Person / Record
Once you’ve selected a Workflow Template, you’ll be required to specify a Target Person and/or Target Record, depending on what the workflow template requires. The box will appear at the bottom of the page. Simply specify the applicable values by clicking the Change button within the edit boxes.
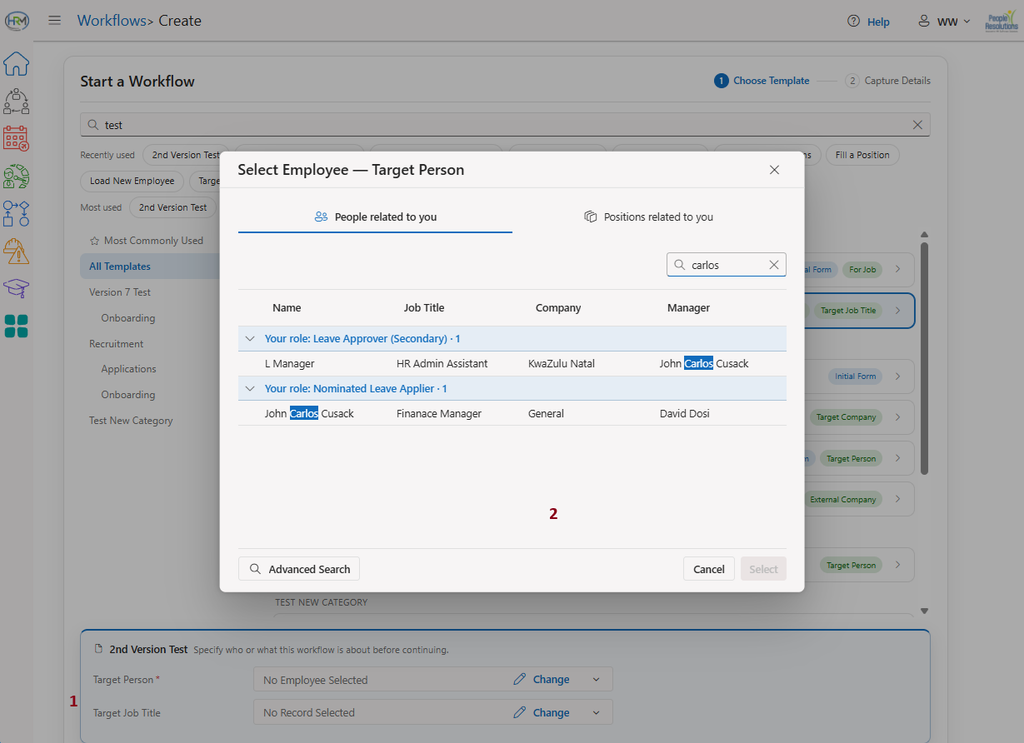
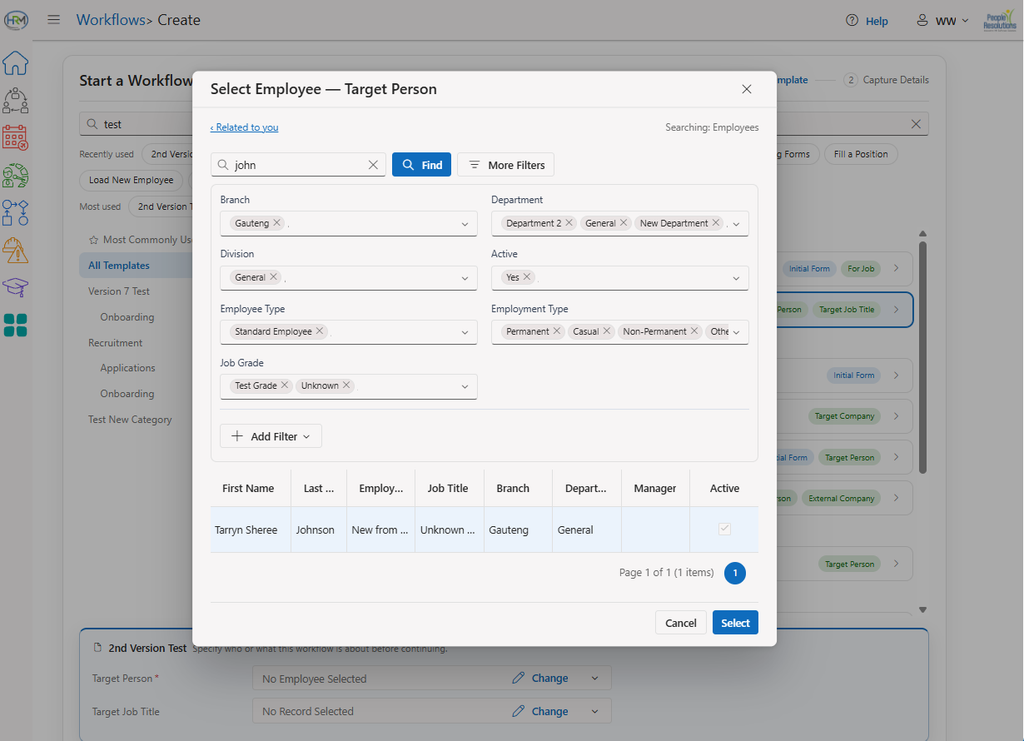
The popup will start off by listing people directly linked to you in the system. You can scroll through that list and type the name in the search box to quickly filter the list of people. You can also search by Position if needed.
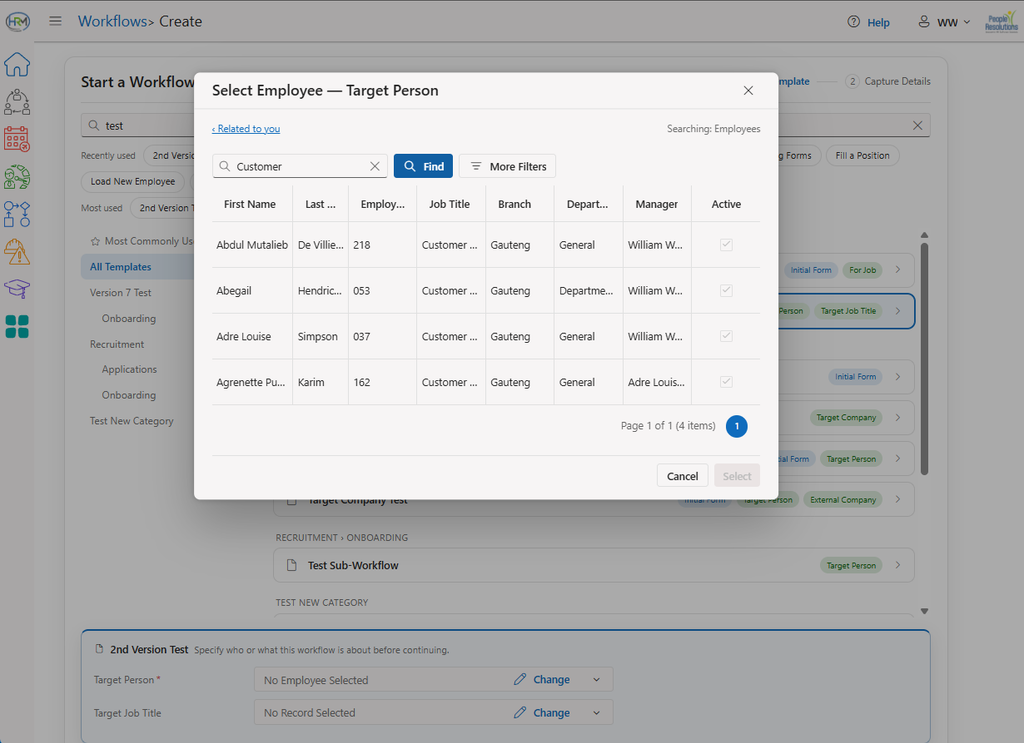
If the person / record isn’t related to you, you can click on the Advanced Search button in the lower left corner of the popup window. This will allow you to search the whole company. You can do a quick search by typing the person’s name, employee number or job title into the search box and clicking the Find button.
If you need more advanced search capabilities, click on the More Filters button to show the full filter engine (as on the 3rd screen above). Then adjust your filters and click on the Find button to list the results. Once the person is found, simply select the person and click the Select button in the bottom-right corner of the popup.
Completing Step 1
Once you’ve selected the Target Person and/or Record, click on the Proceed to Next Step button in the bottom right corner of the page.
Step 2: Capture Details
The system will load the next step based on the selections in the first step. The second step’s page consists of the following elements:
- Header containing the details about the selected template and the workflow that will be created.
- The Target Person and/or Record that was selected will be displayed in pills.
- The standard and custom fields for the workflow that must be completed (both fields “Subject” and “Description” can be renamed in the template configuration).
- The Initial Form as specified / built for the selected workflow template. The form can contain various types of elements and fields like headings, text, questions, fields from records, calculated fields and decisions. If the form wasn’t configured to display the labels next to the input controls, then the initial form will look a bit different from the rest of the page due to different formatting.
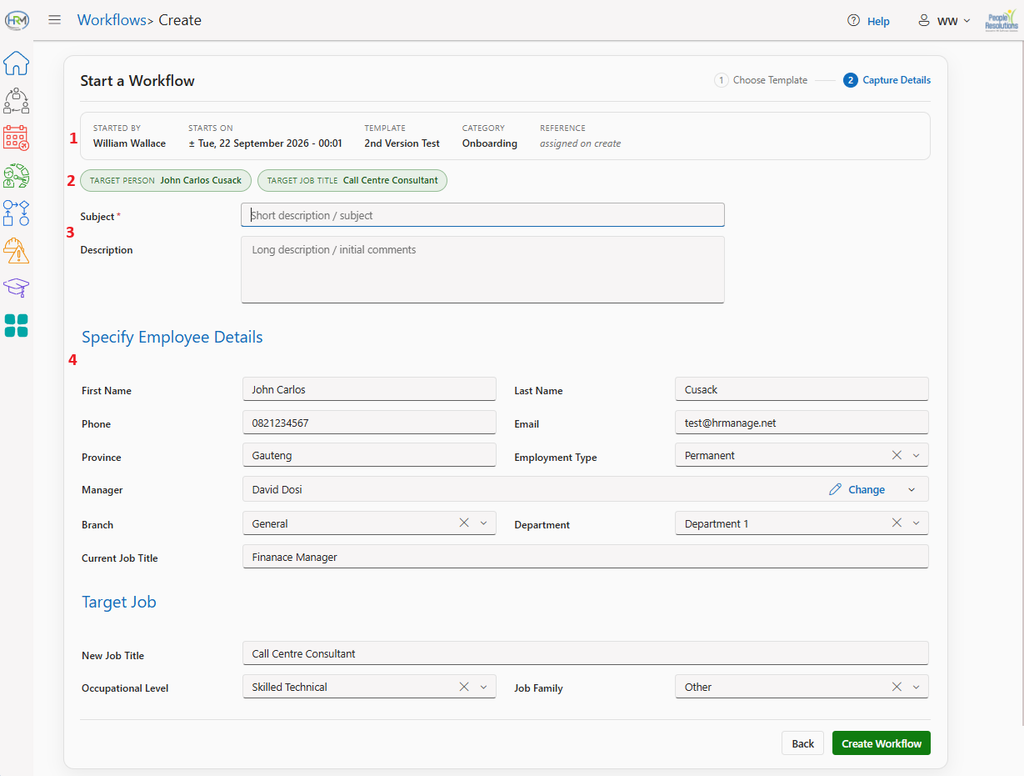
If an Initial Form is present and it is specified to populate with details from either the Target Person or Record, it will now pre-populate and display as part of the next step. Editable fields can then be modified and required fields need to be captured. In the following example screen, the test initial form populated from both the Target Person and Target Job Title that was specified in step 1.
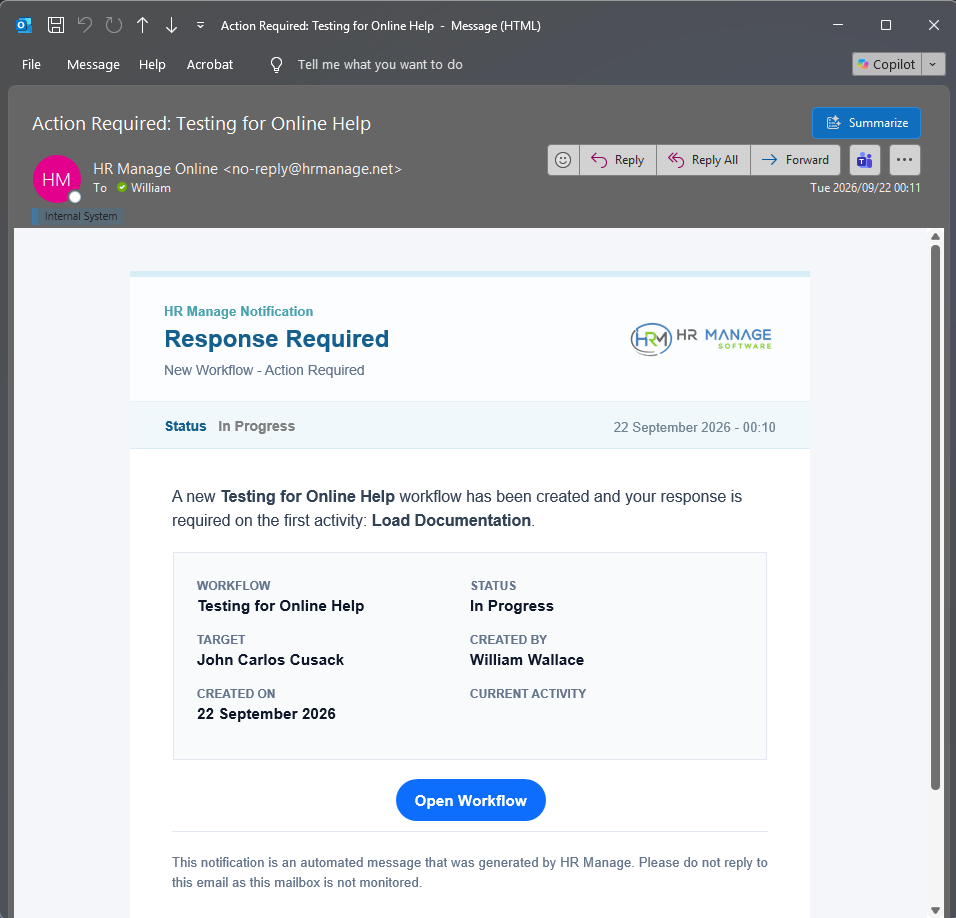
Once all the fields have been completed, click on the Create Workflow button in the bottom-right corner of the page. This will create the workflow and open the newly created workflow’s page. An automatic email notification will also be sent to the people who need to action the first activity in the workflow.