Integration with External Systems
Introduction
Any system that HR Manage integrates with, needs to be registered as an External System in HR Manage. That applies to external forms, payrolls, e-Learning and our Document Signing Portal. The registration contains the core information needed for HR Manage to communicate with the system like API keys and secrets.
Registering an External System
To register a new system on HR Manage, open the “HR Manage System Configuration”, click on the External Systems item in the menu on the left and click Create New on the ribbon bar.
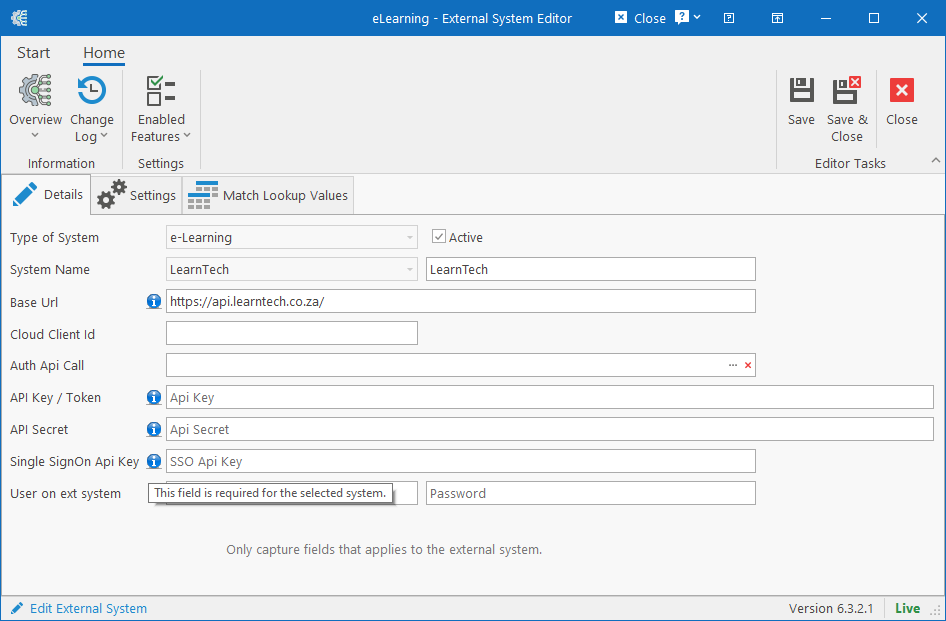
Start off by selecting the “Type of System” to integrate with and then looking for the “System Name” in the next dropdown. If the system that you wish to integrate with is not listed, you can choose “Custom Developed” if we’ll be integrating with an external system by developing plugins.
When selecting a predefined System Name, an icon will appear next to each applicable field that must be completed that applies to the specific system. Different systems require different keys / fields.
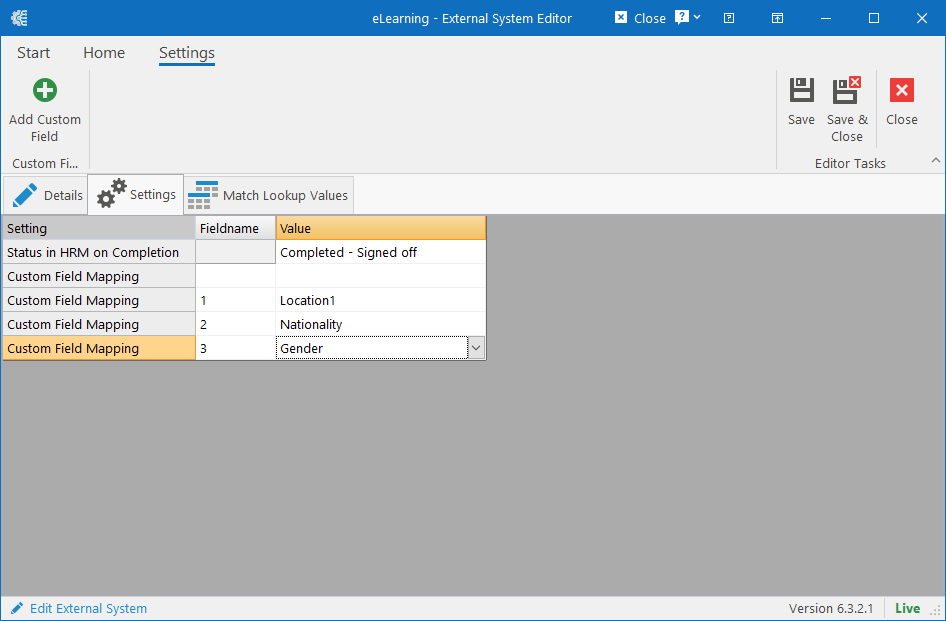
The Settings tab will also differ based on the type of system that is selected. Payrolls will have settings regarding the syncing of leave applications and balances while e-Learning systems will have settings concerning training completion and mapping fields in HR Manage to custom fields on the e-Learning system.
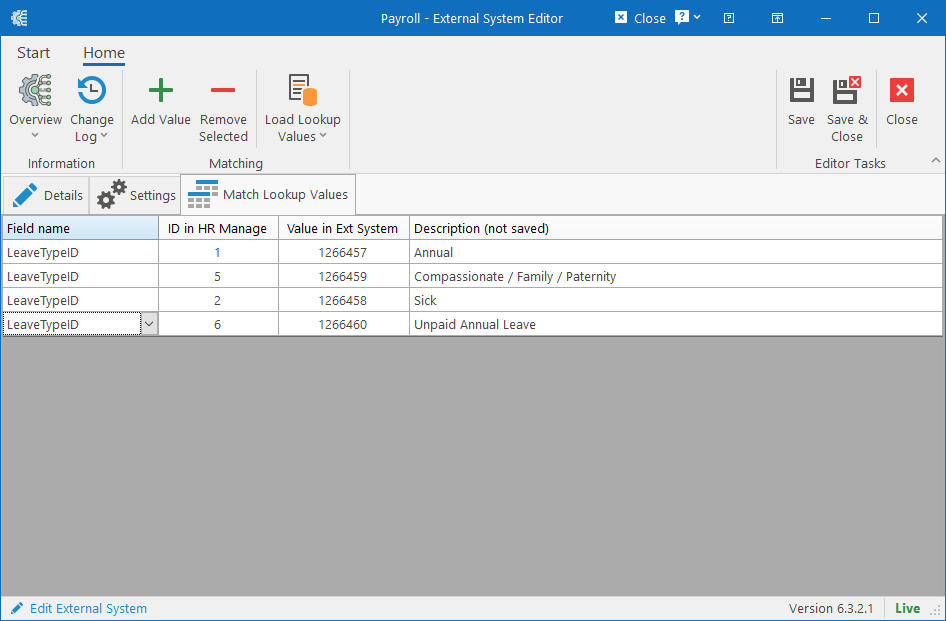
Finally, the Match Lookup Values tab will apply to certain systems like matching lookup values of leave types between the payroll and HR Manage for syncing leave applications / balances.
HR Manage Document Portal
When selecting “HR Portal” as the system type and “PeopleRes HR Portal” as the system name, the editor will show the “HR Document Portal” group in the ribbon bar. This is HR Manage’s in-house developed portal used for document signing and each client that holds a license for the Workflows module, has this available to them.
Registration
Simply click the Register on Portal button to register your HR Manage instance. You can only do this once for your company. The editor will then close and when opened again, the API details will be filled into the applicable fields.
Configuration
When opening an External System registration for the HR Manage Document Portal, the Advanced Configuration button will be available to customise how the portal behaves with requests from your company.
Note that everything being managed here is not stored on HR Manage, but rather directly on the portal under your company’s registration. Thus, system responsiveness might be slightly slower than what you’re used to.
General Settings
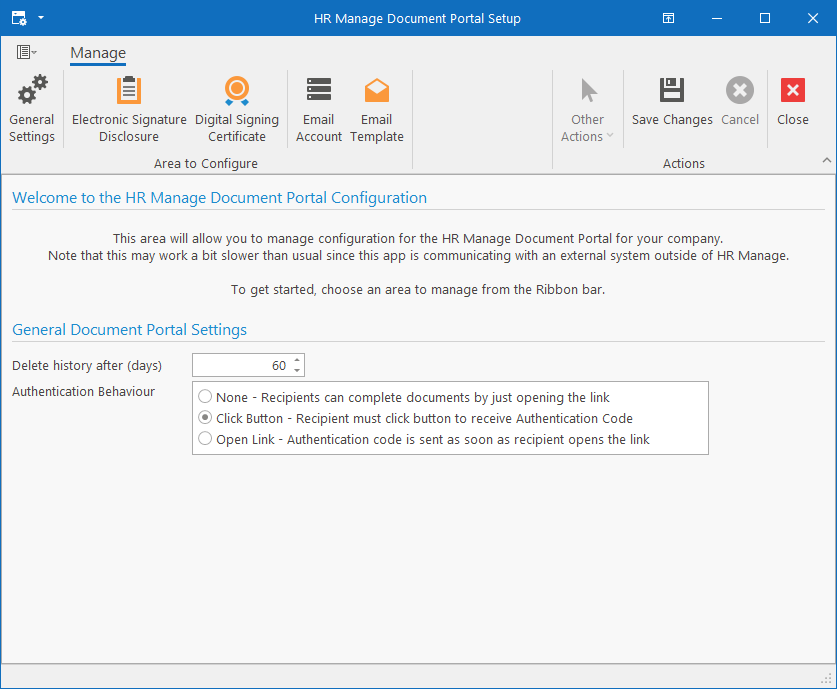
The Delete history setting determines for how many days the completed documents will be stored on the HR Manage portal after completion or cancellation. Maximum is 60.
The Authentication Behaviour determines how a recipient must authenticate themselves before starting the document signing & completion process. The options are:
- None: When recipients open the link, it will ask them to accept the ESD and that will open the document for completion.
- Click Button: When opening the link, the system will prompt the recipient to click a button to request an authorisation code which will then be emailed to them. They must then enter the auth-code and accept the ESD to start the process.
- Open Link: When opening the link, the system will automatically send the authorisation code and ask the recipient to enter it and accept the ESD. This essentially skips the “click button” step in the previous option, but in some cases, the anti virus can cause this to malfunction.
Electronic Signature Disclosure (ESD)
This is like a “Terms and Conditions” for using the online document signing portal. People using it essentially agree to these when they click the Accept button to start signing a document. You can specify your own here or use our standard ESD.
Digital Signing Certificate
Digital Certificates are used to sign the completed Pdf Documents to ensure they’re secure and not tampered with. After each person signs the document, it is digitally signed with this certificate and once everyone has signed, it is again digitally signed and then password protected to prevent tampering.
If your company has bought such a certificate, you can load it here, otherwise you can generate your own self-signed certificate.
Self-signed certificates will simply show as “untrusted” if the certificate hasn’t been installed on your device.
If no certificate is specified, our standard self-signed digital certificate will be used and the issuer will show as “HR Manage Document Signing Portal”.
For a Organisational Document Signing Certificate, one can be acquired from a certificate authority like Sectigo for around $360 per year. Then simply select the “Formal” certificate type and load it in the “Certificate Pfx File” field and specify the password.
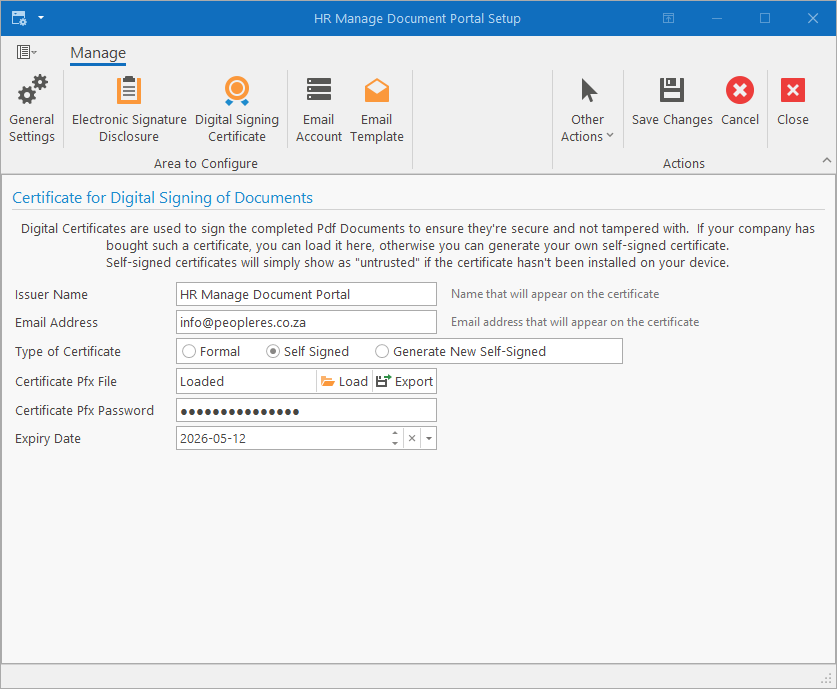
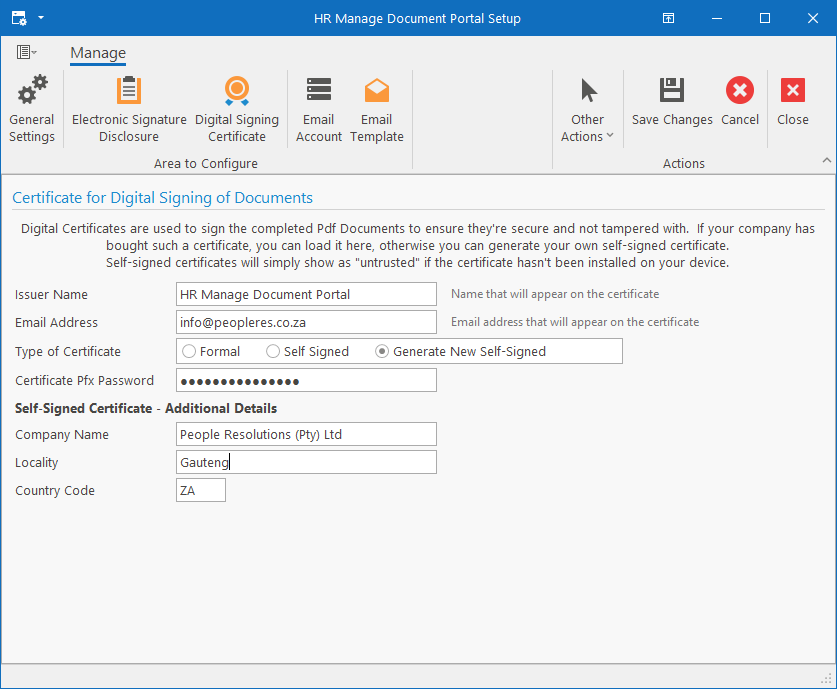
For a Self-Signed Certificate, simply choose the “Generate New Self-Signed” option on the screen and complete the fields. When saving, the certificate will be generated in a Pfx file and secured using the password provided.
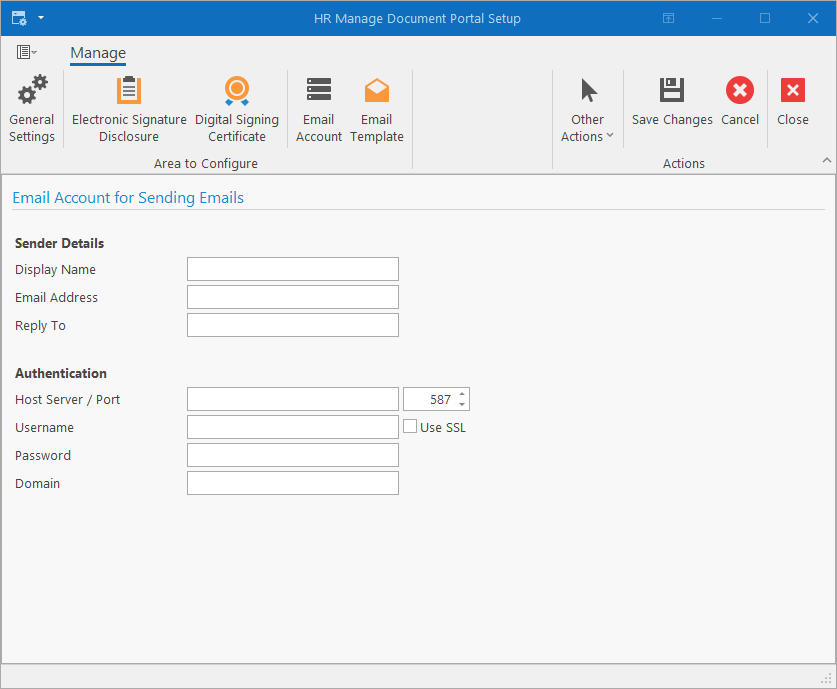
Email Account
Specify the details for the email account to use for sending email notifications to recipients. If not specified, our standard email account will be used. If however, you want someone to be able to reply to the email instead of ending up at an unmonitored email, you should specify one here.