
Configuring Sign Templates
Introduction
Sign Templates define which documents must be signed as part of a sign request, who must fill each role and in which order should the documents be signed and in which order should the people sign.
Embedded in other editors
The sign template designer is embedded in other editors for easy integration. It is currently embedded / integrated in:
- Sign Document Workflow Activity Editor
- Create Multiple Sign Requests wizard
Getting Started
To manage Sign Templates, open the module configuration for either the Employee or Workflow module. Since this is a shared feature, it can be managed from either.
Then click on the Sign Templates item under the “Document Signing” category in the menu on the left. From here, you can manage all the Public sign templates in the system.
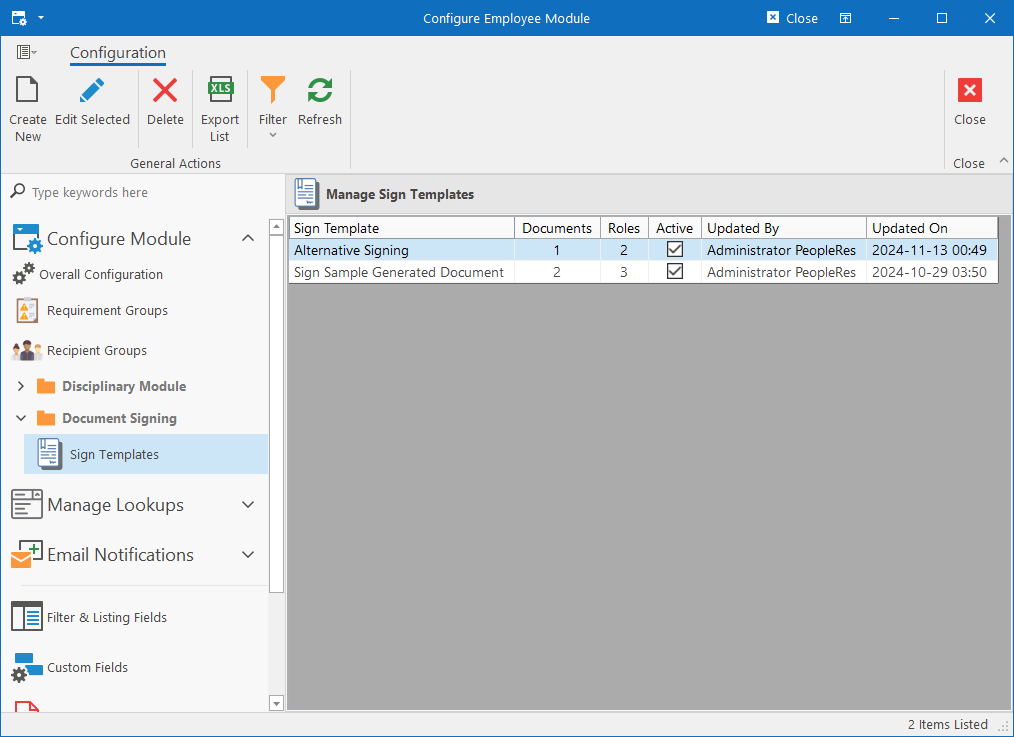
Simply click on the Create New or Edit Selected buttons on the ribbon bar to open the Sign Template Editor.
Configuring a Sign Template
The Sign Template Editor is quite straightforward and it consists of settings, documents and roles.
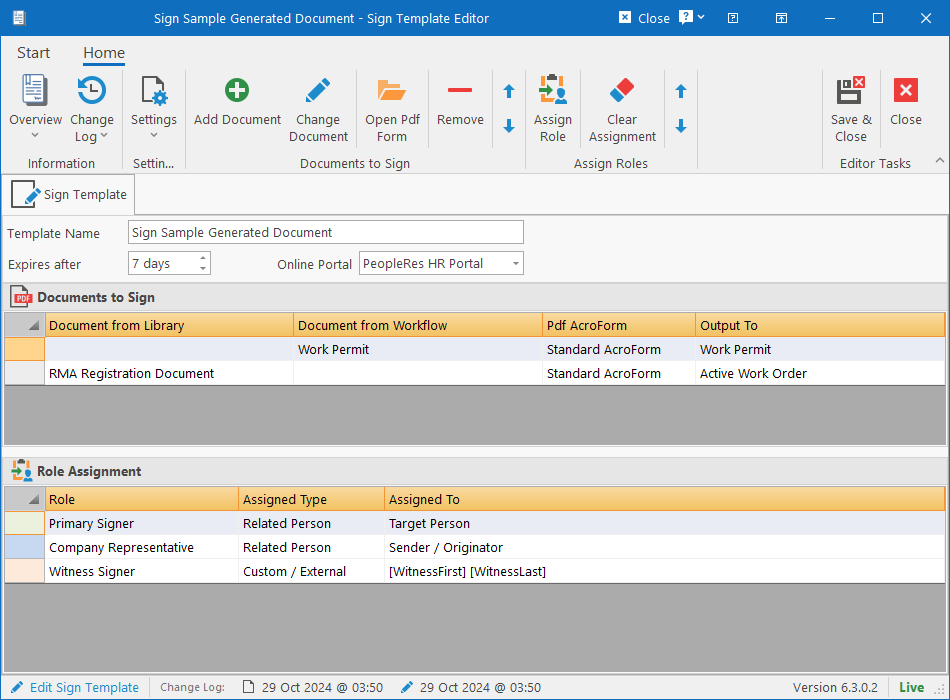
Settings
The settings or meta information is used for identifying the template in the library and some basic options:
- Expires After: Specify for how many days the sign request will be valid before it automatically expires.
- Online Portal: Specify which External System to use to send sign requests to. There should always be only one item listed that will be selected automatically. We might allow multiple options in future.
There are also some additional settings that can be accessed by clicking the Settings dropdown button on the ribbon bar.
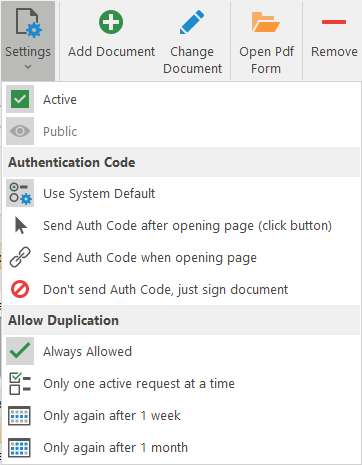
- Active: Indicate if the sign template is still in use or deleted.
- Public: Only available when the designer is embedded in another editor. Indicate if this template can be shared by other entities or workflow activities, or if the template is only used in one instance.
- Authentication Code: Specify how authentication of the recipient should be handled. Authentication is done by sending a unique code to the recipient that must be entered before signing the documents to ensure that the person opening the document is the one who is signing.
- Use System Default: The portal is configured with one of the following settings by default. Choosing this option will use whichever option the portal is set to.
- Send Auth Code after opening page (click button): The recipient will click a link in an email which will open a page on the portal where the user must click a button to begin. Clicking the button will send the authentication code to the recipient and ask the user to enter it.
- Send Auth Code when opening page: When the recipient clicks the link in the email, the page will open and immediately send and prompt for the authentication code (without the extra step of needing to click a button).
- Don’t send Auth Code, just sign document: No authentication will be done and the user who clicks the link can just sign the document.
- Duplication: Specify if duplicate sign requests can be created for a person that already has a sign request based on this template. This is to prevent duplicate sign requests from being submitted when creating multiple in a batch. The options are:
- Always Allowed: Duplicate Sign Requests Allowed
- Only one active request at a time: Only one active sign request allowed at a time. Creating a another for the same person will cause an error until the previous one is completed or cancelled.
- Only again after 1 week: Can only be requested again 7 days after the previous request was completed.
- Only again after 1 month: Can only be requested again 30 days after the previous request was completed.
Documents to Sign
This list specifies which documents should be included in the document pack / sign request that must be signed. The documents can be managed from the “Documents to Sign” ribbon bar group or by right-clicking on the list. The order in which the documents will appear can be changed by dragging the rows up or down or by clicking the Move Up or Move Down buttons on the “Documents to Sign” ribbon bar group.
To add a document to the list, simply click the Add Document button on the “Documents to Sign” ribbon bar group, or click the Change Document button to change settings on the selected document. This will open the Document Source Editor.
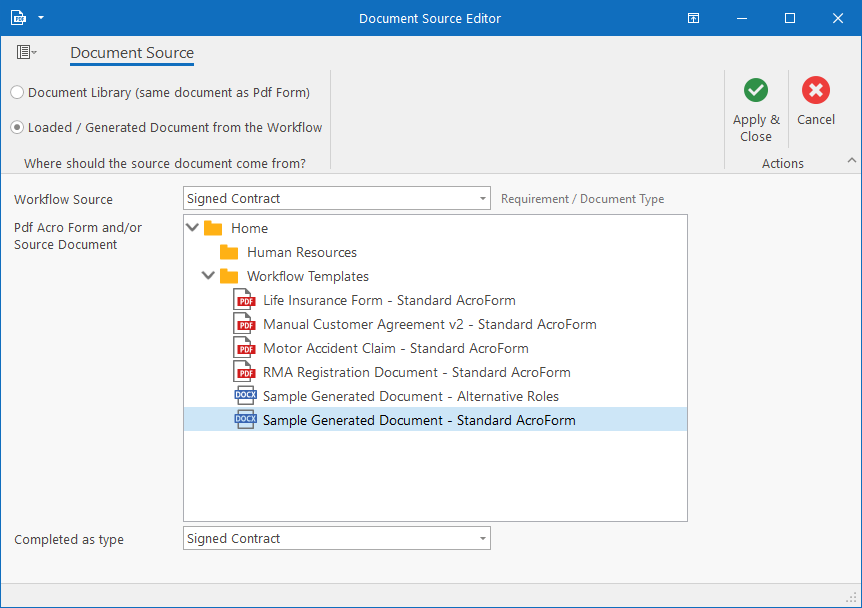
The following parameters need to be specified:
Document Source
Specify where the document should come from. It can either come from a document in the published document library or from a custom / personalised / generated document loaded under a requirement in a workflow. If the latter is specified and the sign request is created without a workflow, the system will retrieve the document from the employee file.
Workflow Source
Only visible or applicable if “Loaded / Generated Document from Workflow” is selected under the “Document Source”. Specify which requirement type the document should be retrieved from in the workflow / target employee.
Pdf Acro Form and/or Source Document
This list contains all the documents in the Published Document Library that have Pdf AcroForms linked to it. It is listed in the format “[DocumentName] – [AcroFormName]”. Thus, if a document has more than one AcroForm linked to it, the document will be listed twice (as per the example in the screen print above).
If the “Document Source” is set to “Document Library”, then the item selected in this list will be used as both the Source Document and the AcroForm.
If the “Document Source” is set to “Document from Workflow”, then only the selected item’s AcroForm will be used. The AcroForm will be used like a “stencil” over the actual source document.
Completed as type
Once the document pack has been signed and completed on the Document Signing Portal, this field specify as which requirement type the document will be returned and possible saved to the workflow or employee file.
Since requirement types can be defined as either “For Employees”, “For Companies” or “For Both”, requirement types that are only used for companies are marked with ” (*C)” in the dropdown list.
Actions
The finish adding or editing the document, click the Apply & Close button in the “Actions” ribbon bar group. This will add the document to the list and it will also determine which roles are defined in the selected Pdf AcroForm and add them to the list of roles if they’re not already listed.
Role Assignment
Roles are automatically added to the list based on the documents added to the template. All that can be done here is to assign the role to someone and change the order in which people must sign the document pack. Simply right-click on any role and click the Assign Role menu item.
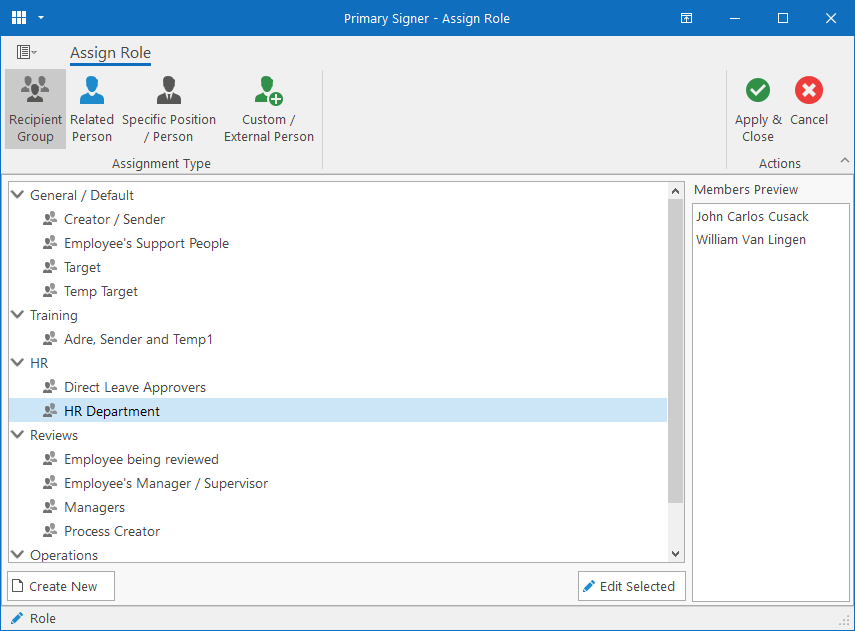
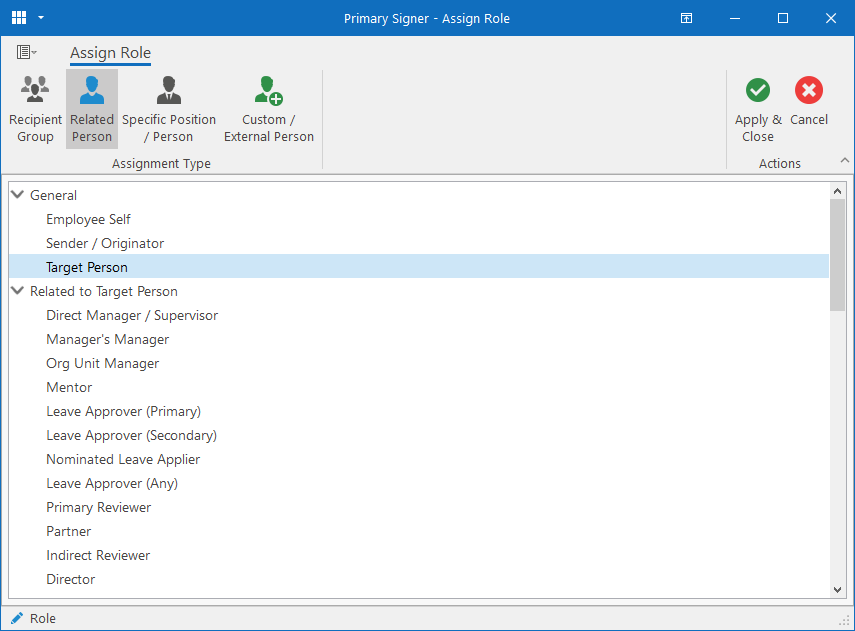
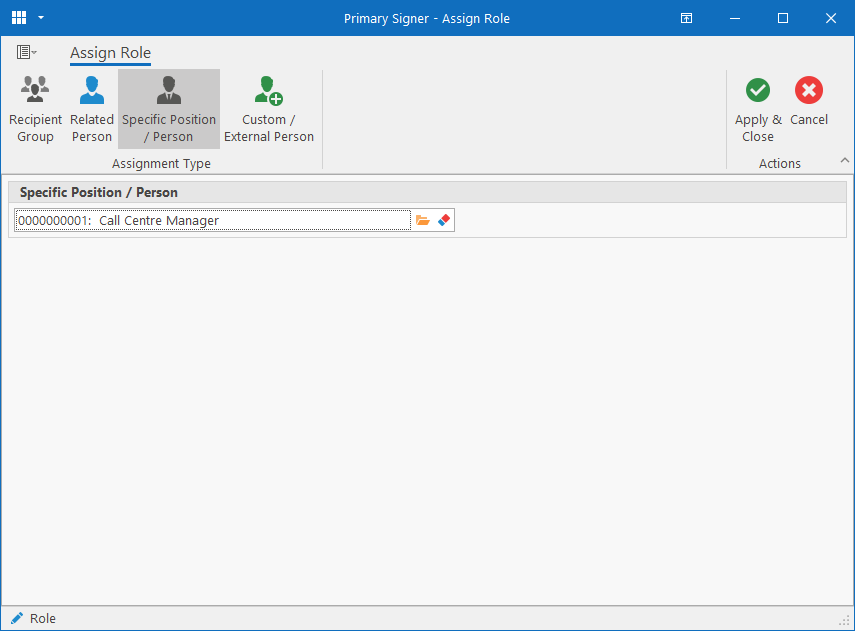
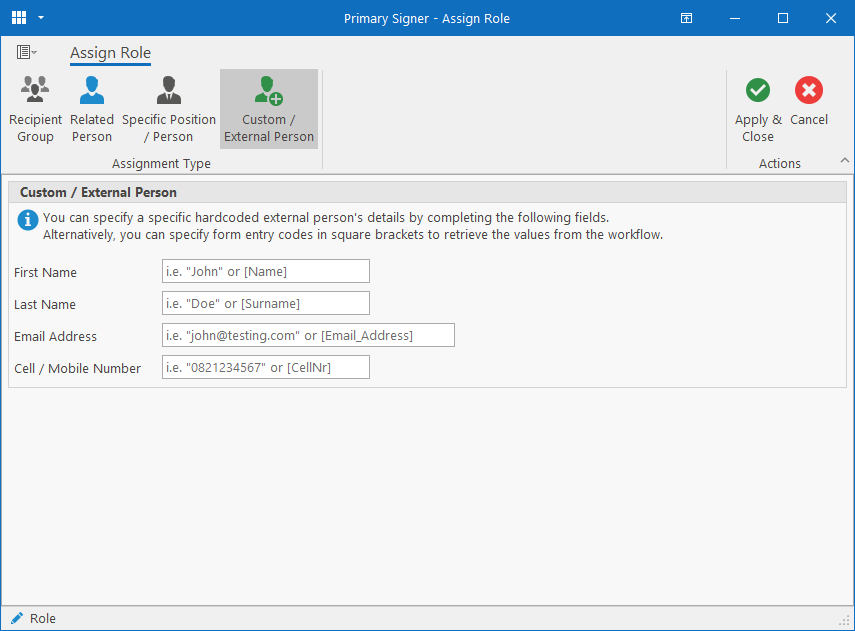
You can then specify who the role must be assigned to:
Recipient Group
A recipient group consists of one or more recipients. A new group can be created directly from here or an existing one can be edited.
While recipient groups support more than one person and only one person can sign the document on behalf of a “role”, the recipient groups are useful in cases where anyone from a specific group of people can complete the document.
Related Person
A related person refers to a relationship between either the Target Person or Creator. Selecting a relationship here will translate to the actual person related to the Target Person or Creator at the time the sign request is created.
Specific Position / Person
To reference someone specific, you can specify either a Position or a specific Person. If specifying a position, whoever is filling that position at the time of creating the sign request, will be assigned to complete the document on behalf of the “role”.
Custom / External Person
Here a person can be specified that is not someone in the database. The person can be specified in one of two ways by completing the First Name, Last Name, Email Address and Cell number fields.
The first way is to simply specify the actual values for the fields which means that the documents will always be sent to the same external person for sign requests that use this template.
The other way is when the sign request is part of a workflow in which case, tags can be specified in the fields. The tag (code for a question in an earlier form activity) must be specified in square brackets.