
Create / Update Logins in a batch
Introduction
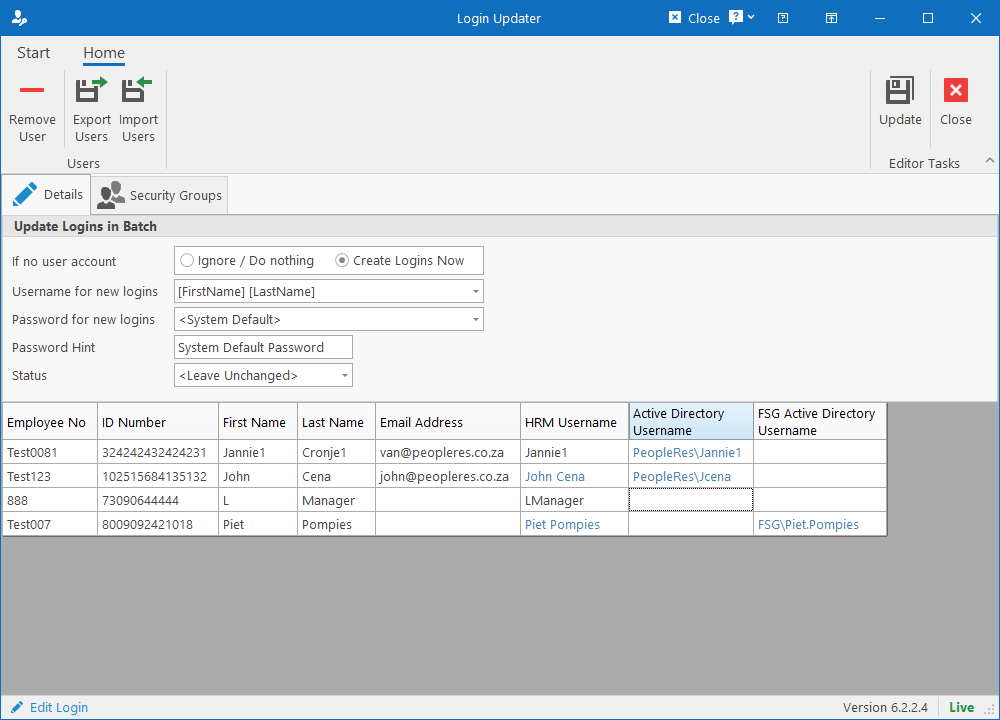
The Batch Login Updater allows administrators to create user accounts in HR Manage for employees in a batch so that users don’t need to go register themselves. It can also be used to link or delink users from Security Groups and IT Administrators are able to link employees to their AD credentials.
Getting Started
To open the Batch Login Updater, simply select more than one person in the Employee Manager and click on the Login Details button on the ribbon bar.
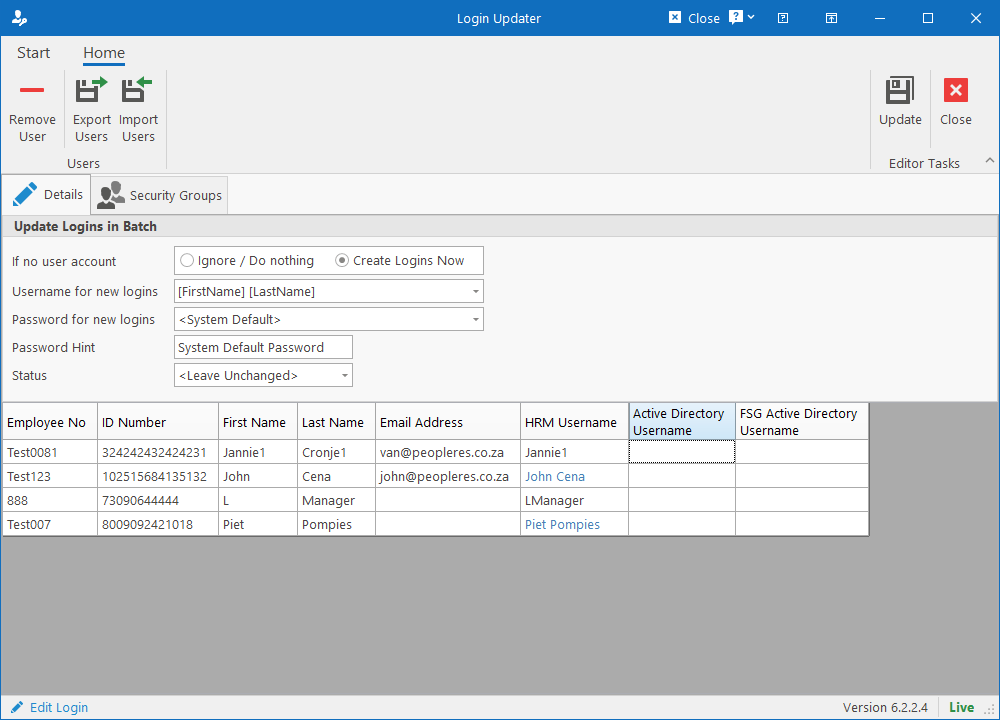
This will open the batch updater where you can specify the default username and password to use for creating new logins or enable/disable the logins for existing users. The grid that lists the users with their current username(s) is editable for rows where no user account already exists.
Any custom AD integrations will be listed as columns and can only be edited by IT Administrators. Due to the sensitive nature of these, not even HR Manage Administrators can modify these.
Linking / Delinking Security Groups
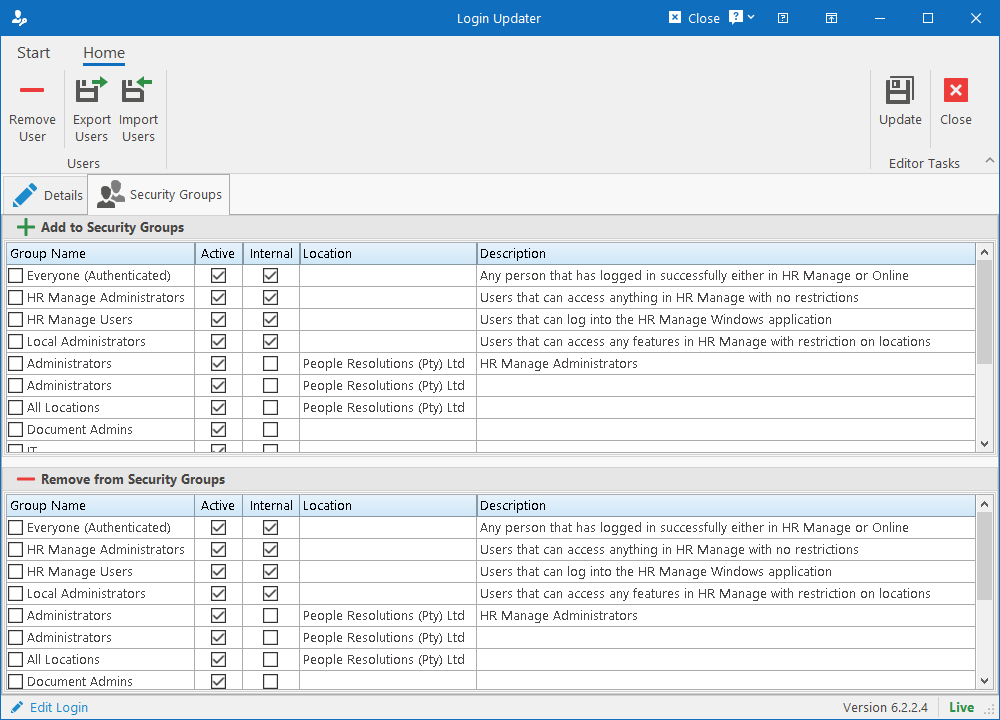
On the “Security Groups” tab, users can be added to Security Groups or remove from existing Security Groups. The selection here will apply to all the users on the first tab when clicking the Update button.
Exporting the Users
It is possible to export the list of users on the first tab to Excel, send that workbook to IT to map the AD usernames to users in HR Manage and then import that file back.
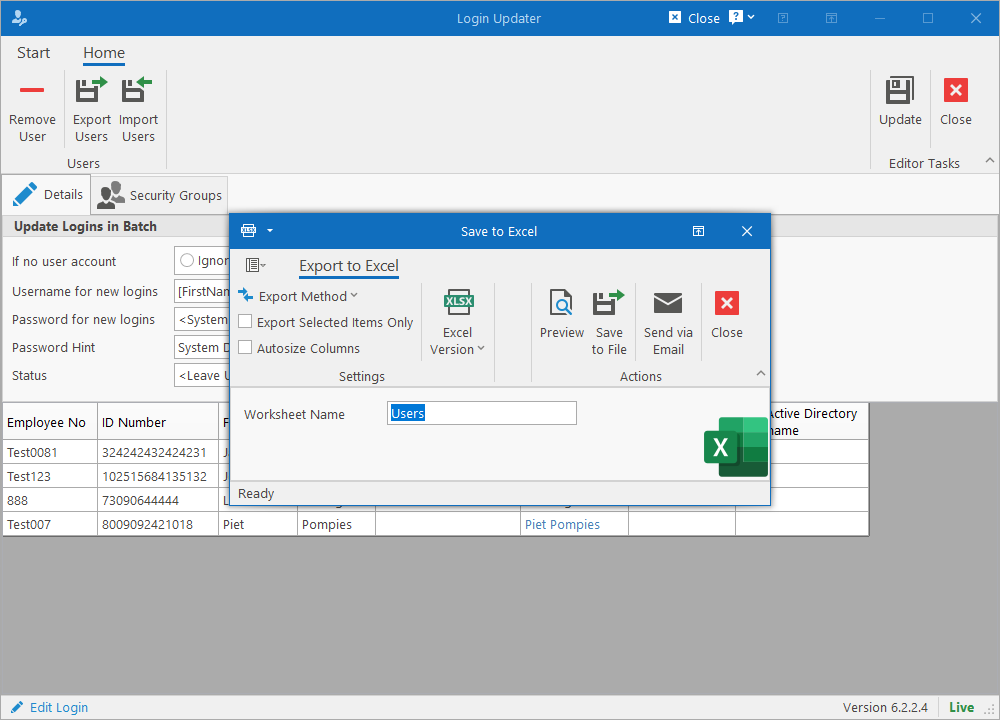
To export the file, simply click on the Export Users button on the ribbon bar and save it as an Excel workbook (or Send it directly as an email).
Importing the Users
The exported users can now be imported back into HR Manage. It is also possible to import users from a custom Excel workbook as long as there is a common matching field available.
Note that only rows from the workbook will be processed that were selected in Employee Manager when opening the Login Updater. So if you’ve closed the Login Updater since exporting the employees, then either select the same employees again or select all the employees and open the Login Updater again.
Then click on the Import Users button on the ribbon bar which will prompt for an Excel Workbook to open. Select a file and click Open.
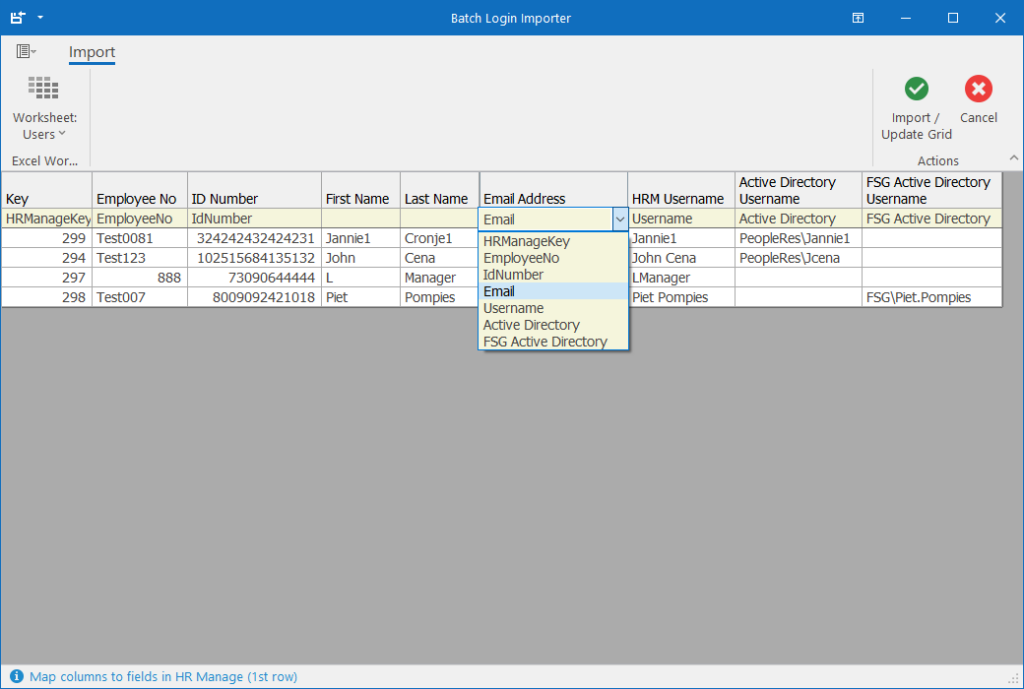
By default, the first available worksheet in the file will be opened (can be changed from the Worksheet dropdown on the ribbon bar). If the file was originally exported from the Batch Login Updater, then the columns will already be mapped automatically.
If not, or if importing a custom file, you must map each column to a field in HR Manage on the first row. You need to specify at least 1 identification field (to find the employee in HR Manage) and 1 value field (a field that must be updated). Only fields that will be used for searching or updating needs to be specified and other descriptive fields like First & Last name shouldn’t be mapped.
Once all the columns/fields are mapped, click the Import / Update Grid button on the ribbon bar. This will update the grid on the Login Updater form with the newly imported values.
Saving the Changes
The changes will only be applied to the database when clicking the Update button on ribbon bar. Any fields that were changed, either manually or by importing, will appear highlighted in blue.
After saving, if there were no errors or warnings, the form will close. Otherwise, a new “Result” column will be added to the grid to show the result of each row. The result options are:
- Success: User was created / updated.
- Warning: No actions were performed on the user because the account already exists.
- Error: Error message will display in the cell in red.