
Editing Training Events
Introduction
A Training Event defines all the details for training and schedules learners to attend the event. HR Manage primarily use Training Events for scheduling training since making changes to the dates, provider, etc. automatically propagates through to all the learners linked to the training event.
Getting Started
In the Training Event Manager, select a training event and click the Edit Selected button on the ribbon bar or simply double click on the event self or press the Enter key. You’ll then be presented with the Training Event Editor. To create a new Training Event, you’ll need to use the New Training Wizard.
Training Event Editor
Training Details tab
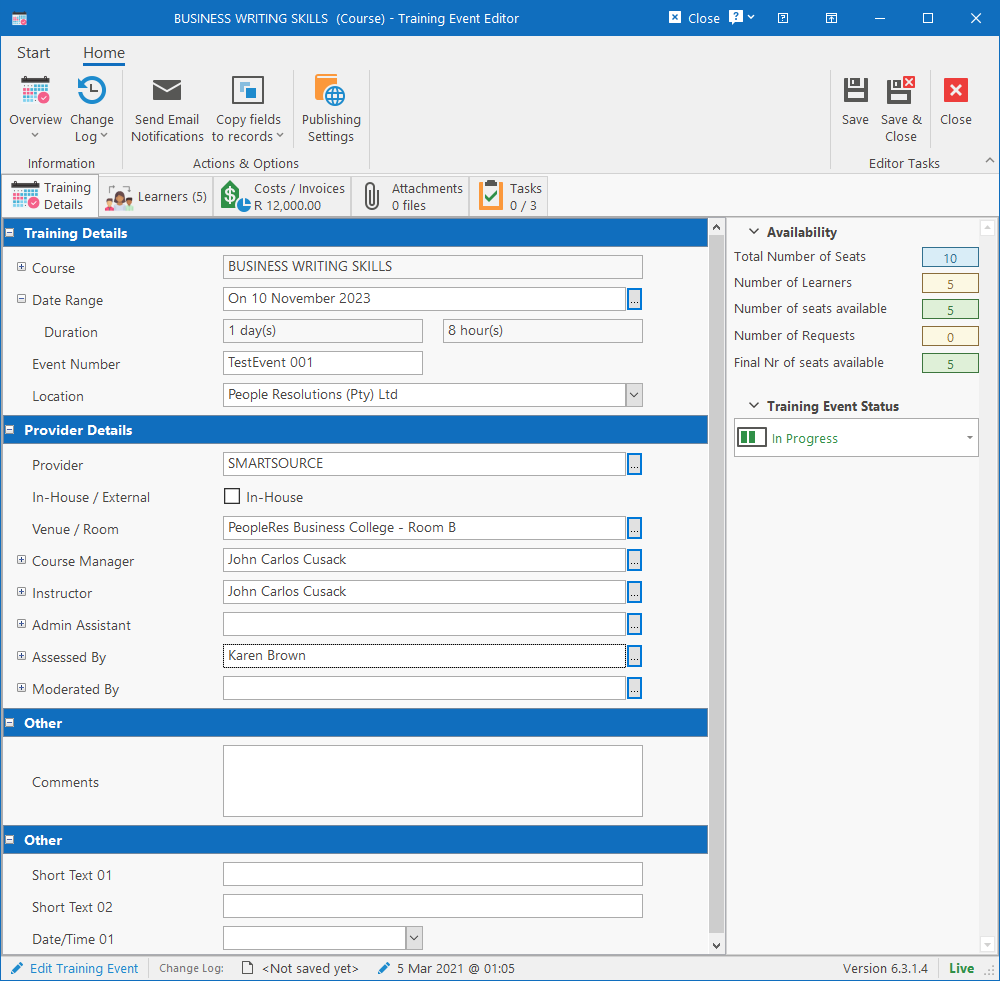
The first tab on the Training Event Editor allows you to see and change the information about the training event.
Ribbon bar actions
- Send Email Notification: Allows you to send notification of training to the various people involved in the event including learners, instructors, assessors, etc.
- Copy fields to records: Specify which fields should automatically be copied to the training records (learners) when changes are made to the event. By default, all fields are selected, but some can be turned off for different kinds of events. The fields that can be copied are Date Range, Duration, Event Number, Training Provider, Venue, Practitioners, Assessment Details and Moderation Details.
- Publishing Settings: This allows an event to be published so learners can apply to join the training event online. For more information, see Publishing Training Events.
Training Details
- Intervention: Shows the type and name of the intervention that has been scheduled. This is set during the creation of the event and cannot be changed once created due to the rules that can be defined for the training type and intervention. This field can be expanded to reveal more information about the intervention from the library.
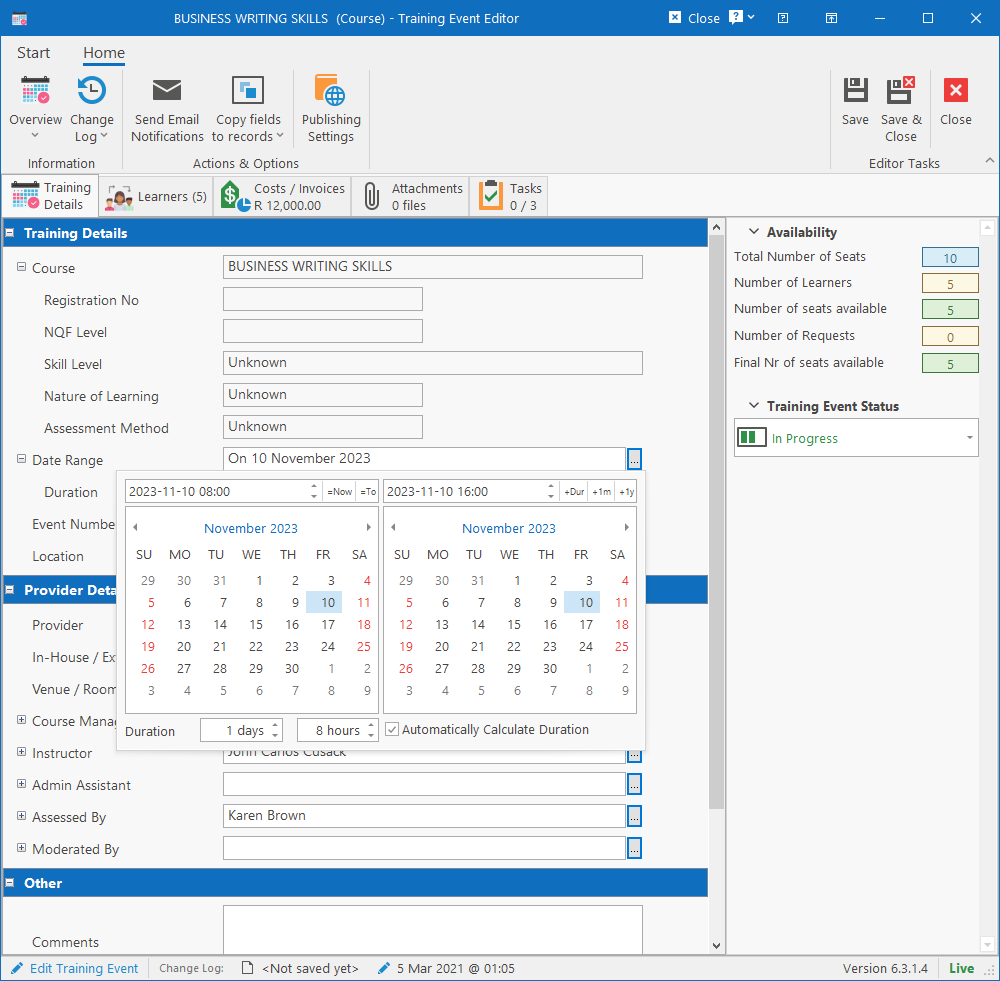
- Date Range: Specify the date range and duration for the training. Selecting a new start date will automatically calculate the new end date based on the default duration specified in the Intervention Library. You can however specify your own end date.
- Duration: This is calculated automatically when selecting the date range. To specify your own, deselect the “Automatically Calculate Duration” checkbox on the Date Range selector. The duration will display in days or for single day events, in hours.
- Location: Specify for which branch the training event is scheduled. If it is open to any branch, select the main company name.
Provider Details
- Provider: Browse for a provider from the Training Provider library. Changing the provider will automatically reset any values that might have been specified for Course Manager, Instructor, Assessor and Moderator, since these are all practitioners linked to training providers.
- In-House / External: Specify if training is considered in-house.
- Venue & Room: Specify at which venue the training will be done. Since each room has the maximum allowed seats defined, selecting a new venue room from the dropdown will automatically recalculate the “Availability” statistics on the right of the screen to show how many seats are still available for the event.
- Practitioners: This includes the Course Manager, Instructor and Admin Assistant. This can be chosen from a dropdown list that will be populated with practitioners linked to the provider. Otherwise, one can be selected from the database. Expanding the field will reveal the practitioner’s phone number and email address.
- Assessed By: If training was assessed, specify the qualified assessor. A qualified Assessor is a person linked to a Training Provider with an Assessor Registration Number captured. Expanding this field will show the registration number, contact information and a date field to specify when the training was assessed.
- Moderated By: If training was moderated, specify the qualified moderator. A qualified Moderator is a person linked to a Training Provider with a Moderator Registration Number captured. Expanding this field will show the registration number, contact information and a date field to specify when the training was moderated.
Other
This section contains a general comments field as well as any custom fields that may be defined for training events.
Availability
This section of statistics (located on the right of the screen), shows how many seats the training venue allows, how many learners are scheduled and how many seats are still available. It will also show how many training requests have been received online (if published). This section will be completely hidden if the selected Training Venue / Room has “0” captured for Maximum Seats.
Training Event Status
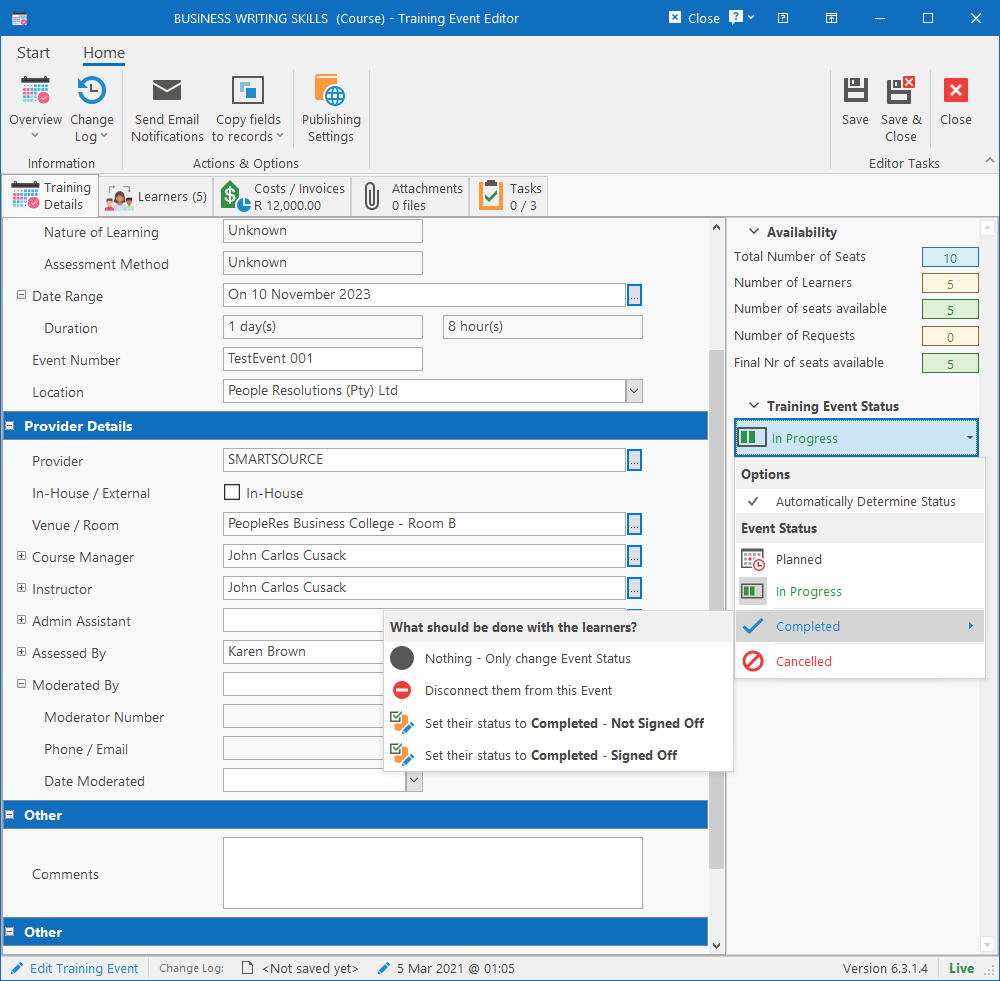
The status reflects the overall status for the training event. By default, this status is handled automatically based on the status of the training records that is managed by this event. For instance, if training records are all still in “Scheduled” status, the event status would be “Planned”. If any training record status changes to anything else, the event status updates to “In Progress” and finally completes when all training records have been completed.
However, the event status can be managed manually by turning the “automatic” flag off. Changing the status has the following effects:
- Planned: Means that training hasn’t started yet. Has no effect on training records.
- In Progress: Means that training is currently in progress. Has no effect on training records.
- Completed: Means that the training is completed and when manually setting to this status, the user must choose how the training records will be affected from one of the following actions:
- Nothing – only change event status: Training Records remain unchanged.
- Disconnect them from this event: Training Records will become standalone and will have to be managed from the Training Record Manager going forward.
- Set their status to Completed – Not Signed Off: Training will be completed.
- Set their status to Completed – Signed Off: Training will be completed. User will be prompted to specify a date on which the learners are declared competent.
- Cancelled: When cancelling a training event, a new dialog will open where the user must choose the reason why the event is being cancelled and what to do with any training records linked to the event. The available options are:
- Nothing, leave records unchanged
- Disconnect them from this event
- Cancel all training not yet completed
Learners tab
The Learners tab lists all the training records of people who have been scheduled for the training event.
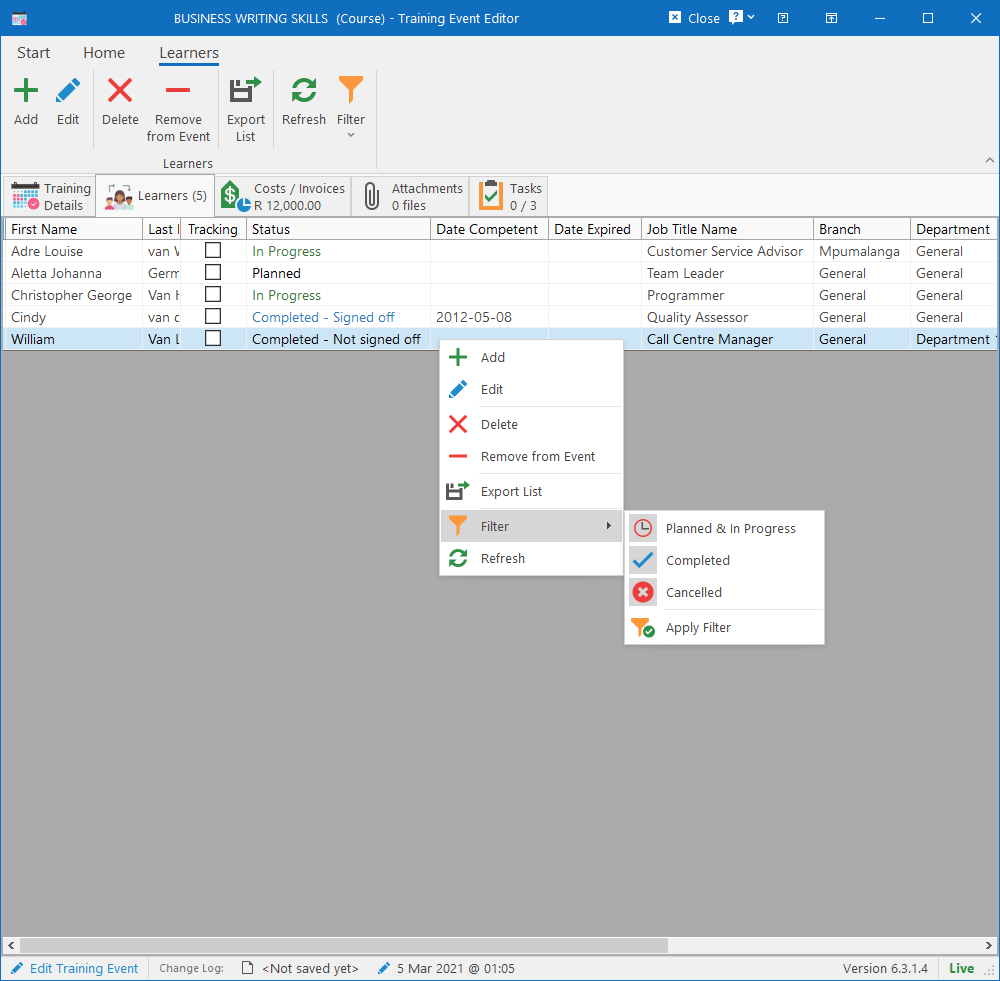
The specific columns that are listed here can be customised in the Training Module configuration.
On this tab, you can perform the following actions:
Add more learners
Simply click the Add button on the ribbon bar, browse for the people in the database to add (you can add multiple at once) and then set the following details to be used for the new training records:
- Tracking per sub-intervention: Specify if you want to manage and track training per sub-intervention. It is only available for interventions that have sub-interventions and that are marked as trackable. If tracking is enabled, the status of the main training record will become read-only since it will then be set automatically as the sub-training records are completed. The available options are:
- None: Don’t track. Changing the status of the main training record will automatically change the changes of all sub-training records to the same.
- Simple: Track on the first level only. This means that each sub-training record would need to be completed (which will automatically complete their sub-sub-training records) before the main training record can be completed.
- Complex: Track on all levels. In the instance where you have an intervention like a Qualification that consists of Courses which in turn consists of modules, for complex tracking, the modules would need to be completed before their parent courses can be completed before the main qualification can be completed.
- Initial Training Status: Can only be set if Tracking is set to none. The default is “Scheduled”, but can be changed if capturing historic training.
- Options / Planned for WSP: Specify if this was planned for the Workplace Skills Plan (used for SETA reporting).
- Options / This is a Learnership: Specify if the learners are part of a learnership (individual learnership contract numbers would have to be captured afterwards on the Training Record Editor for each learner).
- Options / Mark expired records as handled: If there are any records on the system for this training for the new learners that have expired, mark them as “handled” so they stop flagging on the dashboards.
- Sub-Interventions: Specify which core and elective sub-interventions should be scheduled for the learner(s).
Editing Training Records
You can edit the training records by selecting one or more training records and clicking the Edit button on the ribbon bar. Selecting a single record will open the Training Record Editor and selecting multiple records will open the Batch Training Updater.
Deleting Training Records
Select one or more training records and click on the Delete button on the ribbon bar. This will prompt you with the “Delete Training Records” confirmation dialog where you must choose between Cancelling the training (and providing a reason for cancellation) or deleting the training permanently.
Costs / Invoices
Training Events support multiple methods of costing, each method works differently and affects the costs of the training records linked to the event.
Costs Configuration
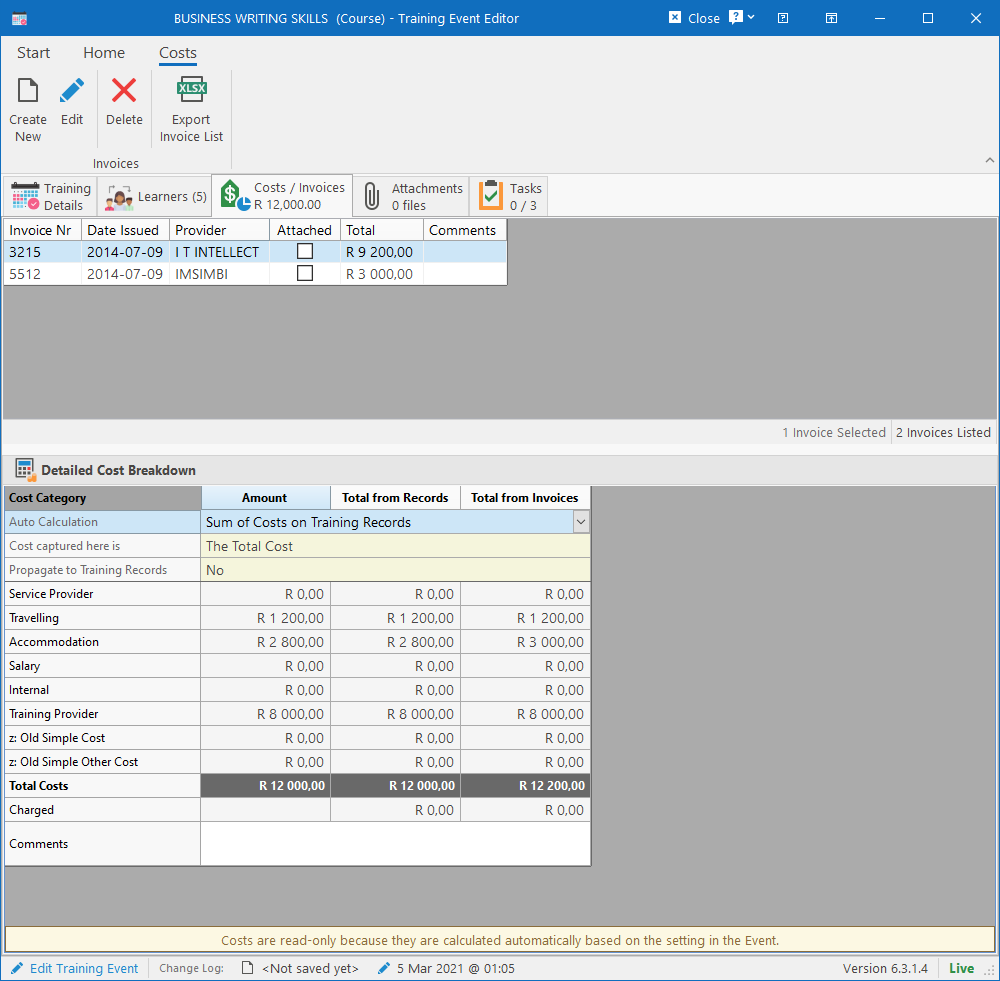
There are three settings that configure the behaviour for the costs of the event and linked training records. These settings can be found in the first 3 rows of the “Detailed Cost Breakdown” grid (2nd grid).
Auto Calculation
Specify if costs should be calculated automatically and how, specify one of the following methods:
- None: Costs can be captured manually here on this Training Event Editor.
- Sum of Costs on Invoices: Invoices received from providers can be loaded in the top list and each invoice consists of a Provider, attachment and breakdown of the costs. Selecting this option will make the costs grid read-only since the Amount column will be calculated.
- Sum of Costs on Training Records: All the costs captured on the training records linked to the event will be added up and stored in the Amount column. This option will thus also make the costs grid read-only.
Cost captured here is
This specifies whether the cost captured on this grid is the total cost for the event or the cost per learner. This field is only editable if Auto Calculation = None (otherwise it is fixed to “The Total Cost”). Depending on the propagate setting (discussed next), this setting will affect the linked training records as follows:
- Per Learner: Cost captured in each category will be copied to the same category in each training record linked to the event as well as to any newly added training records.
- The Total Cost: Cost captured in each category will be divided by the number of learners and distributed to each training record. Adding new training records to the event will recalculate the costs for all learners.
Propagate to Training Records
This setting determines how costs should be copied to the training records linked to the event. This setting works in combination with the previous discussed setting to determine how to calculate and distribute the costs between learners. Selecting any option here (other than “No”), will make cost capturing on the Training Records self read-only.
This setting is important because only costs captured on Training Records applies to SETA reports.
The available options are:
- No: Costs can be captured manually on the Training Records. If Auto Calculation is set to “Sum of Costs on Training Records”, then this will be the set option and cannot be changed.
- Yes, all active records: When calculating the cost per person, the system will divide the cost per category by the number of training records that are scheduled, in progress or completed. The costs will then be copied to these records.
- Yes, all records including Cancelled: Will work the same as the previous option, but costs will divide and propagate to all training records including cancelled records.
Invoices
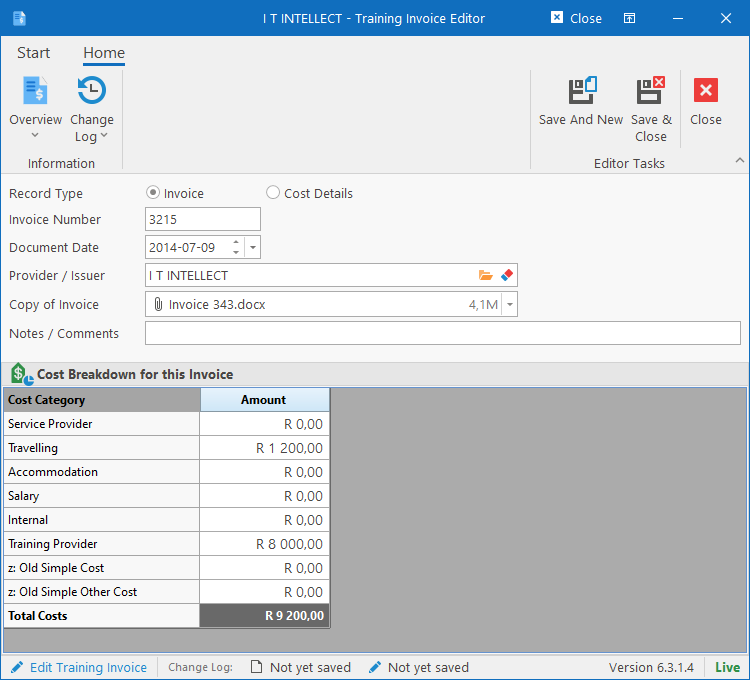
Invoices can be loaded on the Training Event. The Invoice number, date, provider, comments and a copy of the actual invoice can be loaded. The costs are then captured in the same cost categories as defined in the Training Module Configuration. Adding or changing invoices will automatically update the “Total from Invoices” column in the Detailed Cost Breakdown grid.
Detailed Cost Breakdown
This is where the cost for each training cost category can be captured. The categories are configured in the Training Module Configuration and costs for the training event can be captured in the first (Amount) column. The other two columns are purely for informational purposes to show the total amount of invoices received and the total amount of costs captured on the Training Records.
Attachments
The Training Event Editor allows multiple supporting documents to be attached to the event. Files can be attached by dragging them from Windows Explorer / Outlook, pasting them from clipboard or clicking the Attach New File(s) button on the ribbon bar and manually browsing for them.
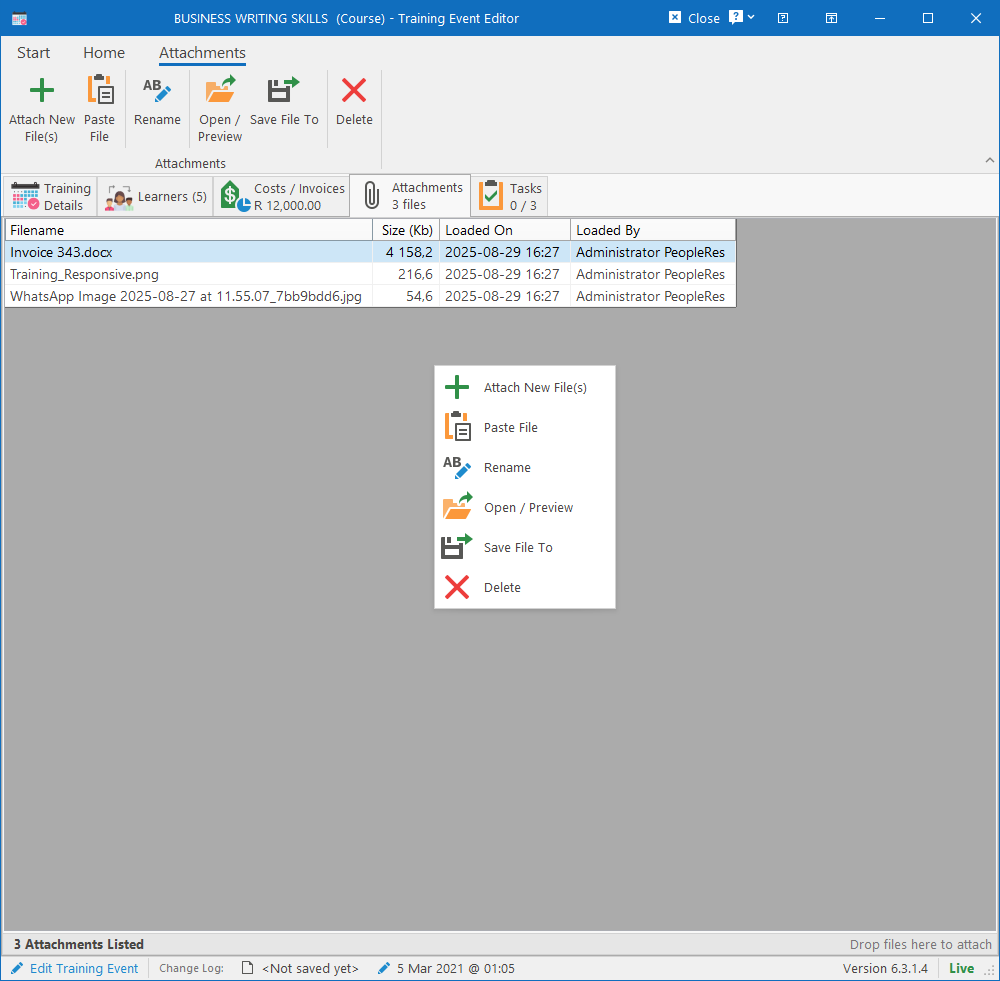
Attachments already loaded can be opened by clicking the Open / Preview button on the ribbon bar. This will attempt to view the file using our built-in viewers for Pdf, Word, Excel and Images. If it is for a different kind of file, the file will be saved as a temp file and opened with the default application.
Alternatively, the attachment can be saved to a file by clicking the Save File To button on the ribbon bar and browsing for a location to save the file to.
Tasks
Training Events support the creation of a Tasklist. One can either be created from a template or from scratch by creating your own tasks and assigning them to people. The tasks can be completed online or in the Windows application.
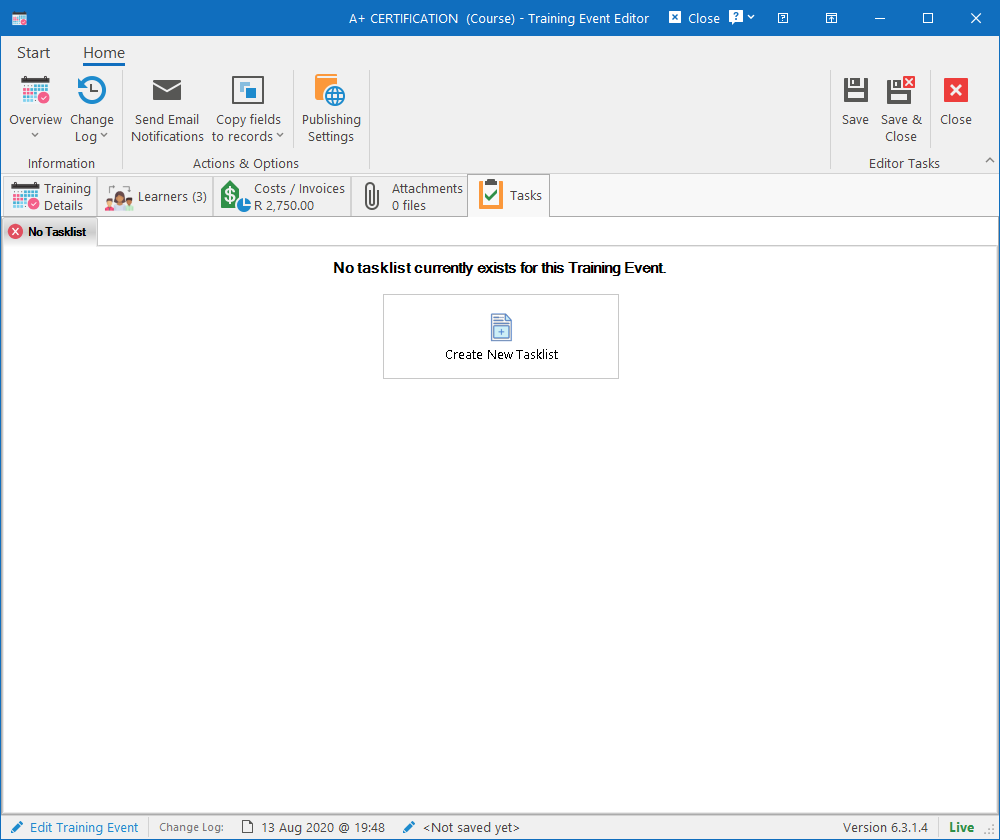
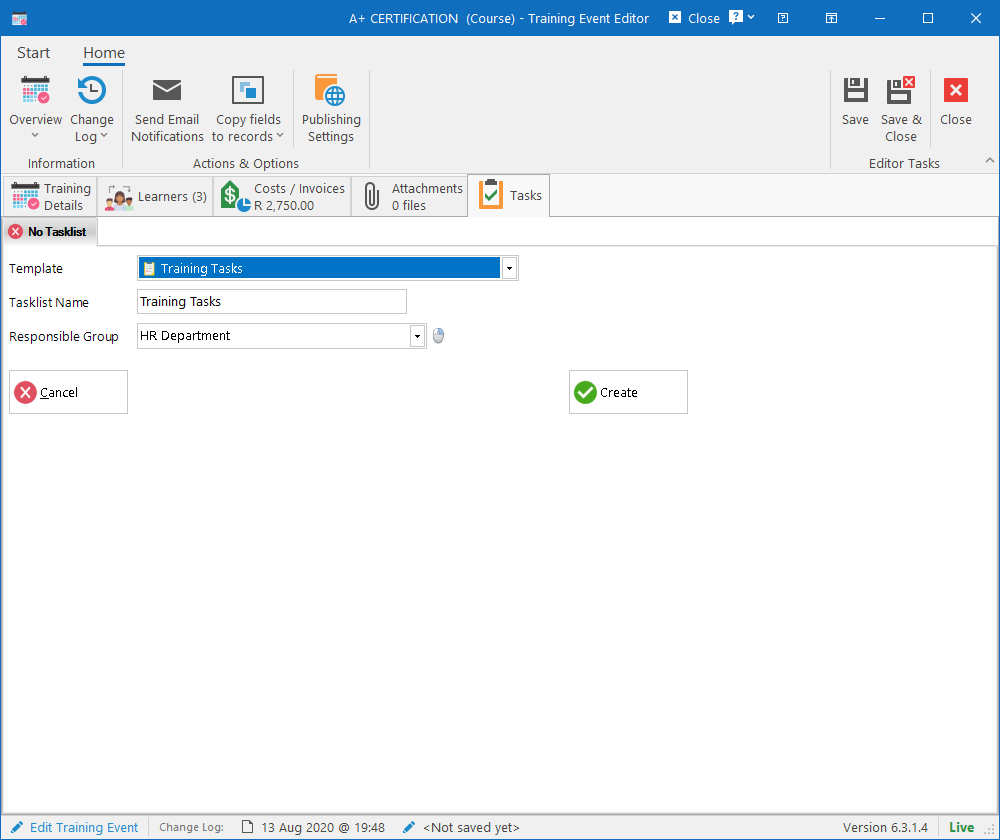
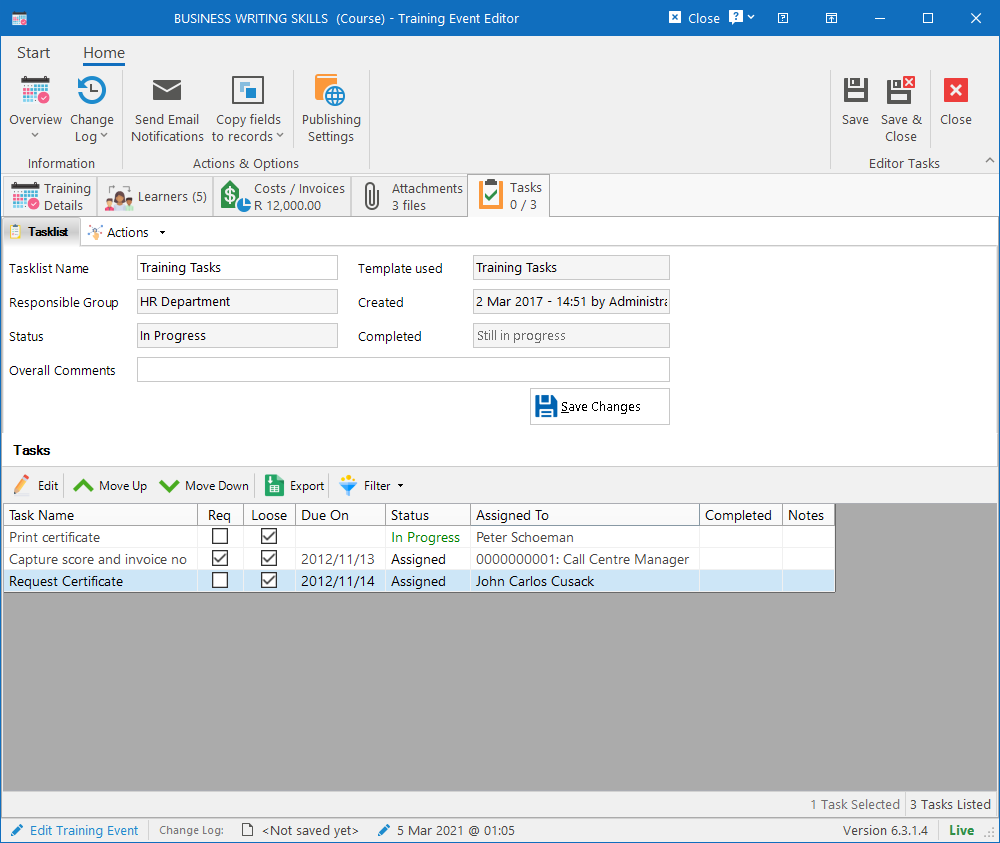
The tasklist functionality is due for an upgrade and once it has been upgraded, this documentation will be completed / updated accordingly.