How Can We Help?
Microsoft Graph / Entra ID Setup
Introduction
HR Manage can integrate with Microsoft Graph to enable certain features like single sign-on through Entra ID and sending emails through Exchange. In order to do this, HR Manage needs to be registered on the Azure portal and be assigned the required permissions.
This article will outline how to do that.
Register HR Manage on Azure
- Open your browser and log into https://portal.azure.com/
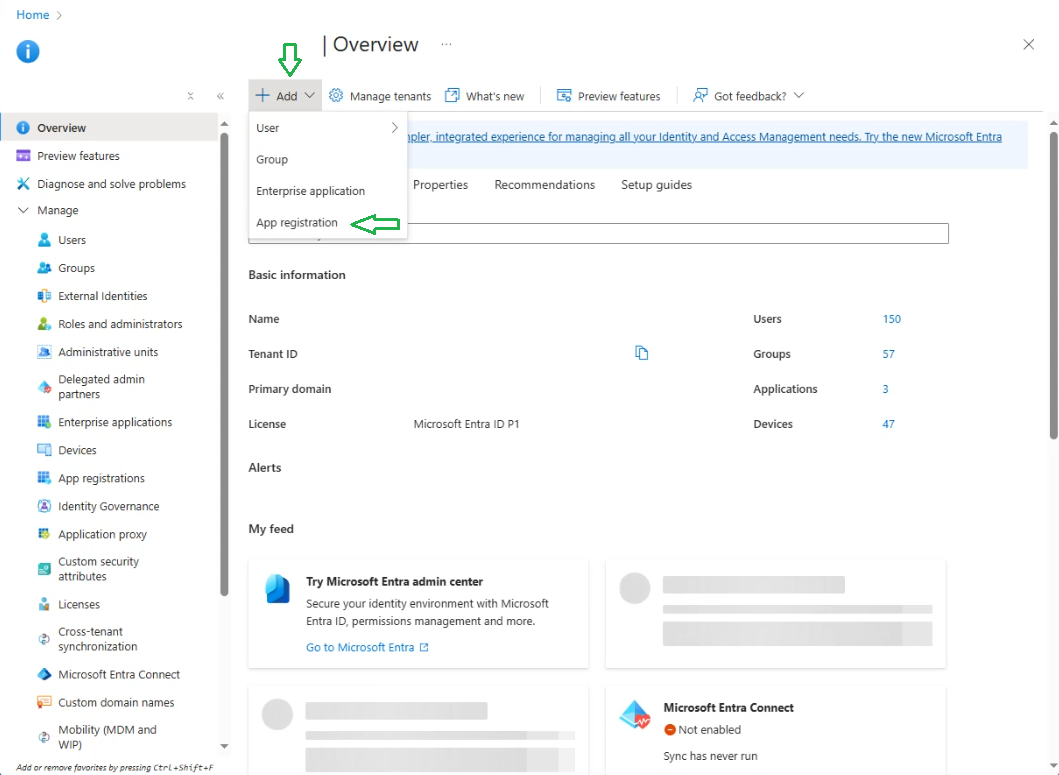
- Under “Azure services”, click on Microsoft Entra ID.
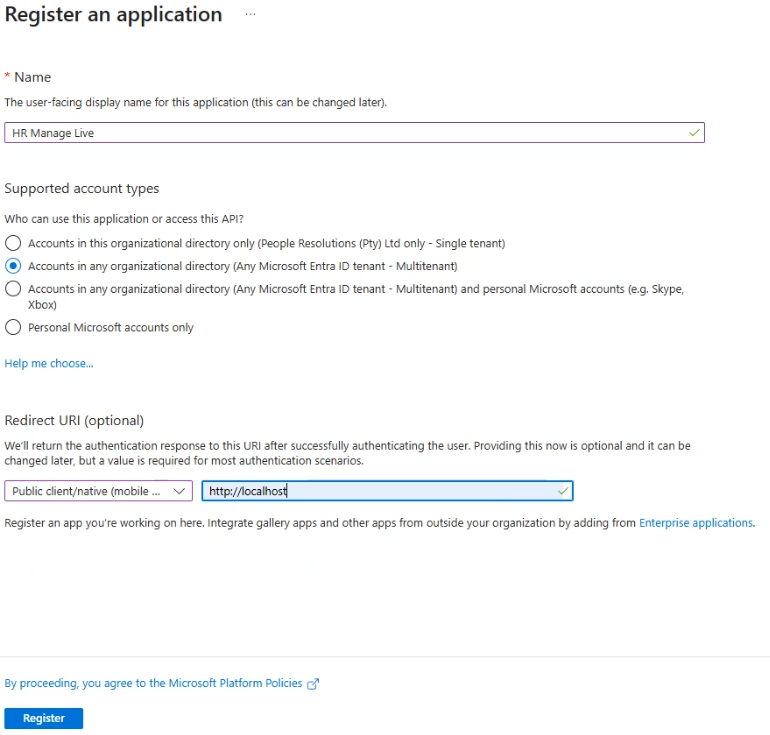
- Click on Add -> App Registration and specify the following details:
- Name: HR Manage
- Supported Account Types: Choose “Multitenant”. Currently only Multitenant is supported, This can however still be locked down to 1 tenant only by allowing only specified tenants.
- Redirect URI: Choose “Public client/native (mobile & desktop)” and then enter the address “http://localhost”.
- Click Register.
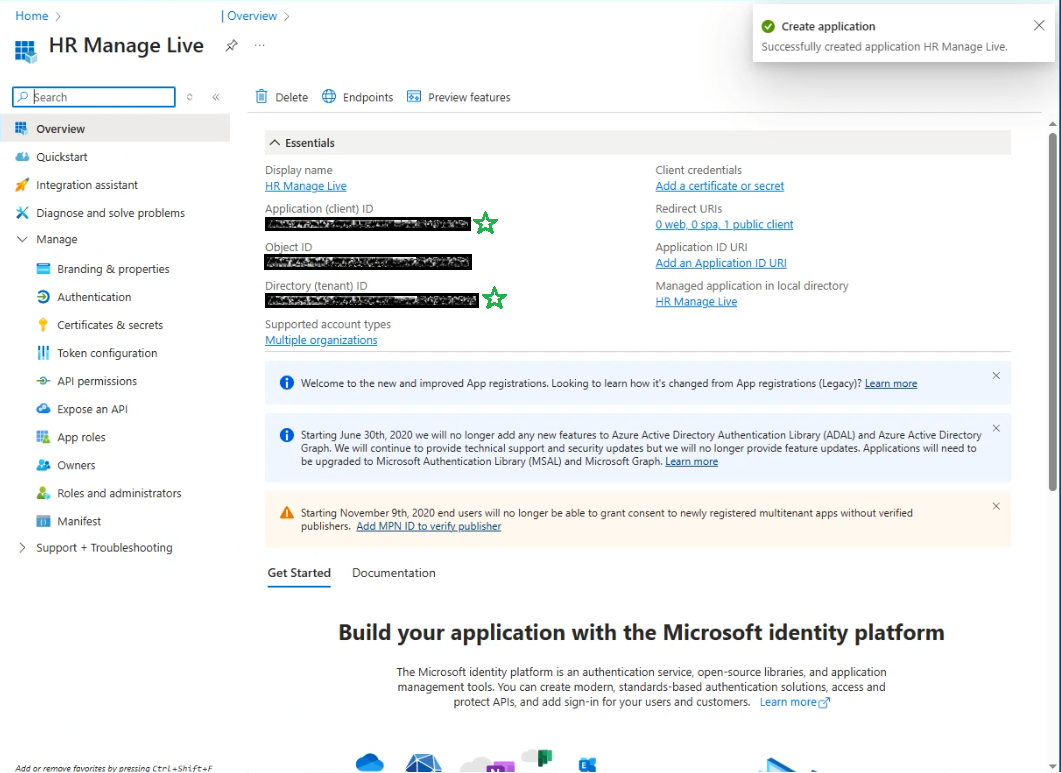
- On the next page (Application Registration), make a copy of the “Application (client) ID” and the “Directory (tenant) ID”.
- For using single sign-on, the Application ID should be provided in the Authentication Service editor in HR Manage.
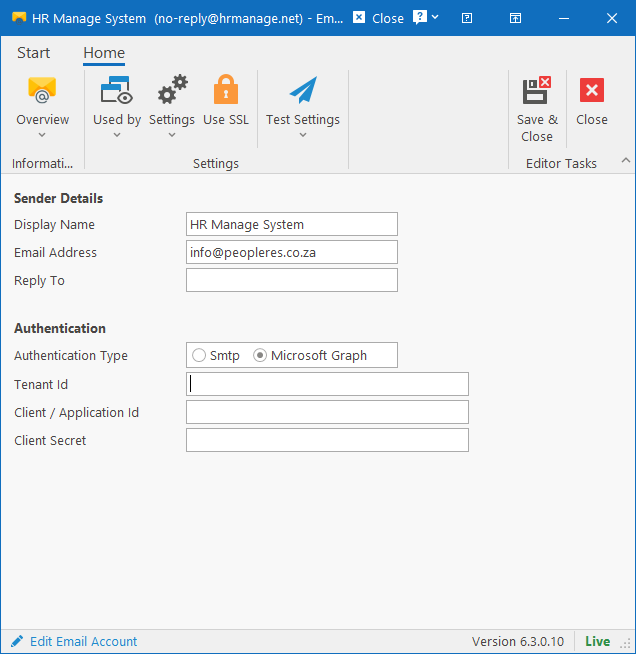
- For sending email messages, both these IDs should be pasted in the corresponding fields in the Email Account editor in HR Manage.
Enabling Entra ID for HR Manage Online
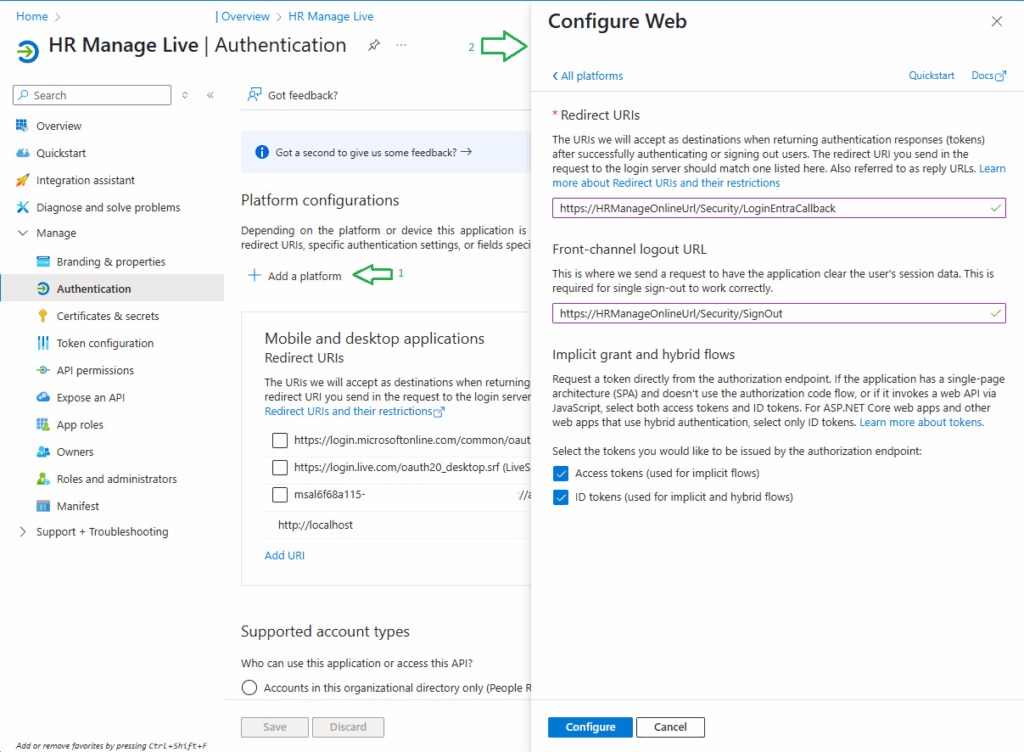
- On the left navigation panel, click on Authentication and then click on Add a platform and then click on Mobile and desktop applications.
- Click on the Add a platform button and then click on the Web option.
- Redirect URI: https://Your-HRManage-Online-URL/Security/LoginExtCallback?Type=Entra_ID
- Front-channel logout URL: https://Your-HRManage-Online-URL/Security/SignOut
- Check both the “Access tokens” and “ID tokens” boxes.
- Click on the Configure button.
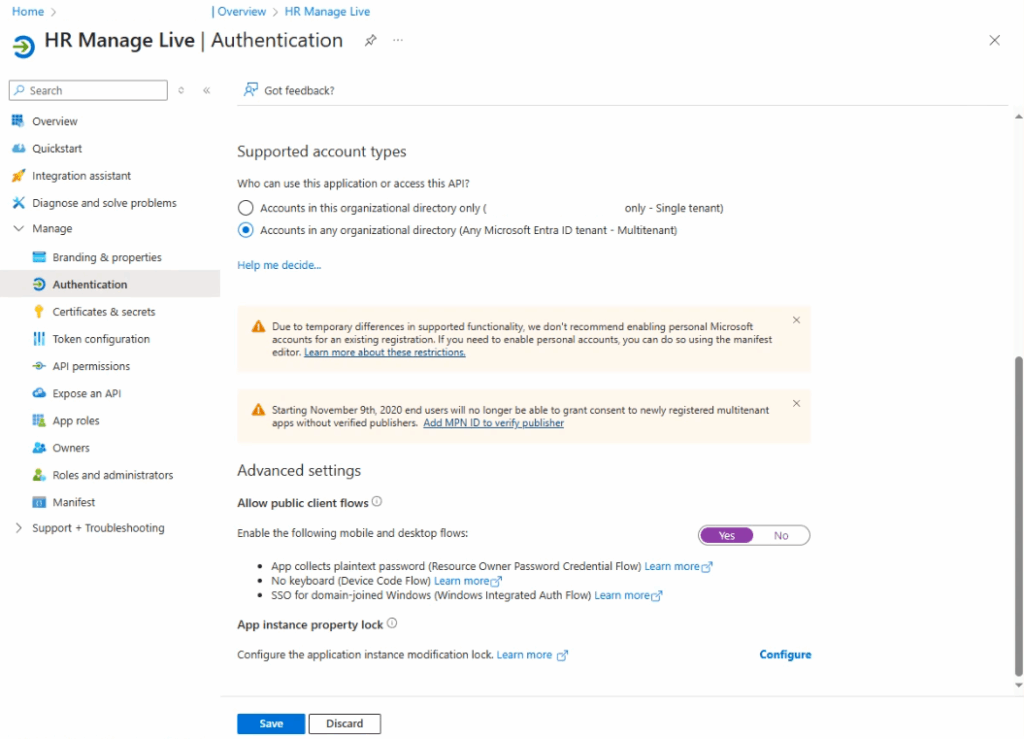
- Back on the main Authentication page, under Advanced settings, enable “Allow public client flows” and click the Save button.
- Click on the Add a platform button and then click on the Web option.
Adding the required API permissions
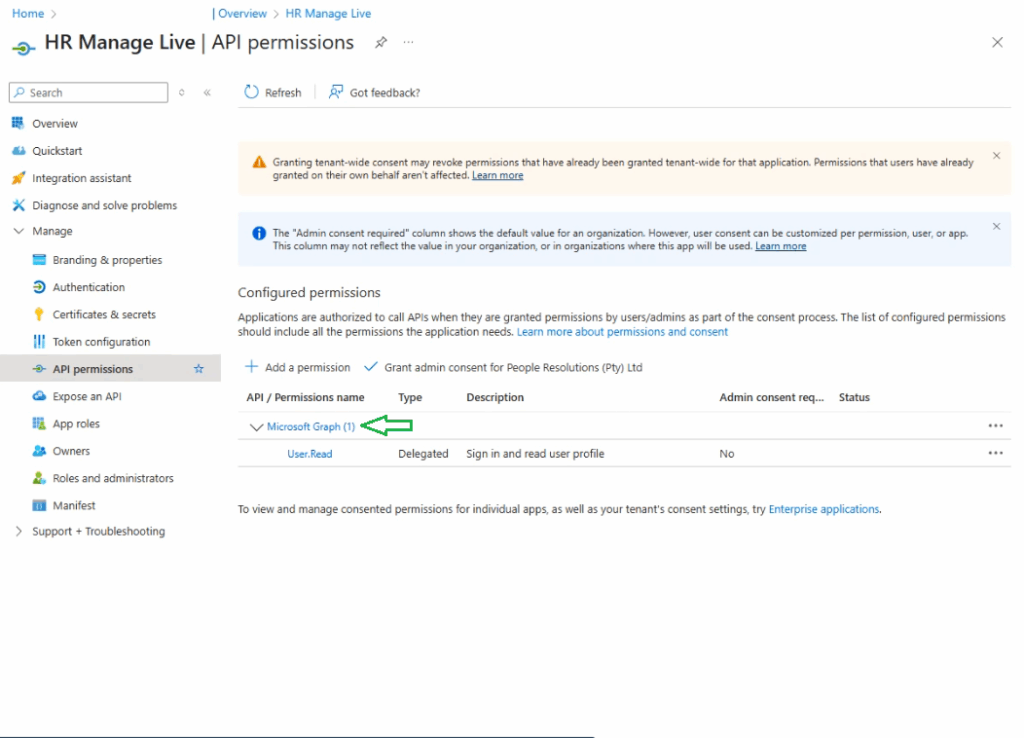
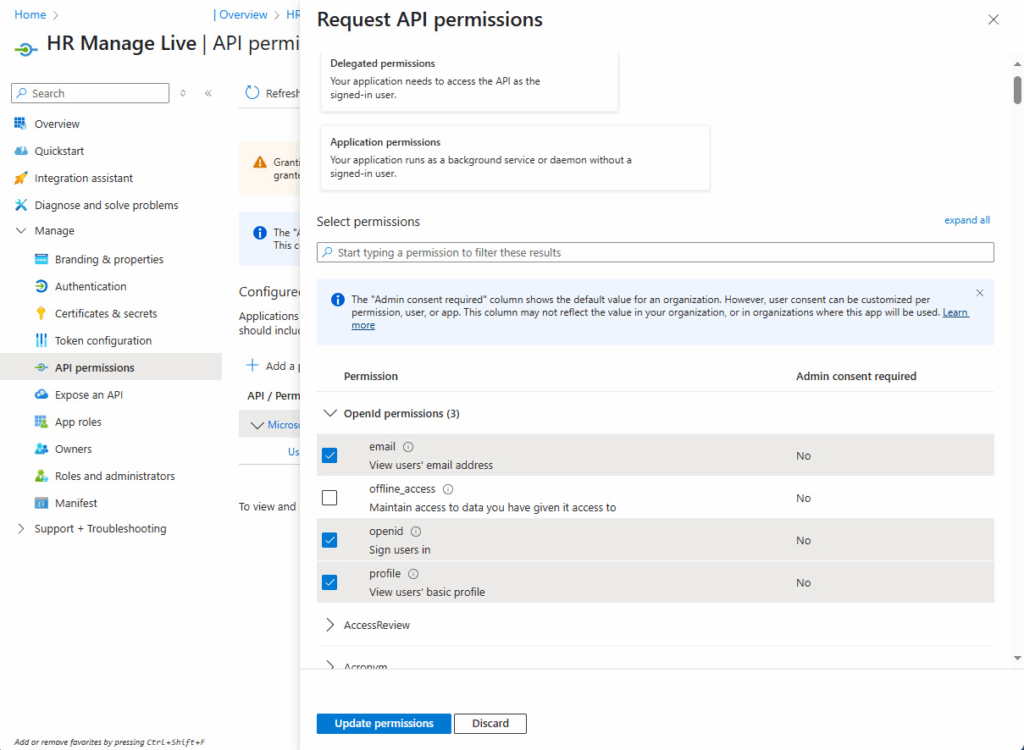
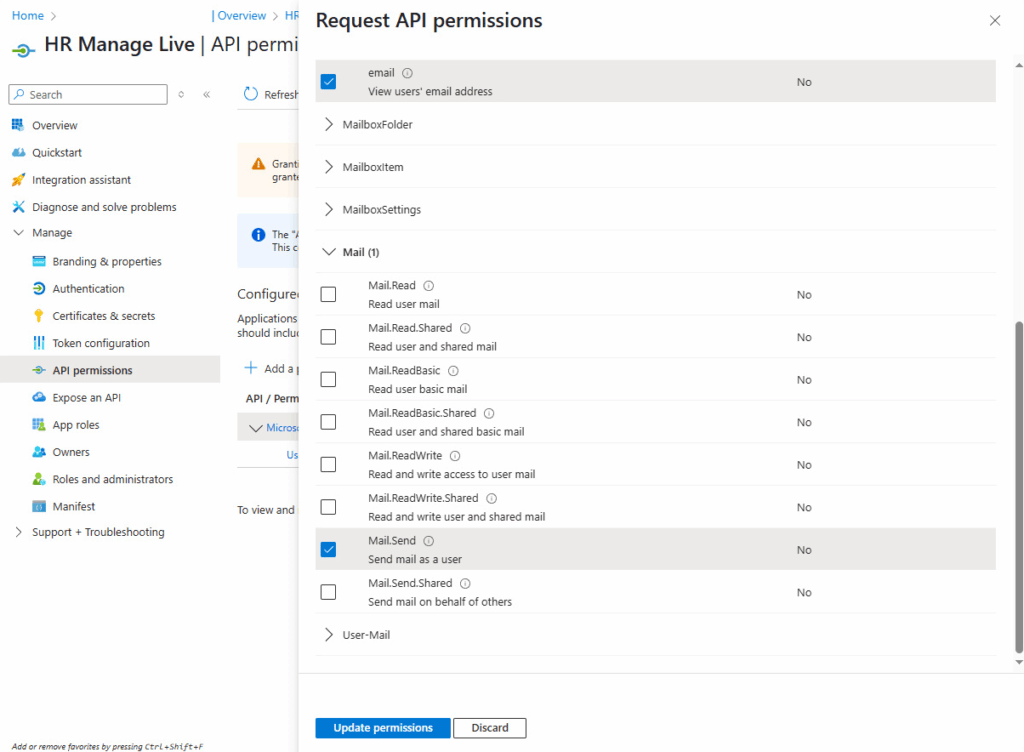
- On the left navigation panel, click on API permissions, then click on Microsoft Graph and find and select the following permissions:
- OpenId permissions
- openid
- profile
- Mail (Only required if you want to allow sending emails through Exchange)
- Mail.Send
- Click the Update permissions button.
- OpenId permissions
Creating a Client secret for sending emails
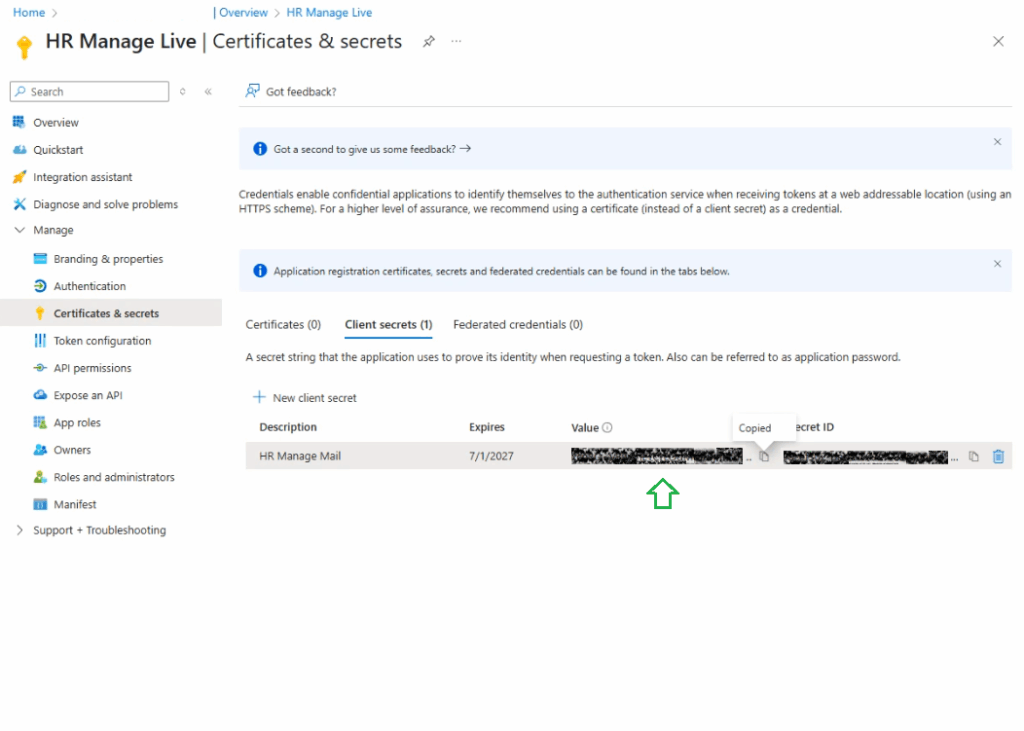
- On the left navigation panel, click on Certificates & secrets, then under the “Client secrets”, click the New client secret button.
- Enter a description (i.e. “HR Manage Mail”) and set the expiry to 24 months and then click the Add button.
- This will add a new secret to the list. Click the copy button next to the item in the Value column. That value should be pasted in the Email Account editor in HR Manage, in the “Client secret” textbox. (Note that once you navigate away from this page, the value won’t be visible again)