
Generate Document Activity
Purpose
The Generate Document activity automatically produces a completed document (for example an appointment letter, confirmation of employment or contract) at a specific point in a workflow. It takes a Word document that you provide as the Source Template, fills in merge fields with the information captured in the workflow up to that point and attaches the finished document to the workflow as a Pdf or Word file. The generated document can also be filed automatically against a Requirement Type on the employee’s compliance record.
The activity is fully automatic: no user action is required when the workflow reaches it. All the work lies in designing the source template which is what this article focuses on.
Creating a Generate Document activity
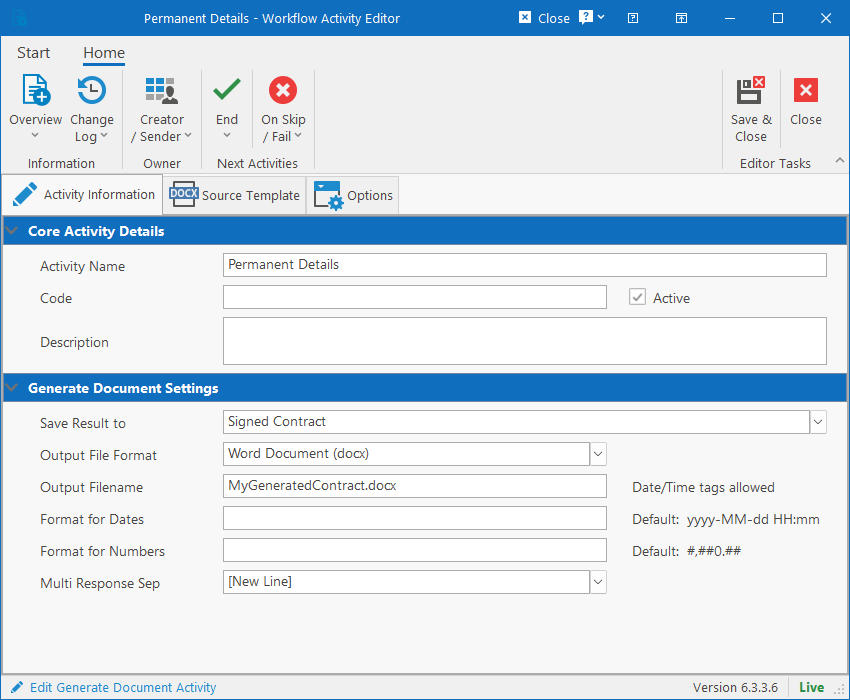
From the Workflow Designer, right-click on the current activity that you want to flow into the new activity, move over the New Activity menu for the appropriate path (On Approval or Rejection) and click the Generate Document activity item. Alternatively, simply click the Generate Document Activity item from the New dropdown button on the toolbar or drag it from the toolbox. This will open the following Activity Editor.
Fields specific to this type of activity
- Save Result to: Specify where the final generated document must be saved to in the workflow. You can specify a Requirement Type or choose “<Don’t save to compliance data>” in which case the generated document will only be attached to the workflow without any classification.
- Output File Format: Specify whether the final generated document should be saved as a Word or Pdf document.
- Output Filename: Name for the final generated document. You can include date/time tags in square brackets like [yyyy], [MM], [MMM], [dd], [HH], [mm] which will generate the final filename by replacing the tags with the respective date/time fields.
- Multi Response Sep: When a field holds more than one answer like a Checkbox List or Tagbox, the answers are joined with the selected separator: A new line, comma, semicolon, pipe or dash.
- Format for Dates: Specify how date values are rendered in the document. The default format is “yyyy-MM-dd HH:mm”. For letters, a friendlier format like “d MMMM yyyy” might be more preferable.
- Format for Numbers: Specify how numeric values are rendered. The default is “#,##0.##”. Do not include a currency symbol in the format if your template already prints one before the field or if the document contain numeric values other than currency.
Source Template
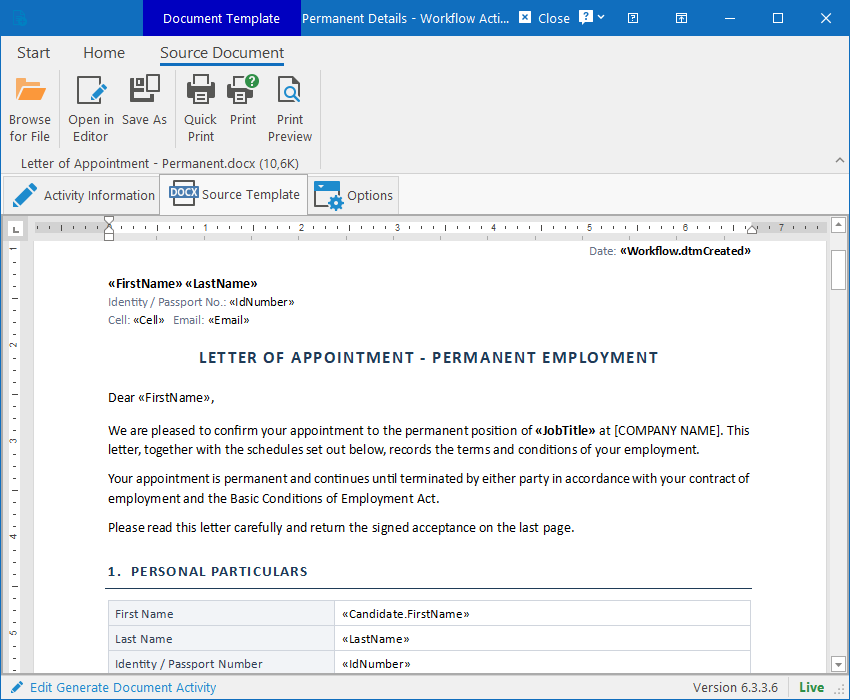
On the Source Template tab, you can load / import a template from a Word document that will be used for mail merge. Simply click on the Browse for File button and load the template from an existing Word document on your computer / network. This will preview the template. You can then click on the Open in Editor button to configure the mail merge.
This will open the Document Editor that will allow you to insert fields directly from the forms and activities completed within the workflow thus far.
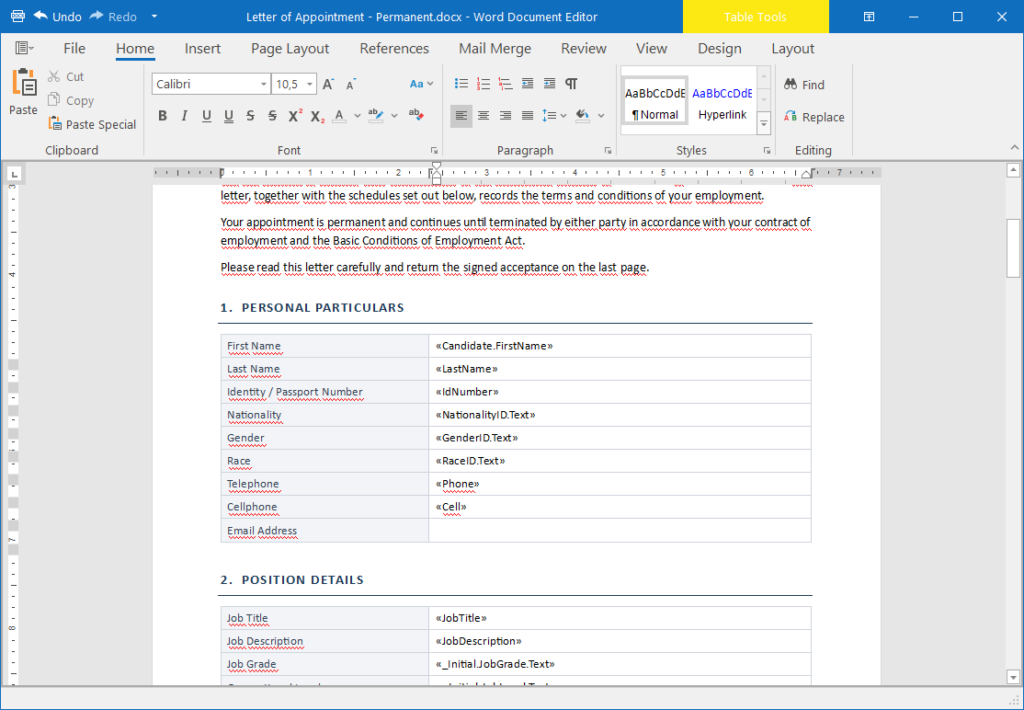
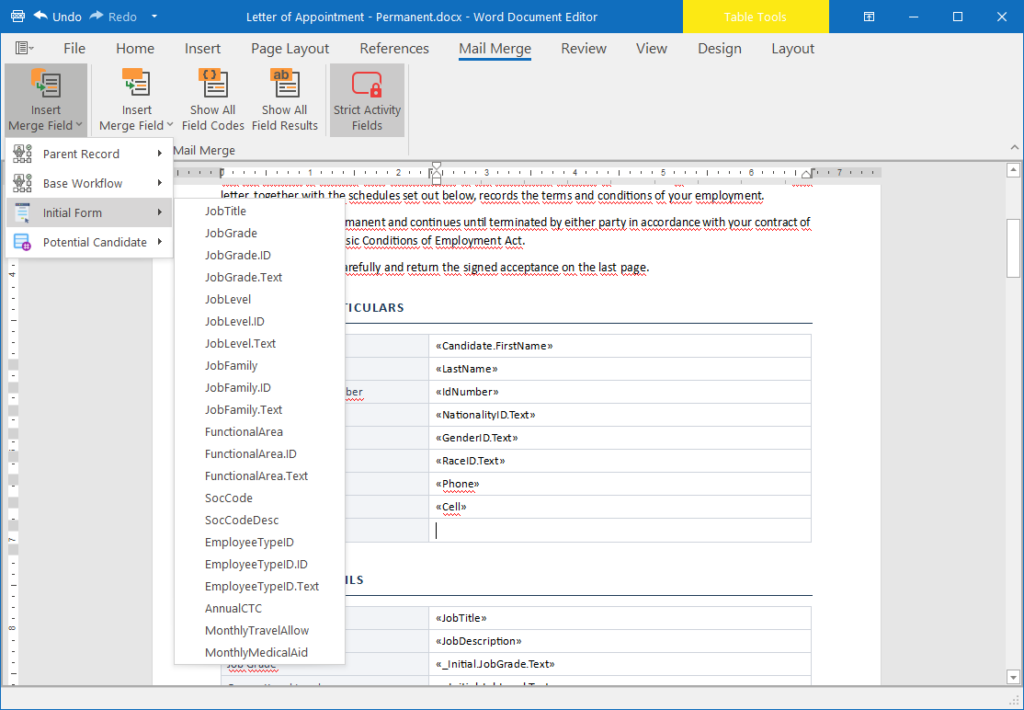
To insert a merge field, simply place the caret on the position you wish to insert the field at, click on the Mail Merge ribbon tab and click on one of the Insert Merge Field dropdown menus.
- The first dropdown menu will display the available fields, grouped by the source.
- The second dropdown menu will just display all the available fields as a flat list without specifying a specific source or activity where the field must be retrieved from.
- The difference is how the merging will behave in the event that a field / code exists in multiple instances in the workflow (i.e. FirstName).
- Adding it from the first dropdown menu will ensure that only the value is merged into the document that was captured within the specific activity / source and ignore all others.
- Adding it from the second dropdown menu will take the most recent value that was captured for that field regardless of where it was captured in the workflow.
Once finished, click Apply & Close in the titlebar (top-right corner of the window). Saving the activity will embed this modified template into the activity.
Merging Help
How the Merge Works
The source template is a normal Word document containing merge fields (placeholders such as «FirstName» or «JobTitle»). When the activity runs, the system gathers every answer captured on the workflow’s forms, together with details of the workflow itself and replaces each merge field with its value. Text, formatting and layout around the merge fields are preserved exactly as you designed them.
Where Merge Fields Come From
Merge fields are drawn from four sources:
- Parent Record: Details of the record that owns the workflow. The exact fields that are available depends on the type or parent record (Standalone Workflow, Review Process, Incident, etc.)
- Base Workflow: Properties of the workflow itself like the Target Person, Created Person, Status.
- Initial Form: Every coded field on the workflow’s initial form. The captured code for each field becomes the “Merge Field”.
- Form Activities: Every coded field on the form of each “Complete a Form” activity. If the activity itself also has a code, then the merge fields will be inserted as “ActivityCode.FieldCode”.
Setting up codes
Codes are essential for fields to become available in the Generate Document activity. Any field without a code specified will be ignored and won’t even appear on the dropdown lists.
To specify a code for an activity (so that you can extract specific fields from specific activities), on the first tab (Activity Information) of every Activity Editor, there is a Code field (2nd from the top). Specify a short code / name for the activity there (no spaces or punctuation).
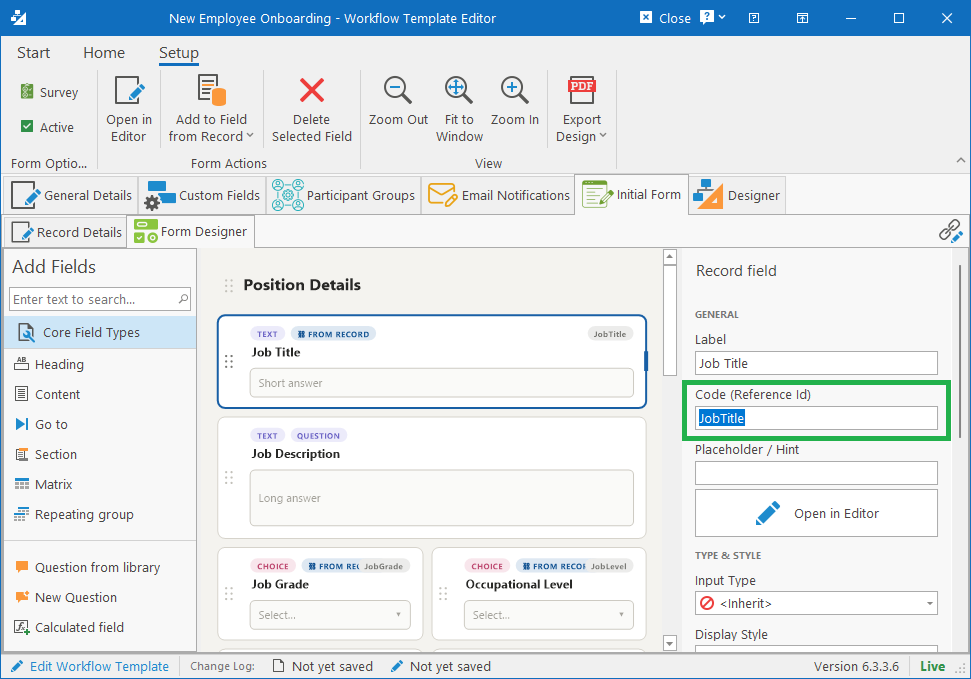
To specify a code for a field on a form, simply select the field in the Form Designer and in the properties panel on the right, there will be a “Code (Reference Id)” field. Specify a unique short name / code there without spaces or punctuation.

Other fields
While most fields come from defined field codes in the workflow, there are also some other fixed fields.
If a code has been specified for an activity, the following merge fields will become available under that activity’s sub-menu:
- Type: Contains the activity type.
- ActivityText: Contains the name for the activity.
- RecipientGroup: The name of the group of people responsible for the activity.
- dtmStart & StartedPerson: Timestamp when the activity was started and the person who started the activity.
- dtmSignedOff & SignedOffPerson: Timestamp when the activity was signed off / completed / approved and the person who completed the activity.
- dtmRejected & RejectedPerson: Timestamp when the activity was rejected / skipped / cancelled and the person who cancelled the activity.
- dtmResponded & RespondedPerson: Timestamp and person who performed the last action on the activity, regardless of whether it was signed off or rejected.
- Comments: Contains the comments that were captured on the activity.
Then for all fields that are lookup fields, additional properties become available. Using the field “EmploymentType” as an example, the following fields will be available for inserting into the document:
- EmploymentType & EmploymentType.Text: Will display the field’s text.
- EmploymentType.ID: Will display the field’s internal ID.
- EmploymentType.Code: Will display the field’s captured code if applicable. This mostly applies to Custom Lookup Fields and Choice Question Fields.
Rating fields merge as their numeric value and a question inside a Matrix merges as the caption of the selected column.
Advanced: Conditional Paragraphs with IF fields
A single template can produce different letters depending on the answers captured, using Word’s native IF fields. This avoids maintaining several near-identical templates behind a Decision activity: the condition lives inside the document and the merge removes the losing text entirely from the generated output.
For example, to include a fixed-term clause only for non-permanent appointments, press Ctrl+F9 in Word (twice, for the nested field) and build:
{ IF "{ MERGEFIELD EmploymentType.ID }" = "0" "This is a permanent position." "This appointment is for a fixed term of { MERGEFIELD ContractMonths } months." }Two independent conditions (for example permanent vs fixed-term and a travel-allowance disclosure) are simply two separate IF paragraphs: together they cover every combination without extra templates or extra activities.
Follow these rules when authoring conditions:
- Compare the .ID or .Code variant, in quotes. The comparison is case-sensitive (unlike Word’s own preview), so comparing display text is fragile; the internal ID or option code never changes.
- Keep each IF to a single paragraph. A multi-paragraph clause needs one IF per paragraph. An empty false branch leaves an empty line where the paragraph would have been.
- Avoid quotation marks inside the branch text and prefer quoted text comparisons over numeric ones.
- A blank or unanswered field takes the false branch and no error occurs.
The generated document contains only the winning text: the other branch is physically absent, so there is no risk of a recipient revealing it.
Why Is My Value Blank?
A merge field that does not resolve renders as an empty string. The merge never fails with an error and if a value comes out blank, work through this checklist:
- Check the code’s spelling and casing. Merge field names are case-sensitive: «jobtitle» will not match a field coded JobTitle.
- Does the field have a code at all? Open the form in the Form Designer and confirm the code badge on the field.
- Does the activity run before the Generate Document activity? Answers captured later in the flow are not yet available. This can only happen if activities were re-ordered after the activity was designed.
- For scoped names («OFFER.JobTitle»), confirm the activity’s Code matches the prefix exactly and that the Activity’s Code wasn’t renamed.
- Was the question actually answered? An unanswered field merges as blank and is indistinguishable from a typo, which is why checking the code first saves time.