
Configuring Leave Types
Introduction
Each leave type consists of a name and a number of rules that affect how it works, how people can apply for it and which approval process to follow.
To get started, open the Leave Module Configuration and click on the Leave Types item in the menu on the left. Then open any of the existing leave types or click Create New on the ribbon bar to open this Leave Type editor.
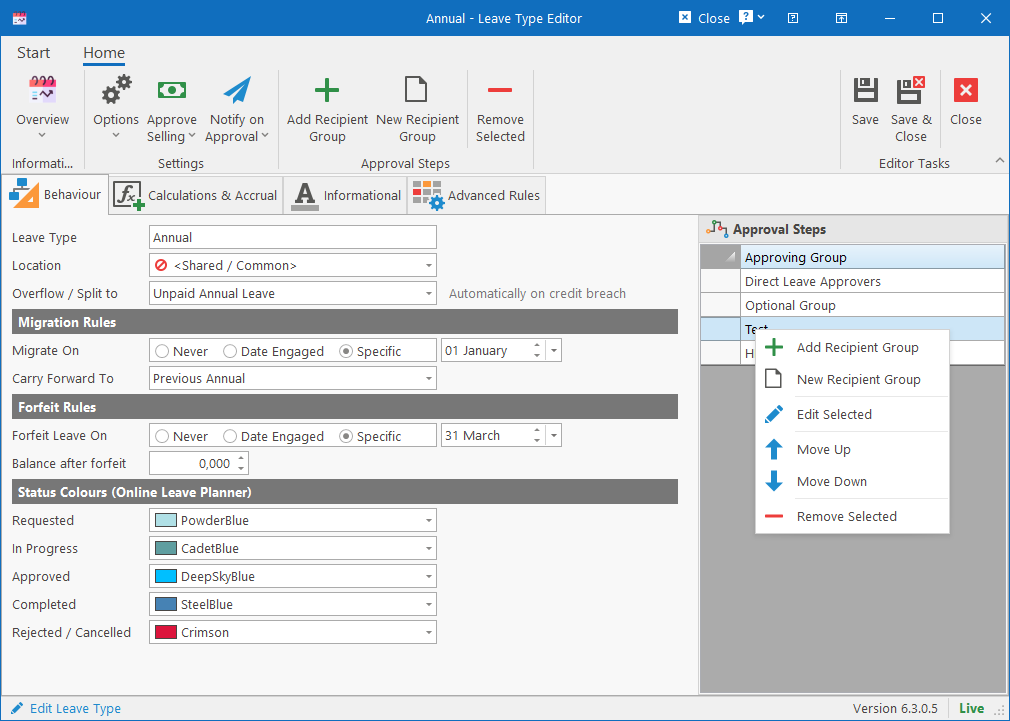
Behaviour tab
The behaviour tab contains the basic information and rules about the leave type.
Fields
- Leave Type: Give a name for the type of leave
- Location: If this type of leave should only be available for employees from a specific location, specify it here.
- Overflow / Split to: If someone applies for more leave than what is available, the system can automatically split the application into two separate types of leave applications. If this function is desired, specify an “overflow” leave type here. In such a case, the original leave application will be created for the number of available leave and another leave application (of selected type) will be created for the remainder.
- Migration Rules: If leave should be migrated to another type of leave on a specific date, specify the following settings.
- Migrate On: When must the leave be migrated? Never, on the employee’s date engaged or on a specific date each year (specify).
- Carry Forward To: Specify the leave type that the balance must be migrated to.
- When applying for leave of this type, the system will automatically check if there are still any leave days available on the Carry Forward leave type and use those leave credits first.
- If there are enough credits for the whole application, then the whole application will be created for the carry forward leave type.
- If there are some credits available, but not enough, then two leave applications will be created: One for the full balance of the carry forward leave type and one for the remaining days of the application on the original leave type.
- Forfeit Rules: If leave should be forfeit at a specific period (usually applies to leave that has been migrated earlier), specify the following settings.
- Forfeit On: When must the leave be forfeit? Never, on the employee’s date engaged or on a specific date each year (specify).
- Balance after forfeit: What must the new balance be after leave has been forfeit?
- Status Colours: Specify the colour for each status that applications of this type of leave should reflect as on the online leave planner. The different status colours are just in case you wish to differentiate, but all the statuses can be the same colour.
Approval Steps
The Approval Steps is a list of Recipient Groups that an application must be approved by, in the order that they’re listed, before an application will be considered “approved”. Any person from each Recipient Group can approve or reject applications on behalf of the entire group. Simply right-click on the list or click a button from the “Approval Steps” ribbon bar group to add, remove or reorder the approval steps. You can also create a new recipient group or edit an existing one by clicking the New Recipient Group or Edit Selected button/menu items. For more information, see the Recipient Group Editor.
Ribbon bar options
The ribbon bar contains various options related to the leave type that are important.
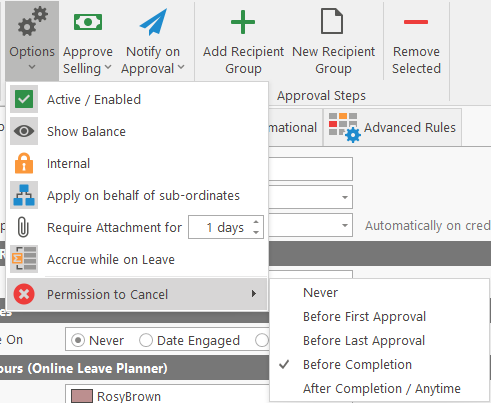

- Options: Settings can be activated / deactivated by simply clicking on them to toggle their status.
- Active / Enabled: Specify if leave type can be used or if it is even visible.
- Show Balance: Specify if the balance should be visible when viewing overall balances. Some balances like “Unpaid Leave” doesn’t make sense to really show.
- Internal: Internal leave types are types that employees cannot apply for directly and applications of this type is usually created automatically due some rule execution.
- Apply on behalf of sub-ordinates: Specify if a manager (or nominated leave applier) can apply for this type of leave on behalf of their sub-ordinates.
- Require Attachment: Usually applies to “sick leave”, specify whether an attachment is required. Specify the number of consecutive leave days (application duration) that requires an attachment. i.e. specify 2 if an attachment is only required for an application of 2 days or longer.
- Accrue while on Leave: Specify if the employee accrues their normal leave while on leave of this type. It is selected by default and sometimes unchecked for “maternity leave”.
- Permission to Cancel: Specify at which point in the application process can the applicant cancel or withdraw their leave application via the online portal.
- Approve Selling: Select a Recipient Group that must approve applications to sell leave. If selling of leave is not allowed for this type, then simply don’t select any recipient group.
- Notify on Approval: If an additional email notification must be sent to a specific group of people once the application has been approved, specify that recipient group here.
Calculations & Accrual
This tab allows the configuration of how accrual should be calculated and added.
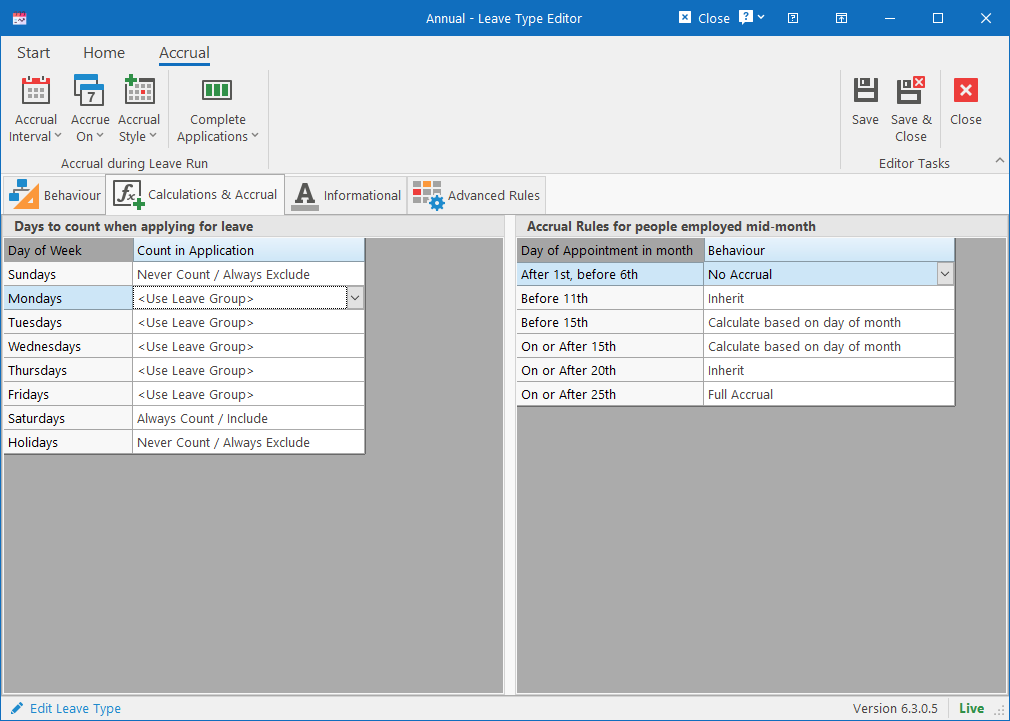
Days to count when applying for leave
This specifies how the duration for leave applications should be calculated based on the days that the application fall on. The available options are:
- <Use Leave Group>: This will use the work days setting from the leave group that the applicant belongs to.
- Never Count / Always Exclude: This will exclude these days from all leave application duration calculations (will thus not be deducted from balances).
- Always Count / Include: This will always include these days in all leave application duration calculations (will thus be deducted from balances).
In most cases, all the settings here can be left to “<Use Leave Group>” since the leave group defines the work days for employees. This however allows for overwriting the leave group’s settings in custom scenarios and we don’t recommend changing this unless actually required.
Accrual Rules for people employed mid-month
This allows configuring the system on how to handle people who were employed on any day of the month other than the 1st. These rules will only be enforced if the leave type has been configured to accrue on the 1st day of every month instead of the Date Engaged.
We provide 6 intervals that can be customised with the following options:
- Inherit: This will inherit from an earlier setting. At the very least, the two middle options (“Before 15th” and “On or After 15th”) should be set to something other than inherit since they serve as the base settings that all others can inherit from.
- Calculate based on day of month: This will take the employee’s monthly entitlement, divide it by the number of days in the month and multiply it with the number of days worked (including weekends).
- Half of normal accrual
- Full accrual
- No accrual
Ribbon bar options
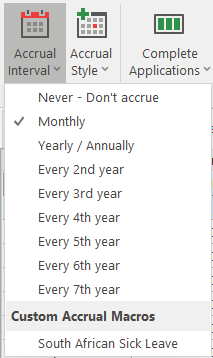
- Accrual Interval: Specify how often accrual should be added for the leave type.
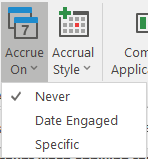
- Accrue On: Specify when accrual should be added. Only applies to leave types that accrue annually.
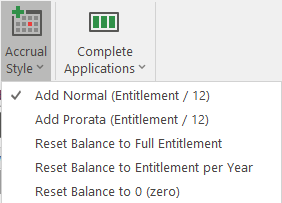
- Accrual Style: How should accrual be added or how should the balance be reset (for types that reset annually)?
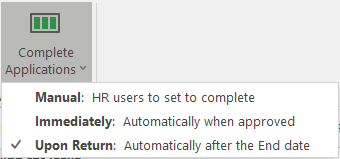
- Complete Applications: Specify when leave applications should be set to completed.
All the above options will be used during the monthly leave accrual run.
Informational
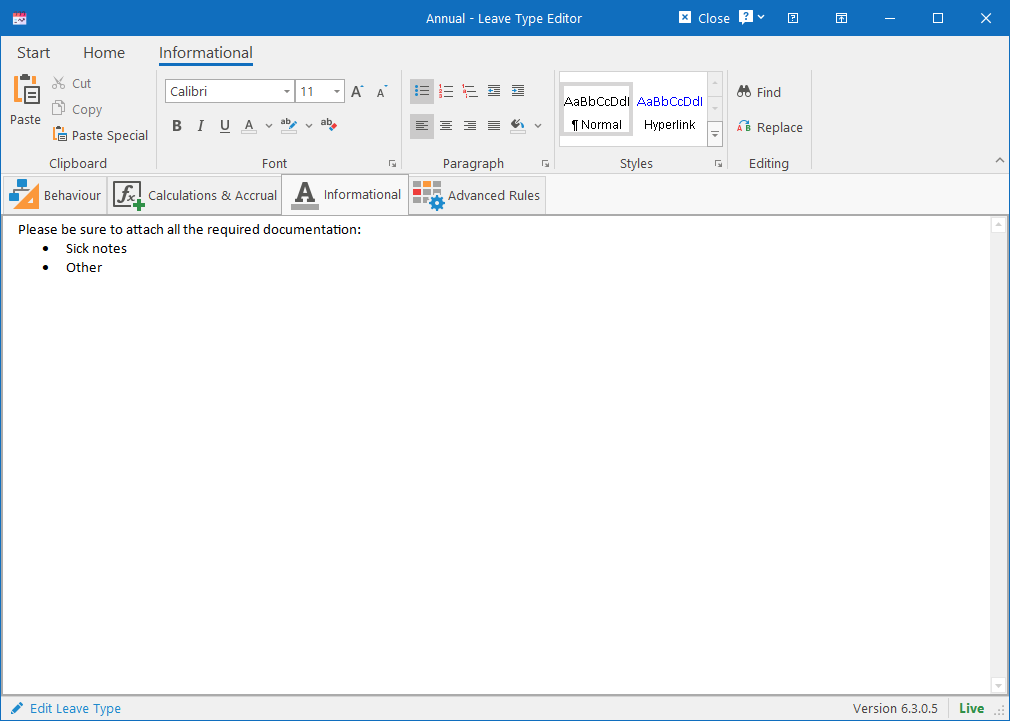
Allows informational text to be captured that will be displayed on the online portal when the user applies for leave of this type.
Custom Accrual Macros
The system allows for accrual macros that will calculate accruals based on advanced rules. The following accrual macros are defined in the system.
South African Sick Leave
Leave that has been configured with this macro will accrue as follows:
- 1 day will be accrued for every 26 days employed for the first 6 months
- The the 6th month, the system will accrue the balance of the total entitlement (Days_per_Year x3 – 6 days).
- After the 6 months, the macro will revert behaviour to a normal 3 year cycle which resets the leave balance to full entitlement on every 3rd year since date engaged.