
Scheduling Training
Introduction
In this article, we will show step-by-step instructions on how to create a new training event and schedule multiple learners for the event.
Video Demonstration
Getting Started
To get started, in HR Manage, go to the Training Administration module by clicking on the Training Administration menu item on the home screen or by clicking the Training toolbar item in the top ribbon. Then click on the Manage Events menu item to open the Training Event Manager. Now simply click on the Create New toolbar button in the ribbon to open the New Training Wizard.
On the “New Training Wizard”, note that you can go back to a previous step at any time by simply clicking the Previous Step button on the ribbon toolbar or by clicking on the step icon at the top of the window below the ribbon bar.
New Training Wizard
Step 1 – Select Intervention
On this step, select the intervention that you would like to schedule for training.
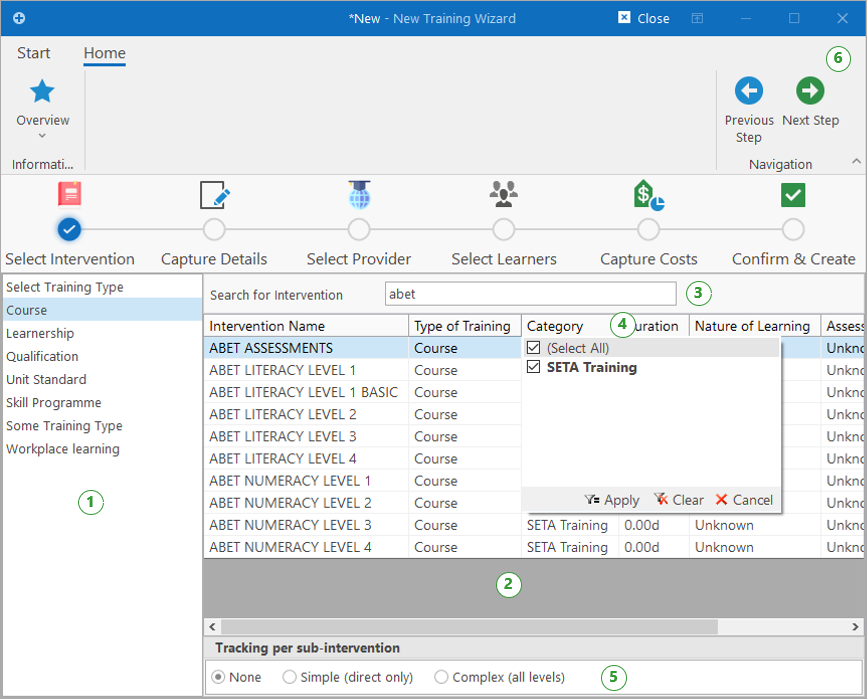
To begin, simply select a Training Type on the left (1) which will populate the interventions of that type on the right (2). You can also filter the list of interventions by typing part of the name in the search box (3). It is also possible to further filter the current list by moving the mouse cursor over the column and clicking on the filter dropdown (4), selecting the filter values and clicking Apply.
When selecting an intervention, the “Tracking per sub-intervention” setting (5) will change automatically based on the configuration of the intervention in the intervention library. To override this setting, simply choose the desired option here. A further explanation of these settings will be discussed in Step 2.
Finally, click on Next Step (6) to continue with the wizard.
Step 2 – Capture Details
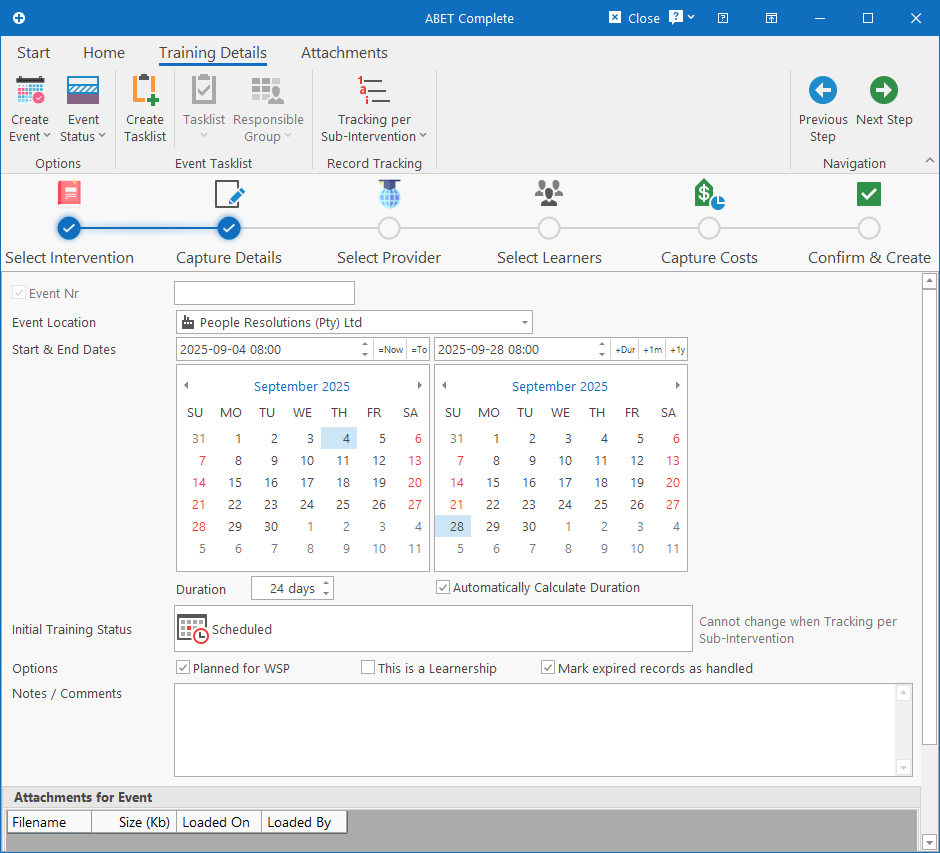
This is where you will capture details and configure the training event. Details like dates, notes, attachments, statuses, etc.
Step 3 – Select Provider
On this step, you will select the provider for the training as well as specify fields related to linked to the provider like the Instructor, Course Manager and Venue.
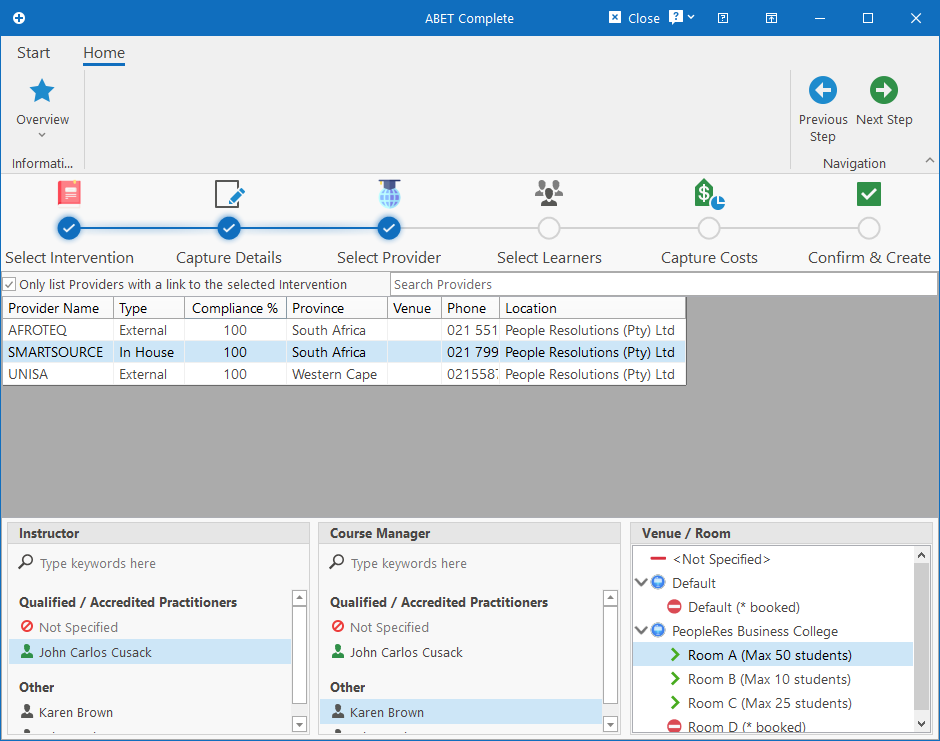
By default, only providers are listed that are linked to the selected intervention. To show all the providers, simply uncheck the “Only list Providers with a link to the selected Intervention” checkbox. You can also search for providers by simply typing into the search box. Both the are located just above the providers list.
As a Provider is selected, the available Instructors and Course Managers will refresh. A qualified practitioner is a person that is linked to both the Provider and the Intervention. A practitioner listed under “Other” is a person that is only linked to the provider.
The default Venue / Room will also be selected automatically if configured on the Training Provider. All venues and rooms will however be listed, each showing the maximum number of students. If a venue is already booked, it will be marked with a “Denied” icon and with the text (* booked) appended to the end.
Step 4 – Select Learners
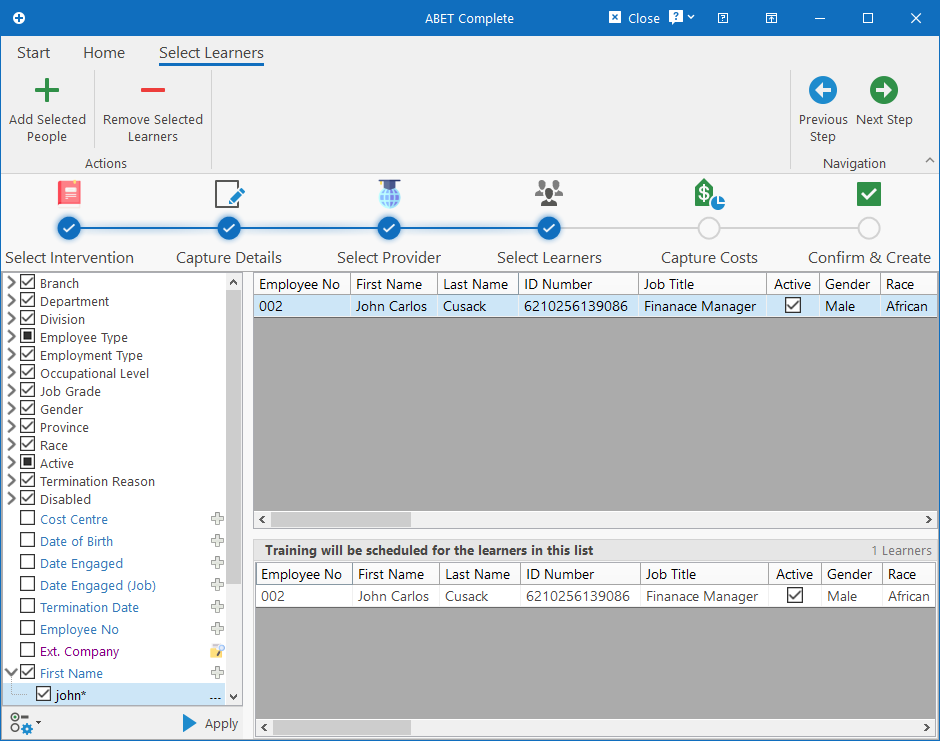
Here you can browse the database of people and select which people should be scheduled for the training. Simply filter and browse for people and add them to the bottom list.
Step 5 – Capture Costs
On this step, you can capture the costs associated with the training. You can also specify which sub-interventions / modules should be scheduled as part of the training (if applicable).
There are various aspects associated with how costs are captured. For more details, see the Costs tab on the Training Event Editor.
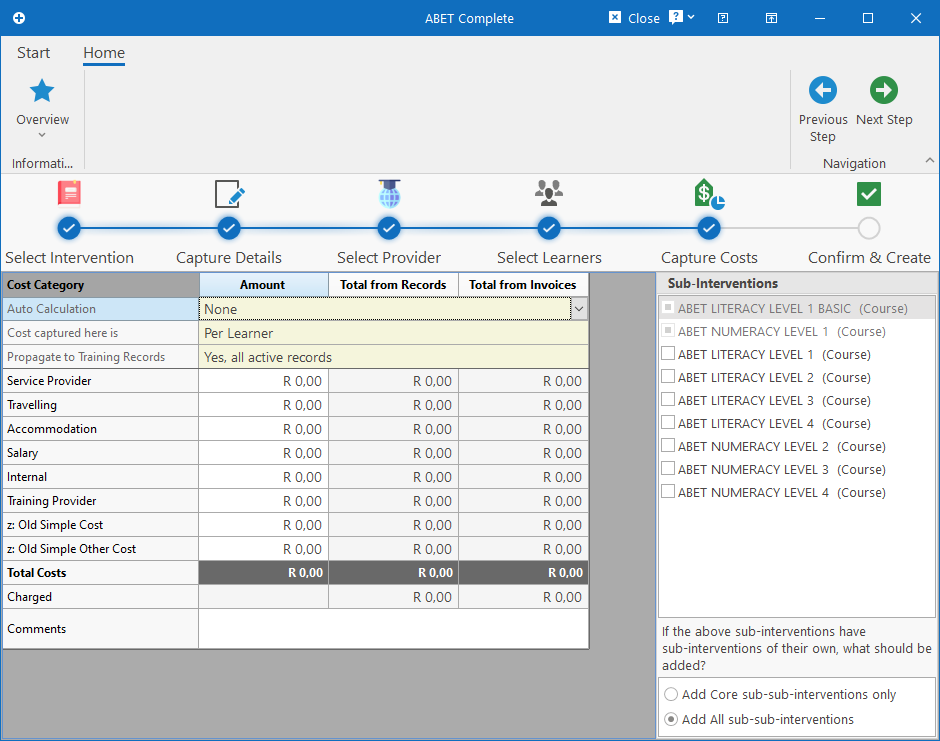
If the selected intervention has sub-interventions, the sub-interventions will be displayed in the list on the right. The Core sub-interventions will be selected (and disabled) while the Electives can be selected as needed.
If any of the sub-interventions in turn, have their own sub-interventions, the option at the bottom determines which of the sub-interventions of the sub-interventions should be created.
Step 6 – Confirm & Create
The final step just shows a confirmation of all the information captured in the previous steps. When ready to actually create the training, simply click the Next Step button on the ribbon bar.
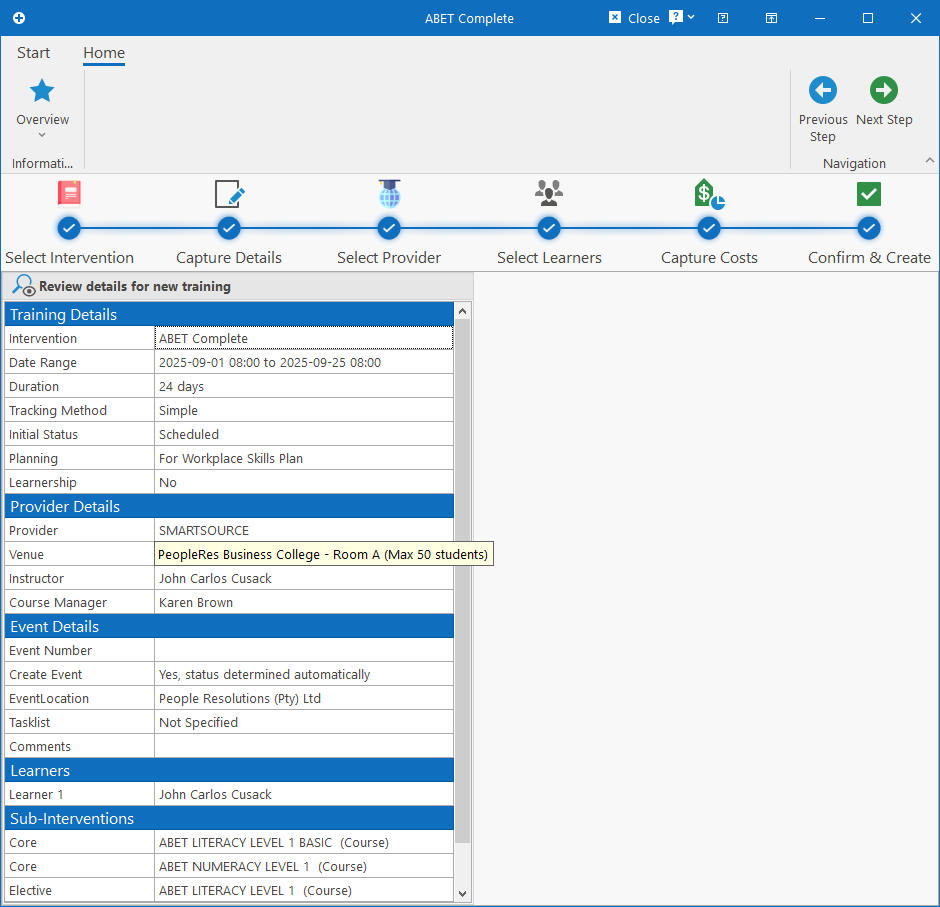
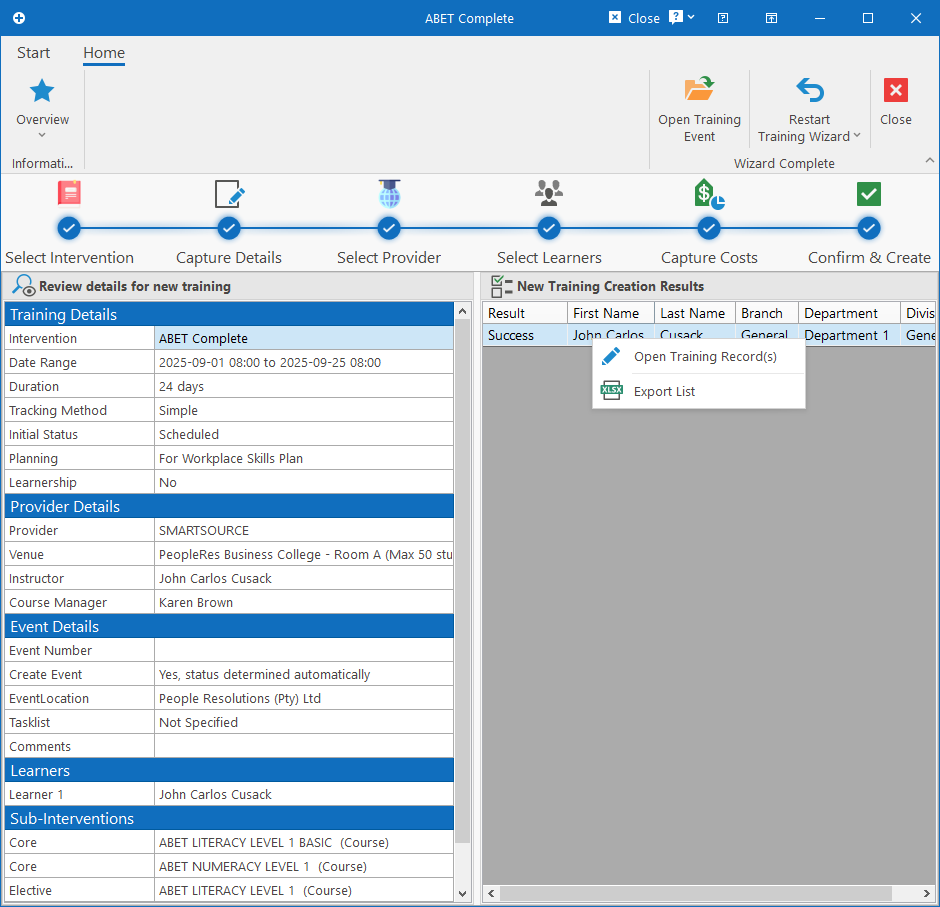
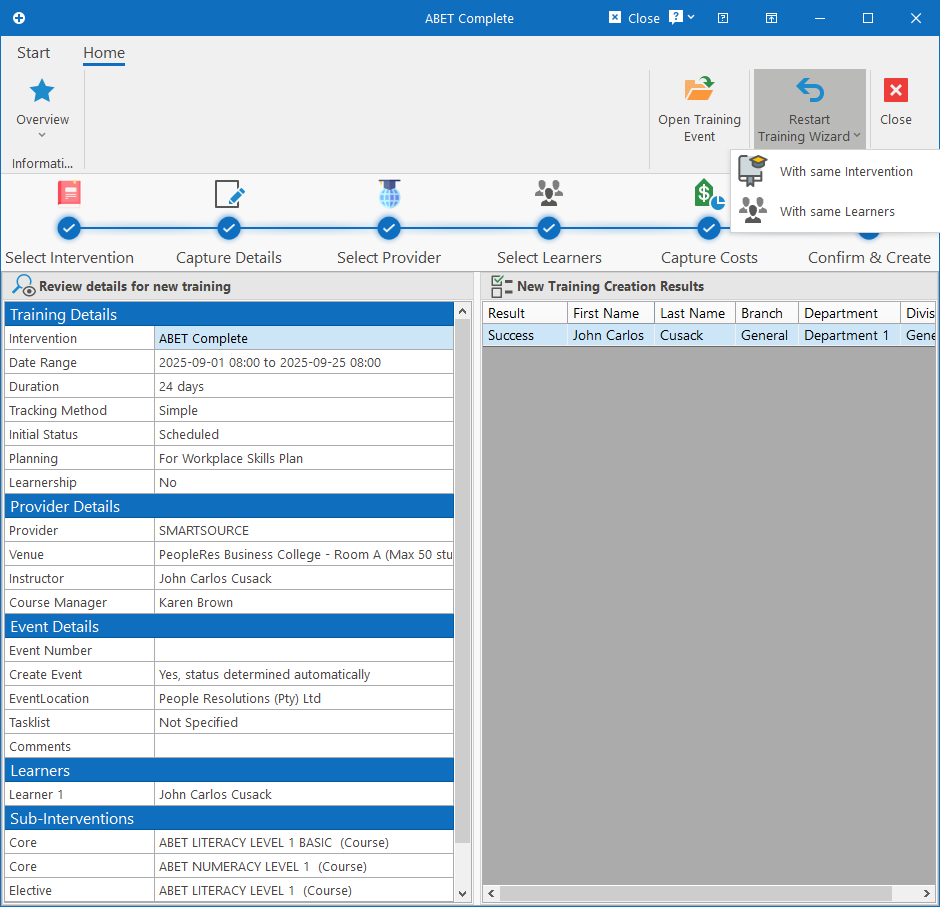
This will create the training event and/or records and display the resulting training records that were created in the list on the right with the status of each. From here, you can perform the following actions:
- Open Training Event: Only available if a Training Event was created. Clicking the button on the ribbon bar will open the training event that was created.
- Open Training Record(s): Select one or more training records in the results list, right-click and click the Open Training Record(s) menu item. This will open the Training Record Editor (if a single record was selected) or the Batch Updater (if more than one was selected).
- Restart Training Wizard: This will move the training scheduling wizard to the first step to create the next batch of training, but without needing to recapture everything. You can choose to either reschedule the same intervention for a different set of learners (which would restart the wizard from step 2), or to schedule the same set of learners for another intervention (which would restart the wizard from step 1).