
Logins / Accounts
Introduction
Logins or User Accounts in HR Manage define security credentials and security access for people already loaded on the system. Thus it is possible to create a login from the Windows application and assign the user to specific security groups which will in turn determine what the user has access to, or the user can register themselves online and only be assigned to the “Everyone” group.
Getting Started
To create or open a Login, open the Employee Manager and select the person you want to modify the login for. This will open the User Account Editor form.
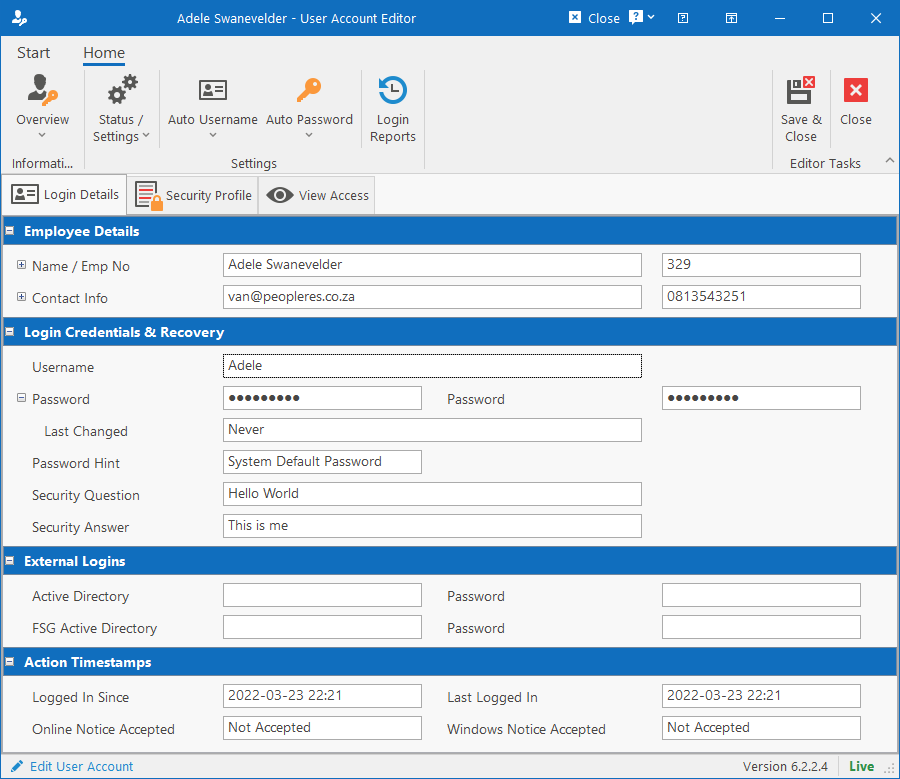
Login Details
This tab contains all the fields that need to be captured for the user account to be active and working.
Ribbon bar
There are a couple of settings and features on the ribbon bar.
- Status / Settings
- Active / Enabled: Indicate if the user can log in or will be blocked.
- Show Denied items on filter engines: Usually if a user doesn’t have access to locations, they just won’t be visible on the filter engines. Choose this option to show locations on filter engines that user don’t have access to (values won’t be selectable though).
- Auto Username
- When creating a new user account, this dropdown contains a pre-populated list of usernames to choose from. Simply click on one to fill in the field.
- Auto Password
- Similar to the Auto Username, the password can be populated with the system default, the user’s ID number or Employee number
- Login Reports
- This opens the Security Report Viewer where the user’s login attempts and activity can be viewed and exported.
Employee Details
This is read-only and only for information purposes to see who the person is and where they are located in the company.
Login Credentials & Recovery
Specify a unique username, a secure password and some recovery information. The password hint will be shown to the user when requested on the login page. The Security Question will be prompted to the user on the password recovery page at which point they must enter the answer correctly in order to reset their password.
External Logins
If Active Directory integration is enabled, the directories will be listed here. This is essentially only completed by the user who is logged in and editing their own login account. They will need to enter their username on the appropriate Active Directory and their AD password. HR Manage will use this information and and upon successful authenticate, will store the AD username only and make it tamperproof. The AD password is not stored.
Action Timestamps
Only shows when the user last logged in and accepted notices.
Security Profile
On this tab, you can specify to which security groups the user belongs to. This membership will determine the access the user has, both roles and locations.
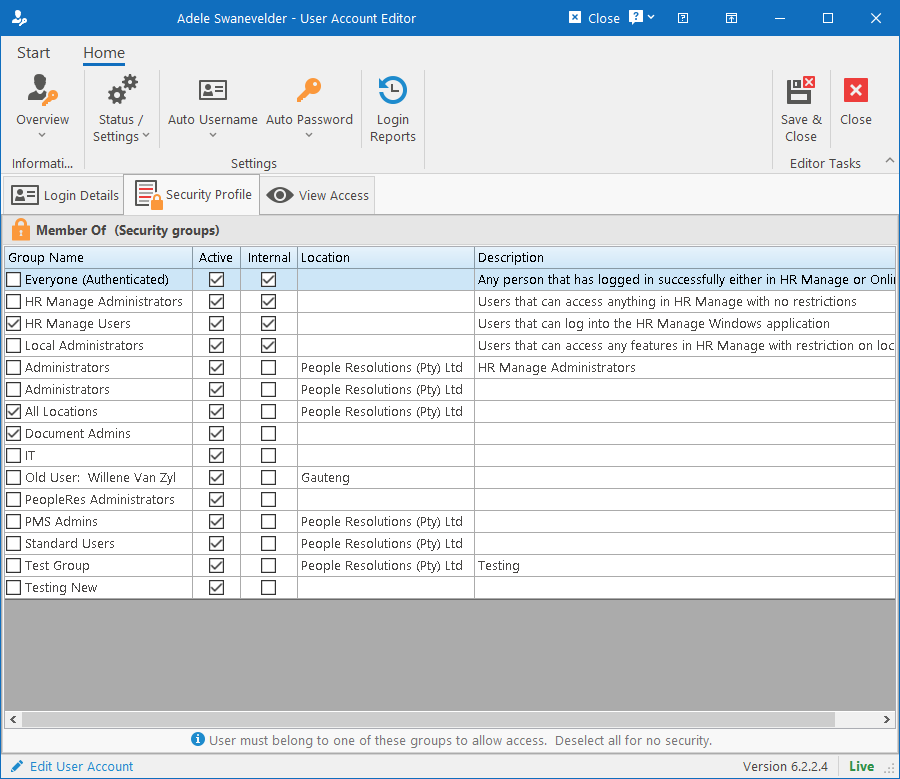
Once all the applicable groups have been selected, you can go to the View Access tab to see the effective security that the user will have based on the selection.
Note that all users will automatically belong to the “Everyone (Authenticated)” group and does not have to be selected on the list as membership is automatic.
Users must have access to the “Manage Users” role in order to select or selected groups. Thus, a user editing their own user account without having access to the role, won’t be able to change anything on this tab.
View Access
On this tab, you can play around with the security group combinations to see which groups a user needs to belong to for getting the appropriate security permissions. For convenience, roles can be searched and filtered. You can either filter by name or by selection (i.e. Only show selected roles). If filtering by selection, if a search term is specified, the search term will be highlighted.
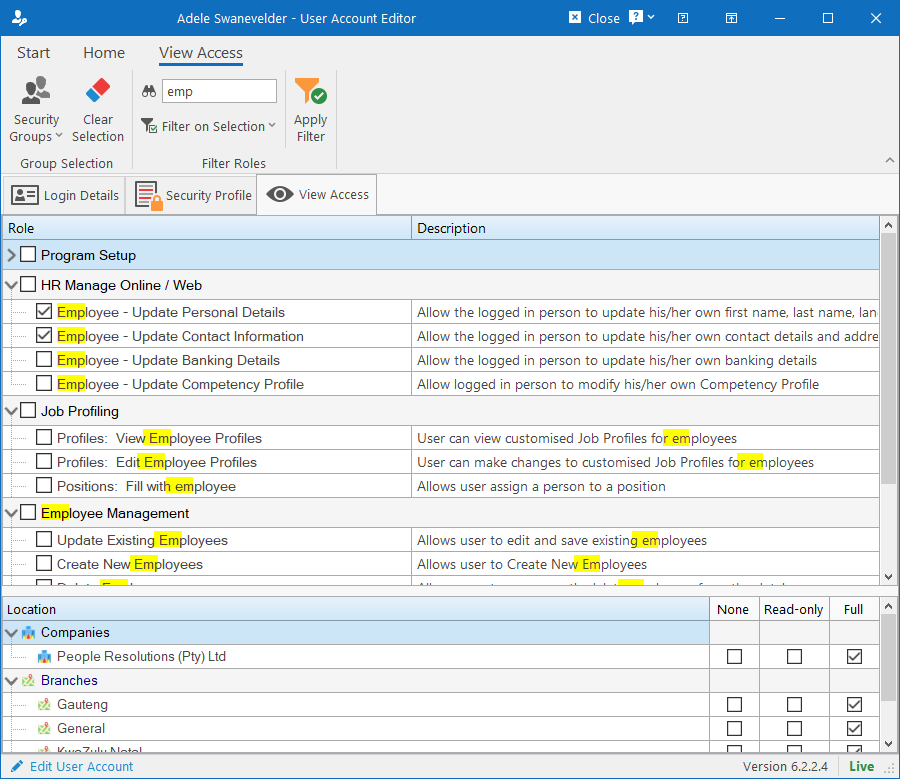
To see different combinations, click on the Security Groups dropdown button on the ribbon bar and select or deselect groups. The changes will reflect immediately on the screen to see the effects.