
-
HR Manage Application
-
-
- Articles coming soon
-
- Articles coming soon
-
- Articles coming soon
-
-
HR Manage Online
-
Config & Admin
-
IT Documentation
-
Version History
Email Notification Designer
Introduction
Email notifications are sent on certain events. Administrators can customise and enable/disable notifications as needed.
Version 7+
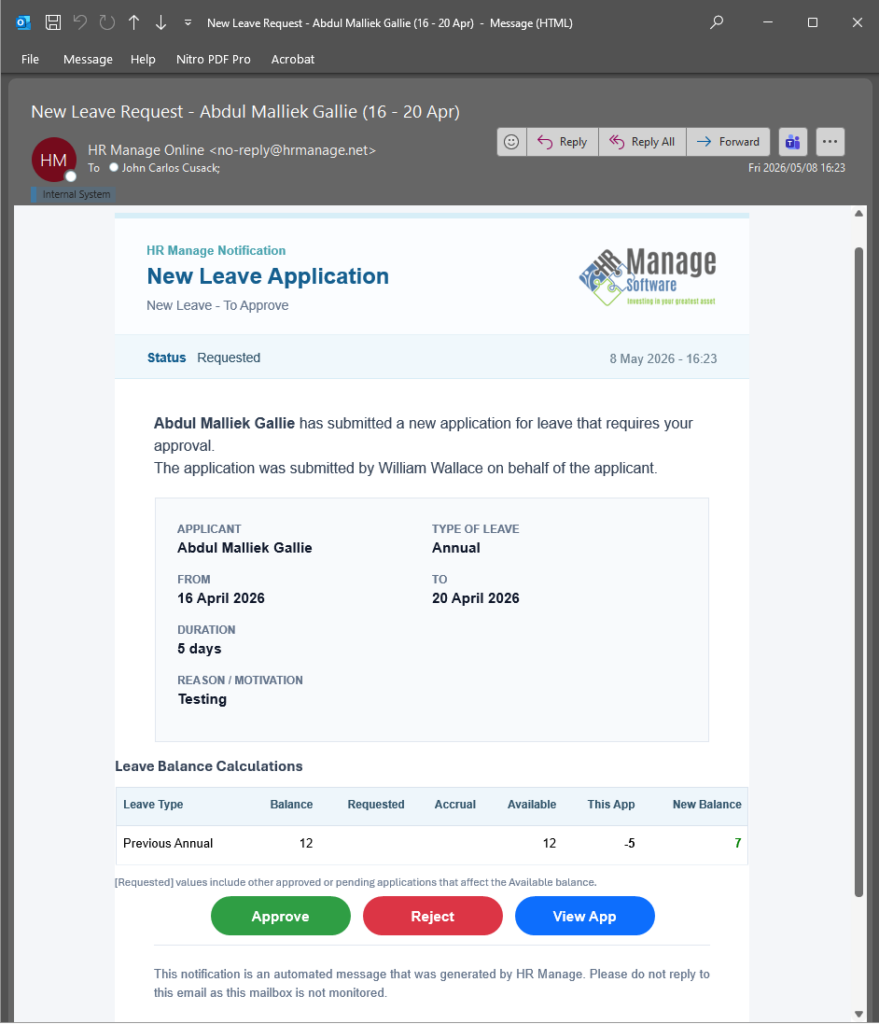
Note that this functionality only applies to legacy email notifications. As of HR Manage version 7, we are phasing these customisable notifications out and replacing them with hardcoded email notifications that allows for more rich functionality within the notification. See the sample email notification below from version 7.
Customising Legacy Notifications
Not all modules have been upgraded to the new platform and their email notifications can still be designed using the Legacy designer.
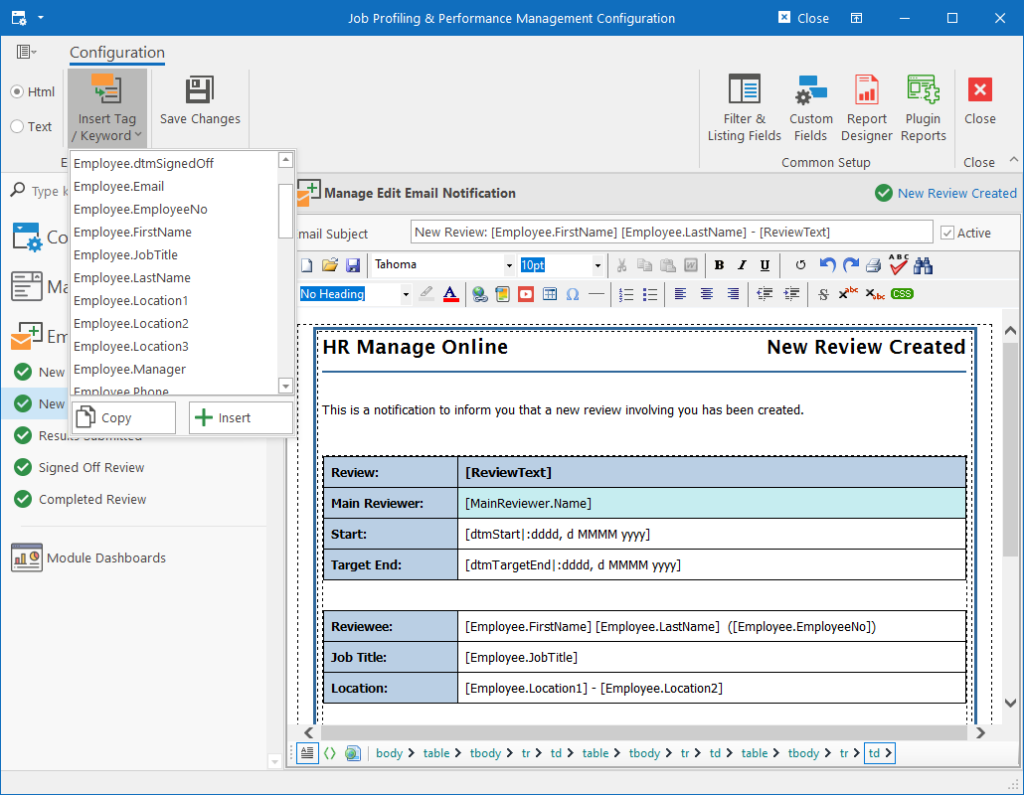
To edit an email notification,
- Open the Configure Module screen on the module that sends the notification
- Scroll down to “Email Notifications” and click on the email notification you wish to edit. If the notification has a green checkmark next to it, it means that the notification is enabled or if it has a red cross, it is disabled.
- Specify a Subject for the email notification (can contain tags).
- Mark the notification as Active / Enabled by marking the Active checkbox as checked.
- Design your notification using the WYSIWYG Html editor (can contain tags).
- Click the Save Changes button on the Ribbon bar.
Tags are placeholders for values from the record that triggered the email notification. Simply place the keyword in square brackets or click the Insert Tag / Keyword dropdown button and choose a tag from the menu. That will insert the tag placeholder at the current cursor location.