
Editing Leave Records
Getting Started
From the Leave Management screen, select a single Leave Record and click the Edit Selected button on the ribbon bar or double click on the record or press the Enter key. This will open the Leave Record Editor screen.
The exact editor that will open will depend on the type of record that was selected. For Standard and Selling Applications, the Leave Application Editor will open. For Balance Adjustments and any other types of records, the Leave Record Editor will open.
Leave Application Editor
This editor allows approving, rejecting or cancellation leave applications as well as making minor adjustments to applications.
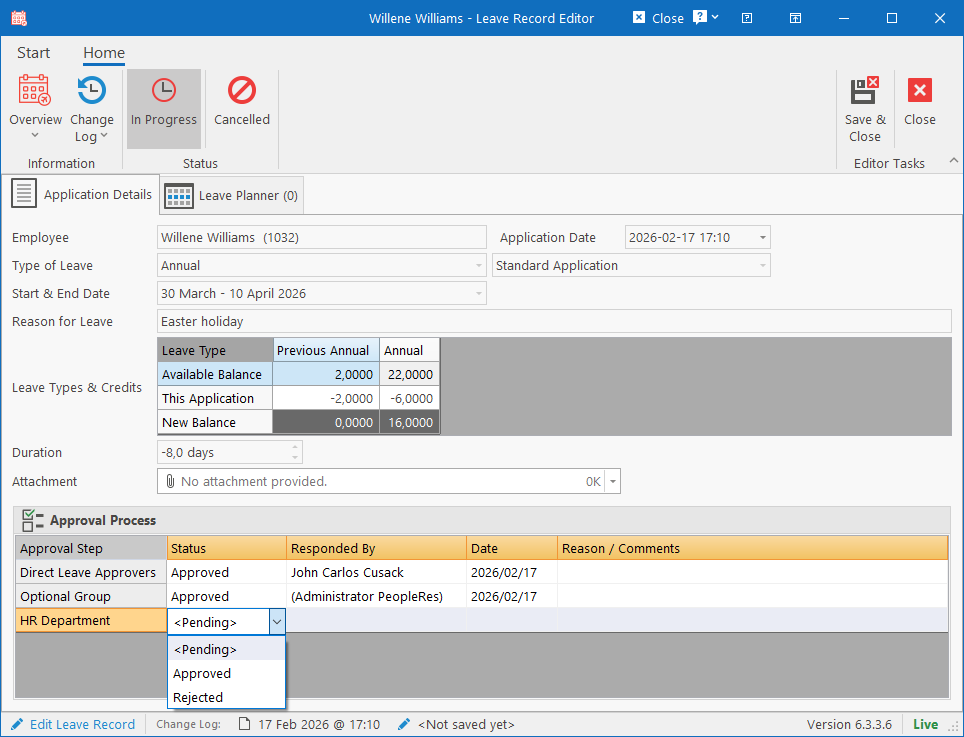
Application Details tab
Fields
- Employee: Name and Employee Number of the application. Moving the mouse cursor over this textbox will display additional information about the employee.
- Application Date: Date when the leave was applied for.
- Type of Leave: The main leave type that was originally applied for. The actual affected leave types may differ based on the rules.
- Record Type: This will be either “Standard Application” or “Application to Sell”.
- Start & End Date: The exact date range when the employee will be on leave. For single-day applications, the time will also display.
- Reason for Leave: Reason why leave was requested.
- Leave Types & Credits: This will display a grid of all leave types that will be affected by the application. A single leave application can use credits from 2 or 3 different leave types depending on available leave credits and configuration of the Carry-Forward and Overflow leave types.
- Available Balance: The first row will display the employee’s current available balance for the specific leave type (column).
- This Application: The second row will display how many credits will be deducted from the leave type for the current application.
- New Balance: The last row will display how much leave will be available after the current application has been approved.
- Duration: This box will show the total duration for the application from all the different leave types combined.
- Calculated Duration: This row will only become visible if the applicant chose to override the duration and that duration differs from the system calculated duration. The applicant would also need to provide a reason for the override.
- Attachment: Document that was attached as part of the application.
Approval Process
The list will display all the steps that must be completed in the approval process before the application become Approved. The editing can be done directly in the list, but they must all be completed from top to bottom.
The following columns must be completed:
- Status: Can be switched between <Pending>, Approved or Rejected. If switched to <Pending>, then all subsequent approval steps that may have been completed, will also switch to <Pending>.
- Responded By: Click on the dropdown to specify who approved or rejected the leave for that approval step. The list will contain all the valid approvers for the step plus the logged in user (whose name will appear in brackets).
- Date: Date when step was approved or rejected.
- Reason / Comments: Any comments related to the approval can be captured here. In the case of the status being set to “Rejected”, then this field is mandatory.
Leave Planner tab
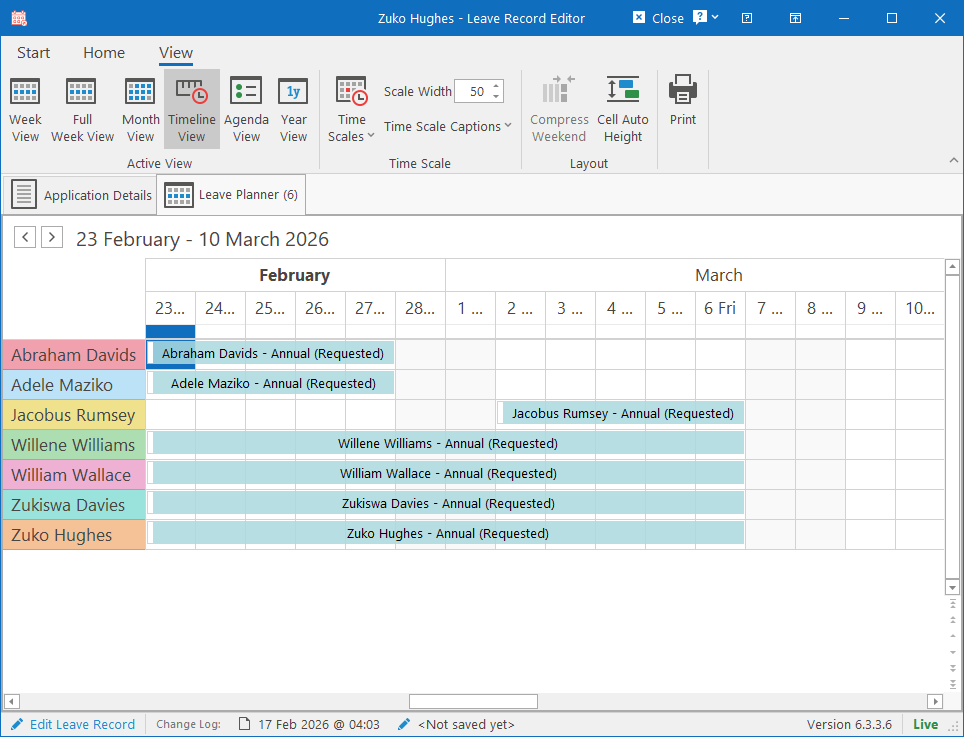
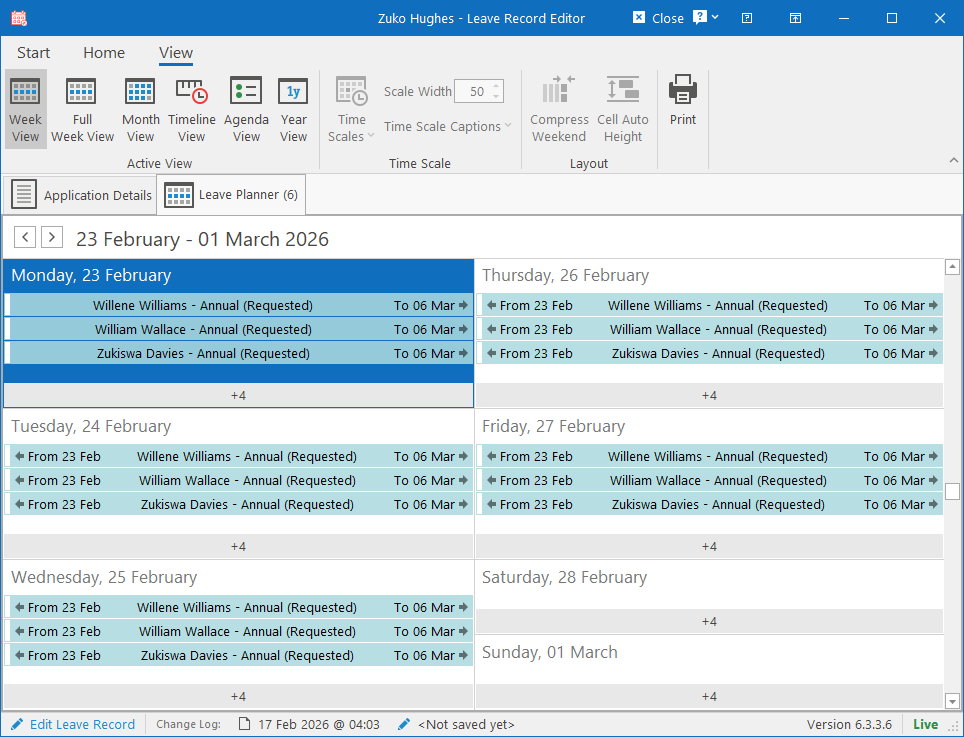
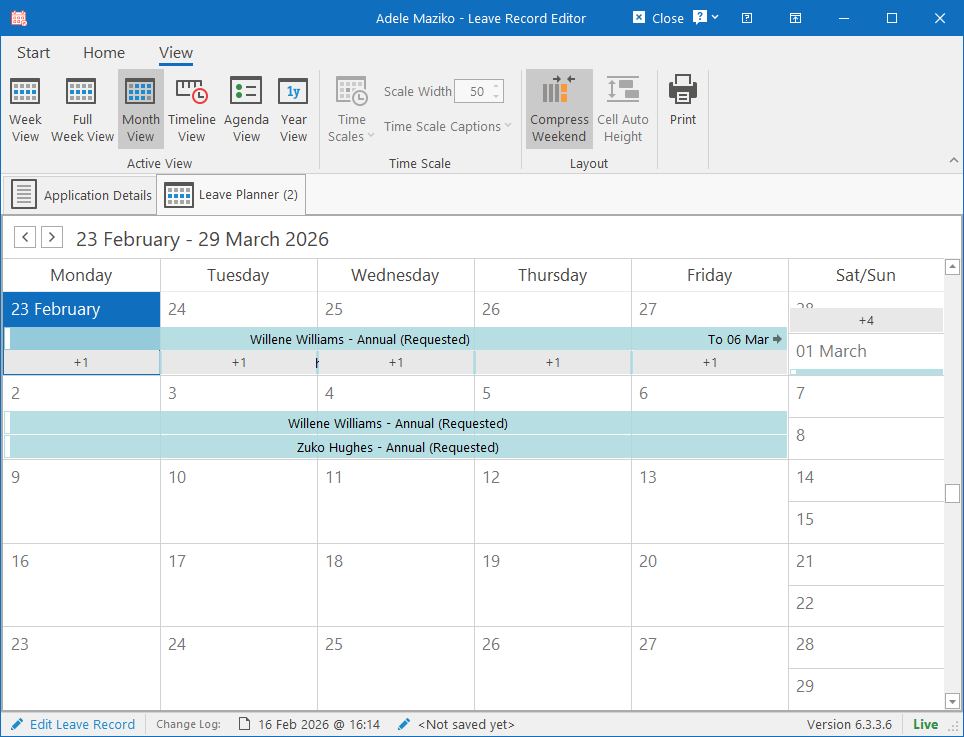
This tab will list all the employees working in close proximity to the applicant and if they have any leave planned during that period. If there are multiple people going on leave during the same period, the number of “conflicts” will be displayed in the tab in brackets. i.e. “Leave Planner (2)”.
The exact people who will display in the planner as well as the date range and colour of the public holidays can be configured in the Leave Module Configuration.
This tab will only be loaded and displayed under the following conditions:
- The application is a Standard Leave Application.
- The application’s dates are still in the future.
Using the actions available in the ribbon bar, you can switch between the various views:
- Week View: Will display the week’s days on a one-pager.
- Full Week View: Will display the week’s days as columns.
- Month View: Will display a month calendar.
- Timeline View: This is the default. Will display each day in the month as a column and you can scroll left and right. Each employee will also display on their own line.
- Agenda View: Will display the list of applications in progress on a specific day.
- Year View: Will display the entire year worth of leave (only future applications). Note that days with multiple applications on them won’t display as clearly in this view due to space constraints.
Leave Record Editor
This editor allows the editing of parameters for a leave record like balance adjustments or even system-generated accrual records.
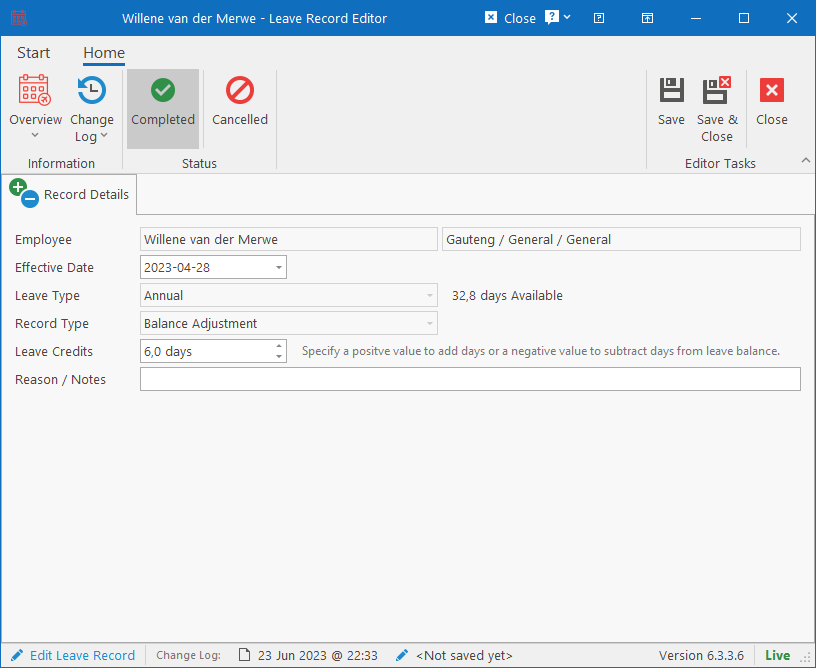
The editor will display the following fields:
- Status: In the ribbon bar, the available statuses for leave records are either Completed or Cancelled. Only Completed records will affect the leave balance.
- Employee: This will display the employee that the leave record is for as well as their location in the company.
- Effective Date: Date on which the balance was adjusted. This field can be edited if needed.
- Leave Type: The type of leave being manipulated. Cannot be changed after the record was created. The available balance (excluding current record) for the employee will display next to the dropdown.
- Record Type: The type of record that is being edited. Cannot be changed after creation. Available types are (types in brackets are system generated):
- Balance Adjustment: Record created using the New Leave Wizard to adjust the balance for an employee’s leave credits.
- <Set Initial Balance>: Record was created by the Employee Batch Updater while specifying the Initial Balance for each person per leave type.
- <Reset Balance>: Record was created by the Employee Batch Updater while performing a balance reset operation.
- <Accrual>: Accrual record was created by the system during a leave run.
- <Transfer Balance>: System created the record during the leave run and is used for transferring balances between leave types.
- <Forfeit>: Can be created either by the system during a leave run or by the New Leave Wizard and choosing the “Forfeit” option.
- Leave Credits: Number of days to adjust the leave balance by for the employee. To add days to the employee’s balance, specify a positive number or to remove days from the employee’s balance, specify a negative number (smaller than 0).
- Reason / Notes: Comments about why the record was created.