
Sending Emails to Employees
Introduction
Getting Started
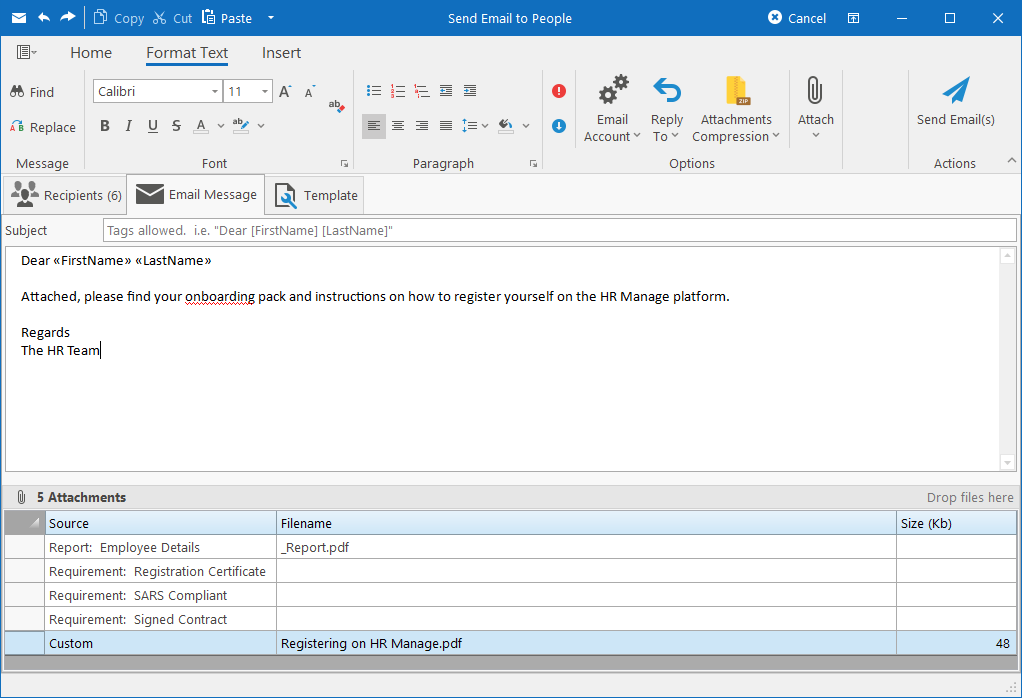
To send emails to people in the system, open Employee Manager, select one or more people and click on the Send Email button on the ribbon bar. This will open the following screen that will allow you to customise what to send.
Recipients tab
This tab will list the people that were selected on the Employee Manager who will receive this email. From here you can add and remove more as needed.
Email Message tab
Subject & Message
On this tab you can type your subject and message for the email. In the subject, you can use tags by enclosing the field names in square brackets. In the email message, you can insert fields by clicking on the Insert Merge Field dropdown from the Insert ribbon bar.
This is a full Html editor with spellcheck enabled. You can insert tables, images and format the message to your liking.
Email Options
There are some options that should be set if you want to customise anything.
Email Priority
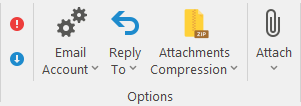
On the very left, you can specify the priority that the message should be sent with. It can either by “High” priority (red exclamation button), “Low” priority (blue down arrow button) or “Normal” (both deselected).
Email Account
The Email Account dropdown button specify which account to send the email from. Usually there should only be one account available and selected by default except maybe for companies that consist of multiple smaller companies. There must however be an email account configured for sending “Email Messages” by your IT department (see Email Client Configuration) for this functionality to work.
Reply To
Most of the email accounts are configured to direct replies to a non-monitored email address (i.e. no-reply@hrmanage.net). Should you wish to receive or direct any replies to emails sent from here, you can choose one of the following options:
- Default (as per account): This will use the reply to email address as configured in the email account.
- Your email address: This will send reply emails to your email address as configured in your user account / employee file.
- Specify: This will reveal a textbox where you can capture a custom email address that should receive replies.
Attachments Compression
This is only applicable if you are sending attachments with your email. You can set the following options:
- Behaviour: Specify if the loose files should be attached or if the files should all be compressed into a single zip file (per email).
- Zip Filename: Specify what to call the zip file attachment.
- Zip file Password: Specify the password to use or leave blank to zip unencrypted. You can use tags in square brackets to make the password personal for each recipient. (i.e. [IDNumber])
Attaching files
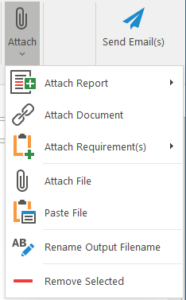
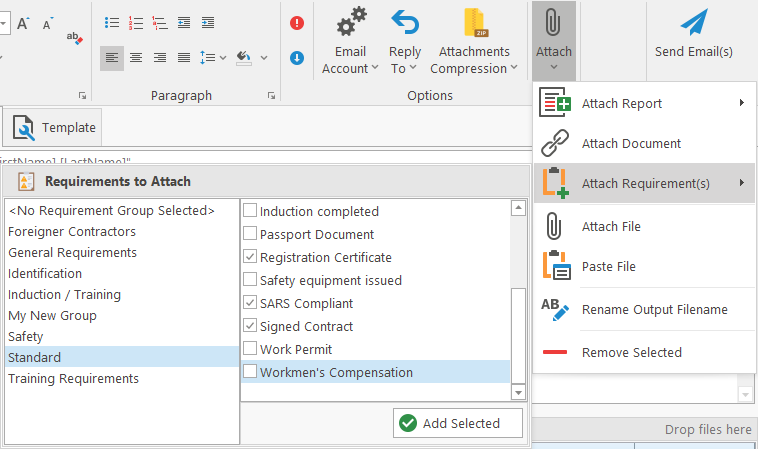
You can attach files by clicking the Attach dropdown button on the ribbon or by navigating to the Home ribbon tab and clicking one of the Attach buttons on the Attachments group.
Attach Report
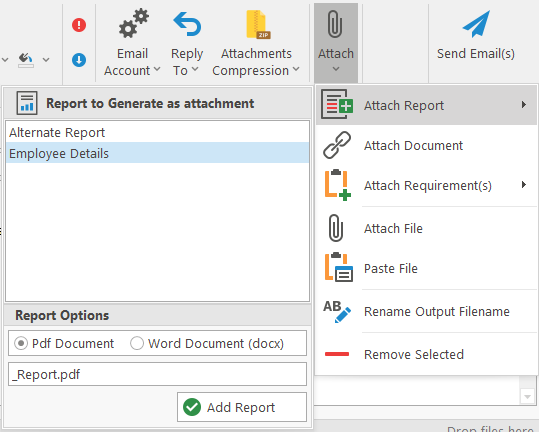
Click on the Attach Report dropdown button and select a report to generate. The reports in this list come from the employee module and new reports can be designed using our report designer.
Specify the name for the file to export the report to (the filename within the zip file) and specify whether the report should be generated as a Pdf or Word document.
Attach Requirement(s)
Click on the Attach Requirement(s) dropdown button and select which requirements should be added from the checked list on the right. If there is a requirement group defined that already includes all the requirements to attach, select it in the left list to automatically select those requirements on the right.
Attach Document
Click on the Attach Document button to open the Published Document library to select a document to be included in the pack.
Attach File
To include a file from your computer in the document pack, you can do one of the following:
- Click on the Attach File on the ribbon bar and then proceed to browse for a file on your computer.
- Click the Paste button on the ribbon bar to paste a file (or files) that you’ve copied in Windows Explorer.
- You can drag files from Windows Explorer or Outlook and drop them in the list.
Send Email(s)
When your message and attachments are ready, simply click the Send Email(s) button to start the process. If a lot of employees were selected or lots of attachments included.
Template tab
Should you wish to create a standard template for sending the same kind of email on a regular basis, you can open the “Template” tab, specify a name for the template and click the Save this Template button on the ribbon bar.
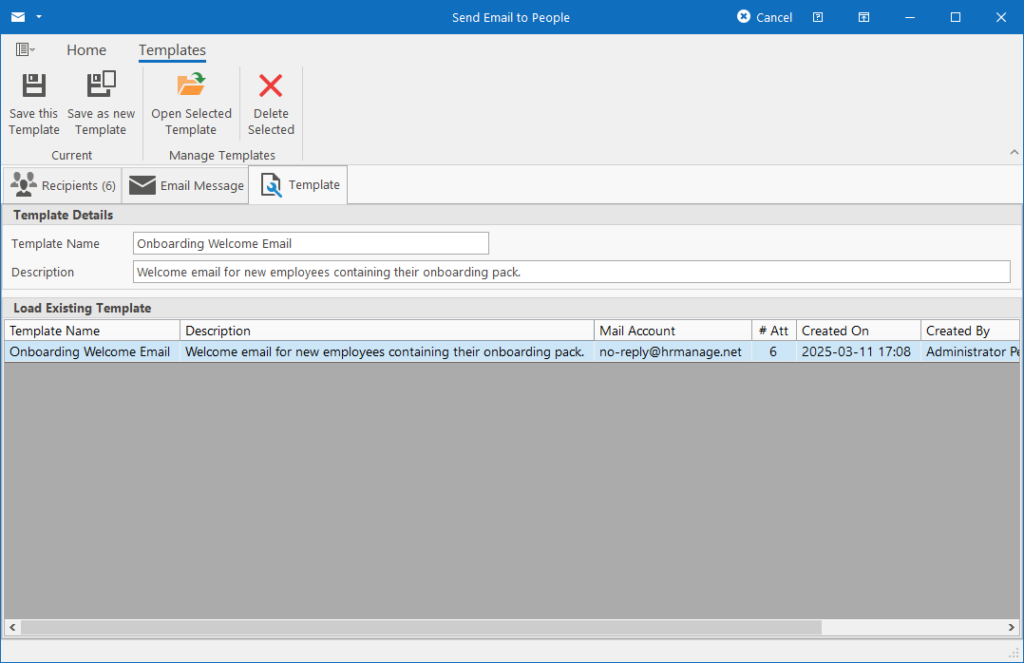
In the Template tab, all the existing templates will be listed and you can simply double-click it or click on it and click the Open Selected Template button on the ribbon bar to load it into the editor.
A template consist of the email subject, message, settings and attachment links.