
Complete a Form
Purpose of Activity
The Complete Form activity is designed to replicate any paper-based forms, allowing users to complete them online.
Creating a Complete Form Activity
From the Workflow Designer, right-click on the current activity that you want to flow into the new activity, move over the New Activity menu for the appropriate path (On Approval or Rejection) and click the Complete Form activity item. Alternatively, simply click the Complete Form Activity item from the New dropdown button on the toolbar. This will open the Activity Editor.
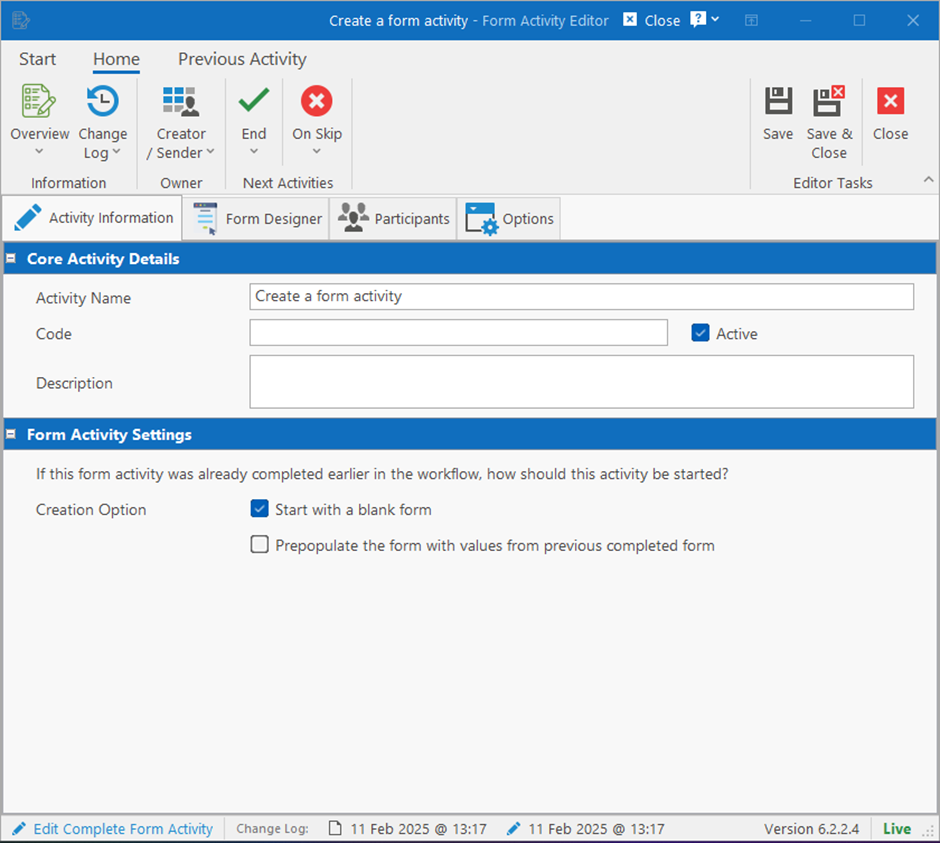
Fields Specific to this type of activity
Form Activity Settings
Creation Option
This setting determines how the system handles a form that was completed earlier in the workflow, such as when a manager rejects a sign-off and the workflow redirects back to the form. The options are:
- Start with a blank form – Previous information is removed, requiring a fresh entry.
- Prepopulate with previous values – Retains data from the previously completed form.
Form Designer
Creating the Form
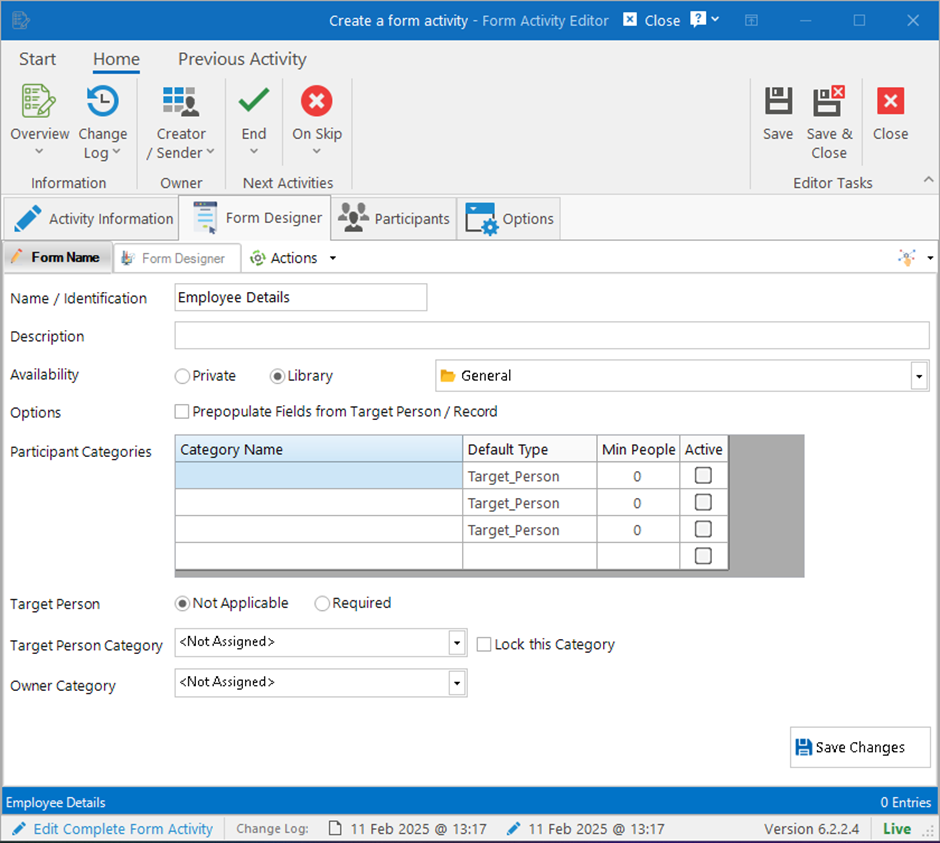
Availability
Create the form name and select whether this form is private (only linked to the workflow) or if the form should be available in the Form Library. If the Library is selected, you need to choose the category in the Form Library under which you want to save the form.
Pre-Populate fields from Target Person/Record
If enabled, Field from Record questions will auto-populate based on the target person or record selected at the beginning of the workflow (e.g., employee name, surname, job title, department).
Participant Categories
<Not Applicable for normal complete form activities – applicable to Surveys>
Target Person and Target Person Category
<Not Applicable for normal complete form activities – applicable to Surveys>
Owner Category
<Not Applicable for normal complete form activities – applicable to Surveys>
Save changes to proceed to the Form Designer.
Adding entries to the form
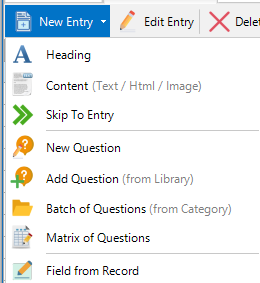
Entry Types
Headings
One-liner text displayed in blue.
Content
Can include text, HTML, or images. Used for formatting and customization.
Questions
Can be free text, dropdowns, or numeric fields. Questions can be displayed in compact (answers beside the question) or full width (answers below the question).
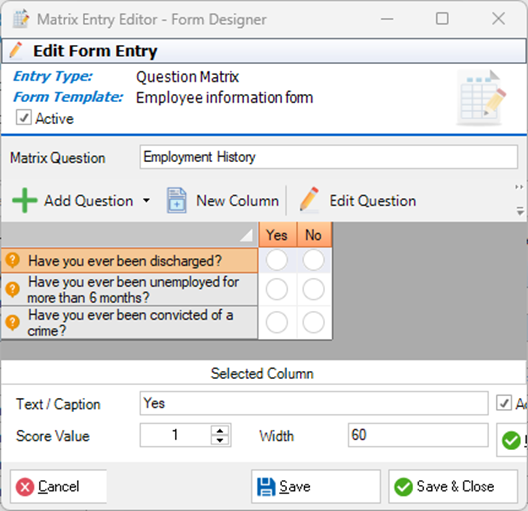
Matrix of Questions
Groups multiple questions under a category with selectable answers (e.g., Yes/No for 10 related questions).
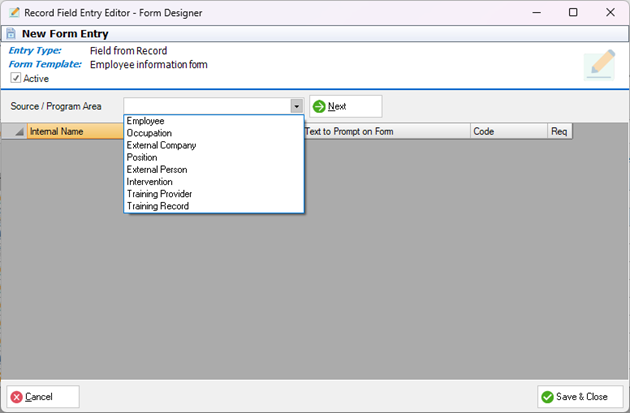
Field From Record
Auto-populated fields embedded in HR Manage, such as Name, Surname, Job Title, Department, etc., based on the target person/record selected at the workflow’s start.
Question Types
- Short Answer – Simple line of free text with a maximum of 1000 characters.
- Long Answer – Multiline textbox with unlimited space
- Decimal Values – Add decimal values with after 4 digits after point
- Integer – Add whole numbers
- Date only – Select a date using a date picker (Calendar)
- Date & Time – Select date and time using a date/time picker
- Time only – Enter a time – hours and minutes
- Radio Buttons – Select one option from a list of radio buttons
- Single Dropdown – Select a value from a dropdown list
- Multiple Checkboxes – Select multiple values from a list of checkboxes
- Multiple Dropdown – Select multiple values from a dropdown list
- Star Rating – Enter a rating by selecting number of stars
Skipping questions based on form selections
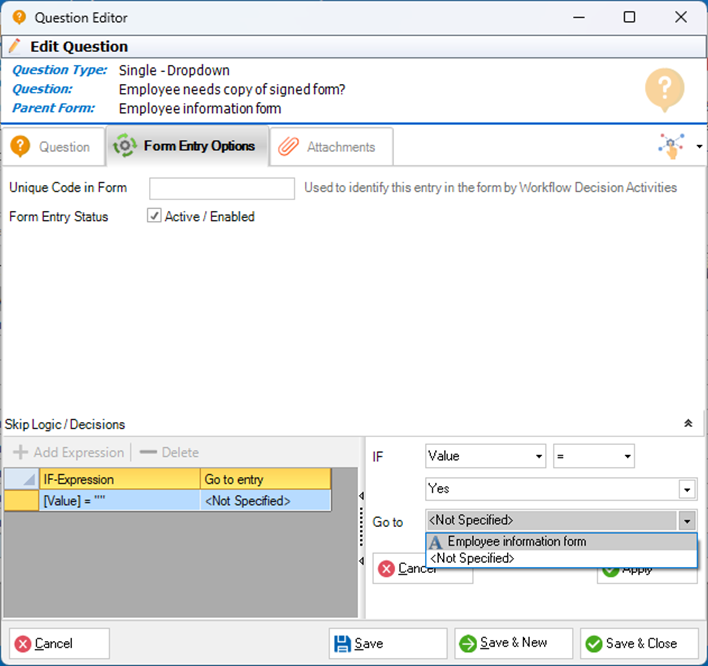
To dynamically adjust questions based on previous answers, use expressions within the form. For example:
- If purchasing an asset, the system can direct the user to either a vehicle-related section or an equipment-related section based on their selection.
- To enable this, navigate to the selector question (Yes/No) → Form Entry Options → Add Expression.
Always remember to Save.