
New Leave Wizard
Getting Started
The HR Manage Windows application allows power users to create multiple leave transactions in bulk through the New Leave Wizard. From the main HR Manage screen, click on the Leave / Time-Off menu item and then click on the Manage Leave menu item to open the Leave Manager. Now simply click the Create New button on the ribbon bar to open the wizard.
Alternatively, the wizard can be accessed from the Employee Manager. Simply select the employees to create leave transactions for and click on the Create dropdown menu on the ribbon bar and then click on the Leave menu item. This will open the wizard with the employees preselected.
Step 1 – Select People
On the first step, you must specify the type of leave to create and select the people to apply for. To select people, click on the Add People button in the ribbon bar to open the Employee Selector screen that will allow you to filter and select multiple people at once. Make sure to add all the people to include to the bottom “selected” list.
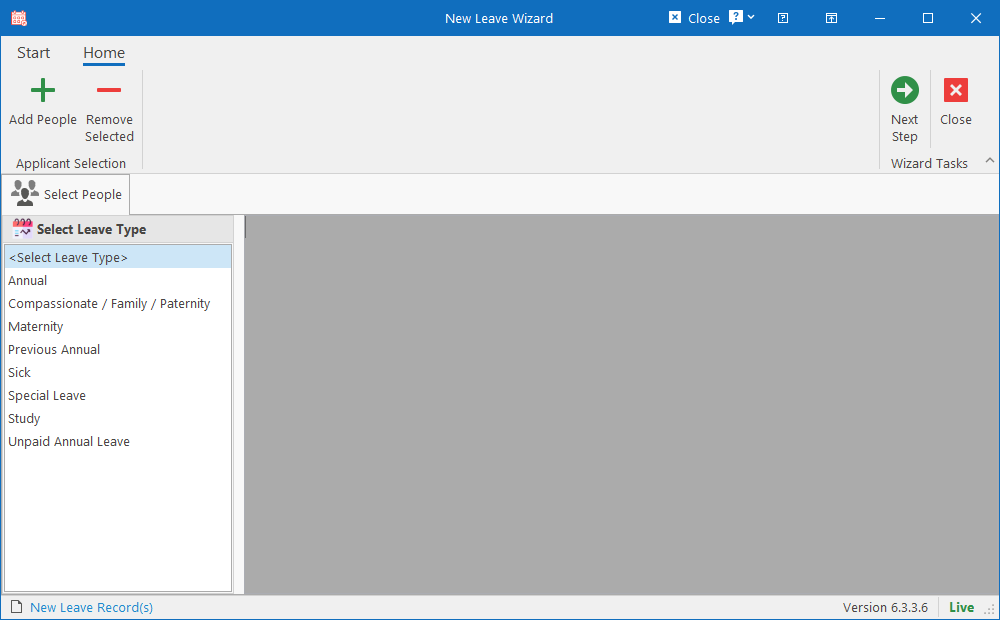
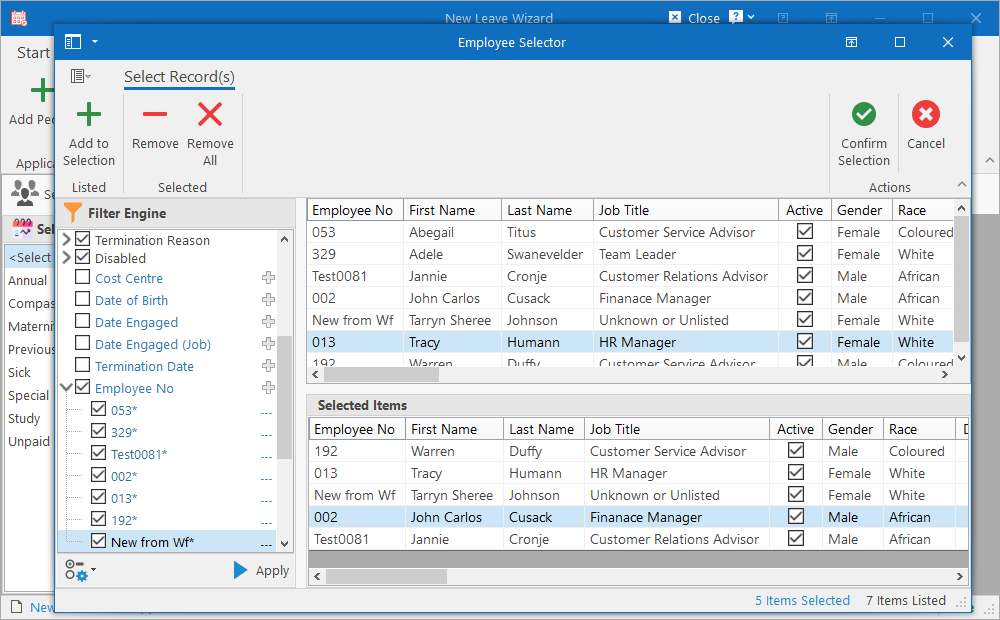
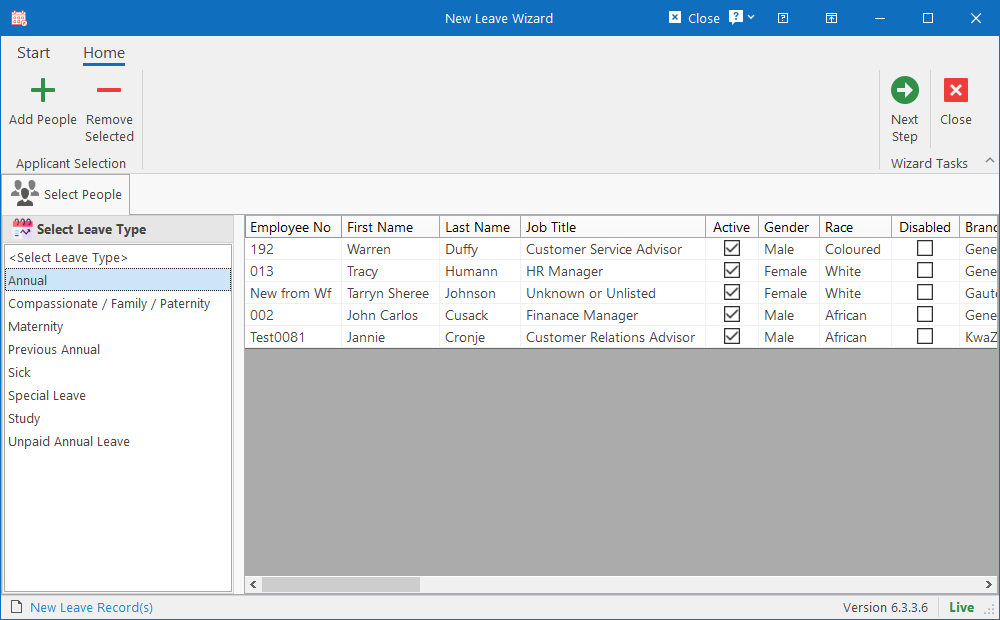
Once you click the Confirm Selection button on the Employee Selector, the people from the bottom list will be copied to the wizard. Now just ensure that you’ve selected the correct Leave Type and click Next.
Step 2 – Leave Details
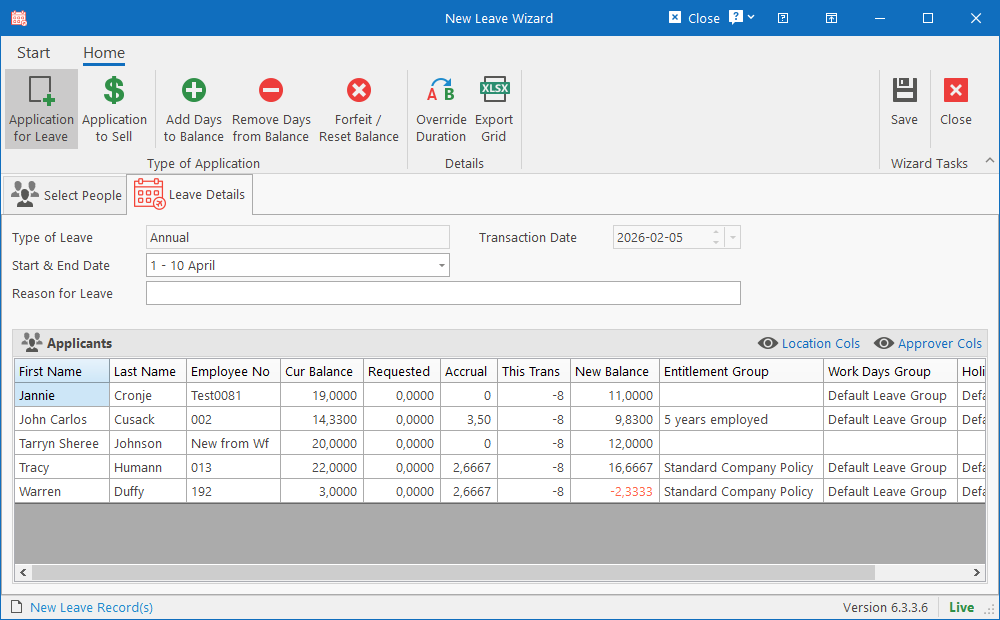
Moving to this step will generate a grid of the selected employees with their current balances and leave groups that they belong to.
Type of Transaction
First you need to specify the type of transaction to perform by selecting the type in the ribbon bar. The available types are:
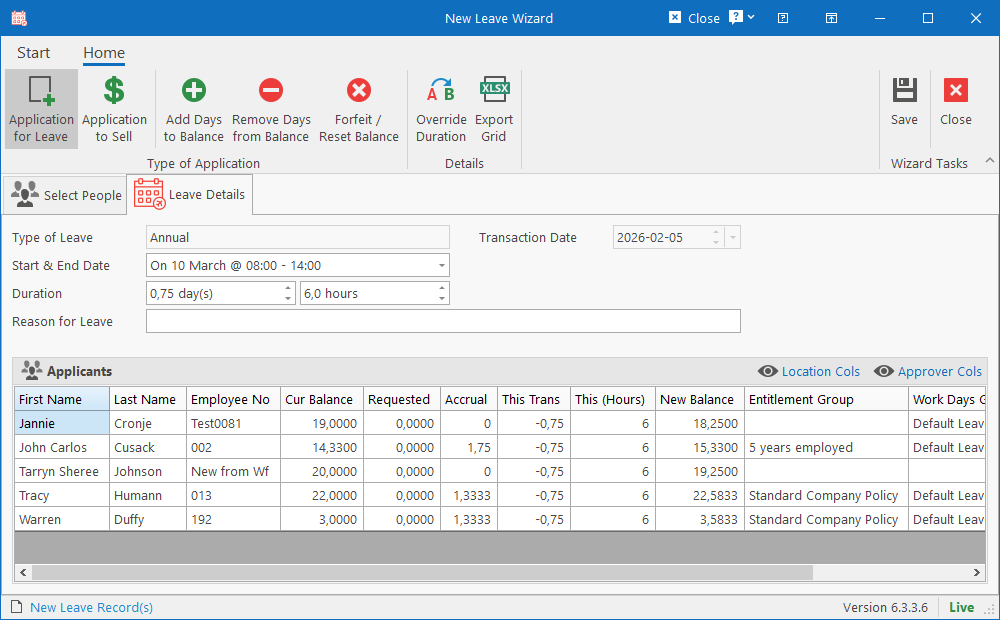
- Application for Leave: This is the leave standard application consisting of a period, duration and reason.
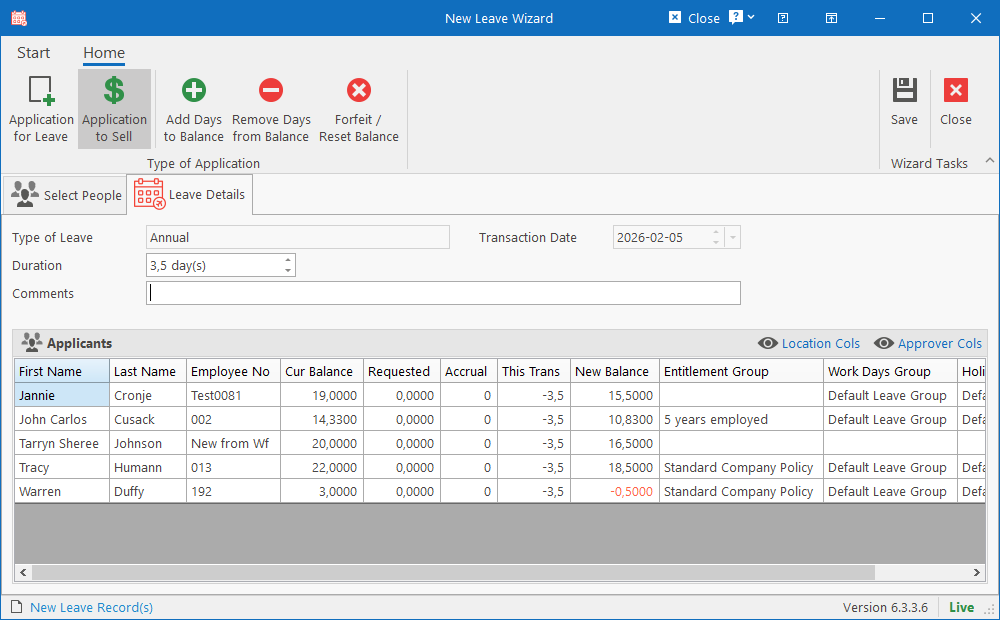
- Application to Sell: This is a special application to sell leave. This option will only be available if the client has configured their system to allow selling of leave as well as the leave type for approval to sell. Only the number of days to sell and comments can be captured.
- Add Days to Balance: Adjust the leave balance by adding leave days to it. You can specify the transaction date, number of days to add and a reason / comments.
- Remove Days from Balance: Adjust the leave balance by removing leave days from it. You can specify the transaction date, number of days to add and a reason / comments.
- Forfeit / Reset Balance: Adjust the leave balance to 0.
Leave Details
The specific fields that will be available for editing will depend on the type of transaction. The following fields are available:
- Type of Leave: This is the leave type that was selected in step 1. To change it, you have to move back to step 1 by clicking on the Select People tab, but that would result in any changes made to the details tab being lost.
- Transaction Date: Date on which the transaction occurs / occurred. It can only be edited for leave adjustments, not applications. Making changes to this field for adjustments will recalculate accrual accordingly if the date is specified more than a month in advance.
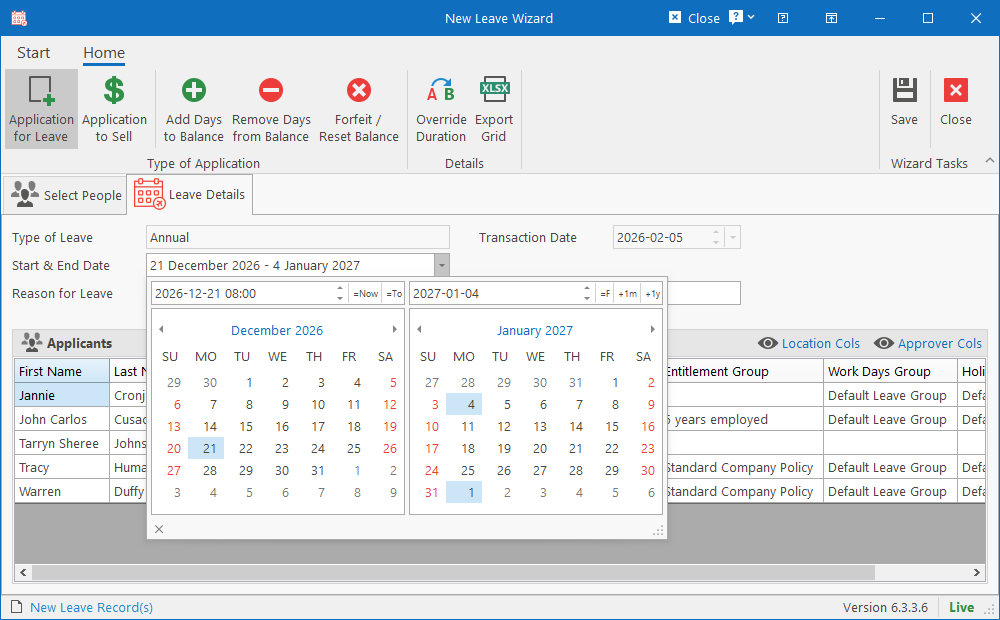
- Start & End Date: This will allow you to specify the start and end date from a dropdown calendar. Making any change to either dates will recalculate the grid, including the Accrual and Duration columns.
- Duration: The duration is calculated dynamically as the date range is changed. The duration will only become visible and editable in the following instances:
- You explicitly choose to override the calculated duration. To do that, click on the Override Duration check button in the ribbon bar. Note that if the overridden value differs from the calculated value, a “tamper” warning will show when opening the application.
- The date range spans over a single day. In that case, the system will prompt for the number of hours that the person(s) will be on leave. As the specific hours are specified, the fractional day will be calculated.
- Reason for Leave / Comments: Used for providing additional context to the transaction.
Applicants Grid
This grid contains the final data that will be used to create the leave transactions. It contains the most basic of columns with additional columns that can be made visible if needed. This grid is constantly being recalculated based on changes made to the fields above.
Here are the possible columns:
- First Name, Last Name, Employee No: Fields to identify the employees.
- Cur Balance: Latest balance for each employee as calculated based on Completed transactions.
- Requested: Leave applications that have been created, but not yet completed or approved.
- Accrual: For leave that accrue monthly, if the application falls in the following month or later, the system will automatically calculate how much accrual would be earned by the time the leave ends.
- This Trans: The calculated duration (in days) for the application / transaction being created by the wizard. If the duration is overridden, the overridden duration will display in this column and if the overridden value differs from the calculated value, the specific cells will be highlighted in orange.
- Note that the calculated duration for each applicant may differ if they belong to different leave groups. i.e. One applicant can have different work days or public holidays than another, thus affecting the final calculation.
- Hours: For single-day applications, this column will become visible and display the number of hours that the application is for.
- New Balance: This column contains the estimated calculation of what the new balance will be by the time the leave concludes. If this calculation results in a negative balance, it will be highlighted in red.
- Leave Groups: Columns showing which leave groups the applicants belong to.
- Location Columns: These columns are hidden by default but can be made visible by clicking on the Location Cols link in the grid’s header. The columns include Location 1, 2, 3 and Job Title.
- Approver Columns: These columns are hidden by default but can be made visible by clicking on the Approver Cols link in the grid’s header. The columns include Manager, Primary & Secondary Leave Approvers.
Step 3 – Create the transactions
When everything is set, click the Save button. The wizard will move to the Results tab where the create leave transactions will be listed. From there it can be opened or exported to Excel.