
Custom Fields
Introduction
Custom Fields extend the base functionality of HR Manage to allow for capturing custom content for entities like People, Companies, Learning Interventions, etc. The type of data to be stored in the field can be specified as well as the order in which they must appear on forms, but there are two main types of custom fields:
- Core Fields
- These fields are actual extended columns in the system and there are only a limited number of core fields available. They are pre-created by default and no new fields can be created and they cannot be deleted.
- By default, these fields are set as disabled and to use them, you would have to filter out the inactive custom fields, open them and rename and enable them.
- These custom fields can be used as fields in the filter engine and even as table columns.
- Extended Fields
- These fields are stored differently than the Core fields and there are no limit on how many extended custom fields can be created. The limitation however is that they cannot be used in filter engines or table columns yet.
Getting Started
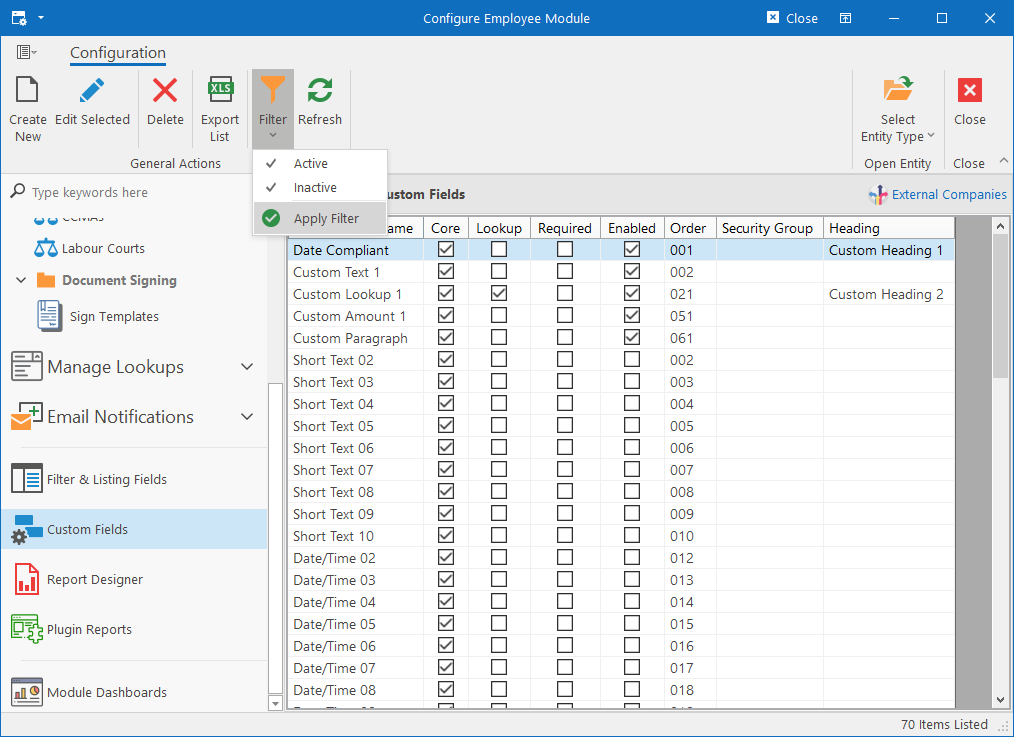
To manage custom fields for an entity, open the Module Configuration screen for the module to which the entity belongs, then click Custom Fields in the menu on the left and click on the entity in the popup menu. This will list all the active custom fields for that entity.
To create a new Extended Custom field, simply click the Create New button on the ribbon bar.
To enable a Core Custom field, click on the Filter dropdown menu, select both “Active” and “Inactive” and then click Apply Filter. Then simply open the field for the type you want to use.
Creating / Editing a Custom Field
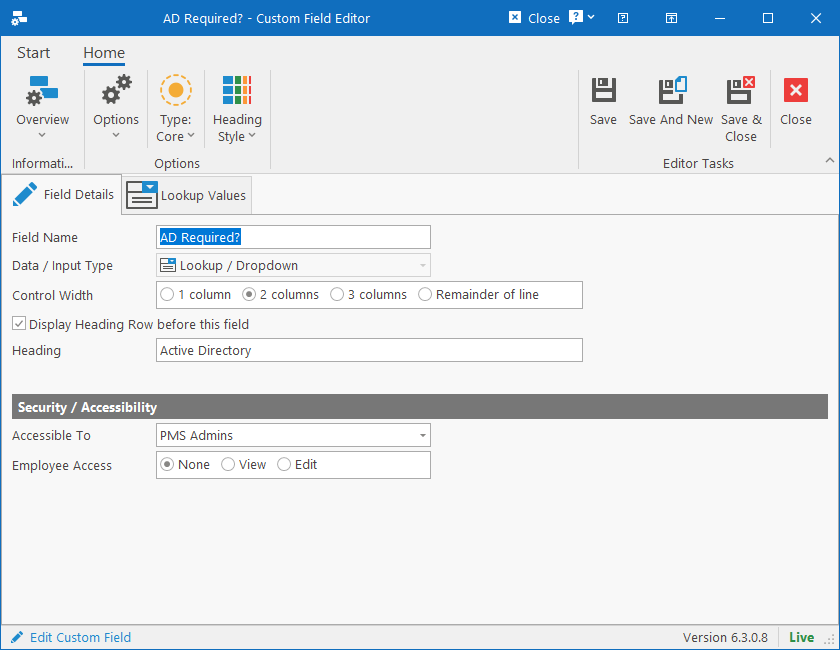
The Custom Field Editor contains all the parameters and settings required for configuring the field.
Ribbon Bar
- Options
- Active / Enabled: Must be checked / selected in order for the custom field to show on the editor.
- Required: Indicate if the field must be captured on the editor before the record can be saved.
- Updatable in Batch: Indicate if this field should be available on the batch updater for updating multiple records in a batch. It can be turned on for instances where the field is not unique and should be turned off for instances where the field’s value will typically be unique per record like an ID or address.
- Sort Order: This is simply a number that specifies the position of the custom field in the list of custom fields. The custom fields will be sorted on this number before generating the editor form.
- Type: Specify the type of custom field. This cannot be changed and is purely for informational purposes.
- Heading Style: Specify the colour style that the heading must appear in if the “Display Heading Row before this field” checkbox is selected.
Field Details
- Field Name: Text that will be prompted to the user when seeing this field on the editor form.
- Data / Input Type: Type of data that will be captured in the field. Once a field has been created, the type cannot be changed. The following types are available:
- Short Text (max 300 characters)
- Lookup / Dropdown: Selecting this will make the Lookup Values tab visible where the values for the dropdown can be captured.
- Date / Time
- Integer / Whole number
- Decimal Number
- Currency Amount
- Long Text / Paragraph
- Control Width: The controls on the editor form is usually displayed on a grid of 4 columns. The label / text is displayed in one column and this width then specifies how many columns the input control must be wide. If there are two consecutive custom fields that are only 1 column wide, then the two fields will be displayed next to each other instead of underneath each other.
- Display Heading Row before this field: If selected, a textbox will become visible where a heading can be captured that will be displayed before this field. This field and all fields underneath it will then fall under this heading until a field is encountered with its own heading.
- Accessible To: Select a Security Group that the user must belong to in order to view or edit the contents of the field.
Lookup Values
This tab will only be available / visible if the Data / Input Type is Lookup. The lookup values for this custom field can be edited here directly in the grid and everything will be saved when saving the custom field.
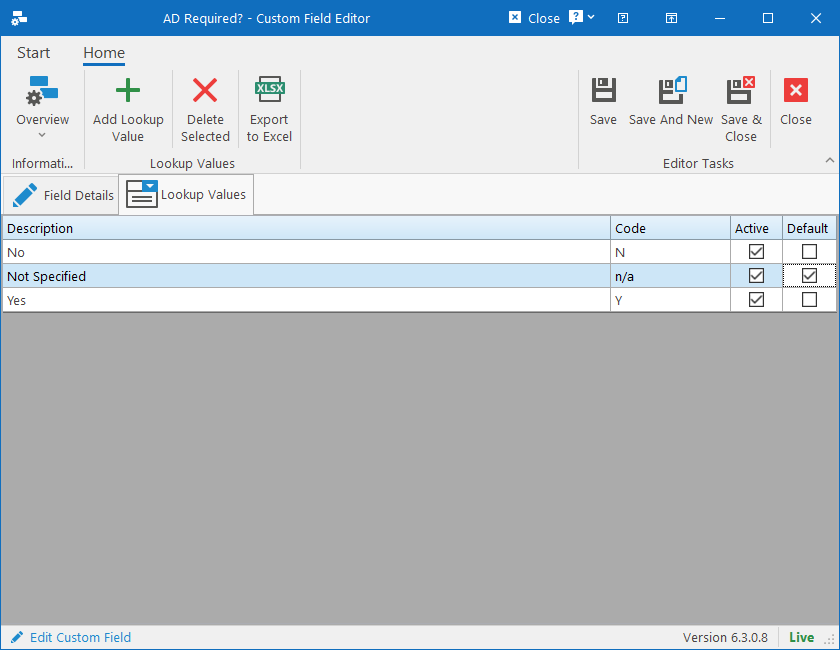
To add a new value, click the Add Lookup Value button on the ribbon bar. This will add a new row in the grid and immediately set it in edit mode.
To delete a value row, select the value in the grid and click on the Delete Selected button on the ribbon bar. The system will first attempt to delete the value (immediately), but if the delete operation fails due to it being in-use, it will simply change the Active column to false instead.
To specify the default selected value for this custom field when creating a new record, select the Default checkbox for the value.