Managing Employee Assets
Getting Started
Assets assigned to an employee can be accessed from the Employee Management Module. Simply open the Employee Manager, select the employee and then click on the Jump To dropdown button on the ribbon bar and click on Assets / Issued Equipment.
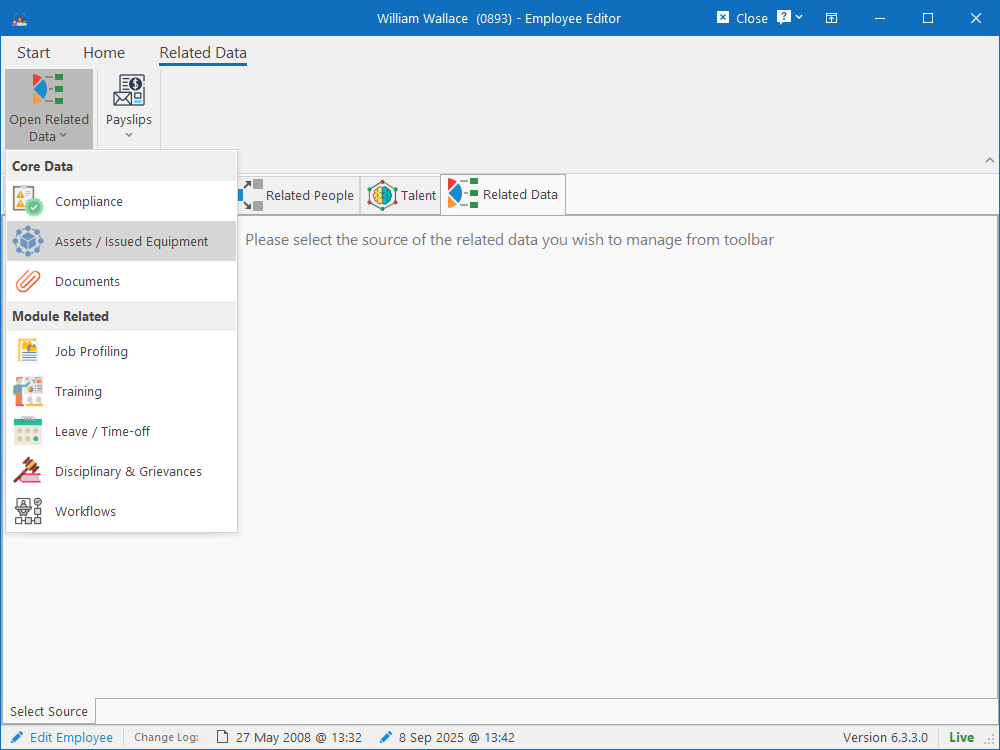
Alternatively, open the employee, click on the Open Related Data dropdown button on the ribbon bar and click on Assets / Issued Equipment.
This will open the Assets & Equipment data screen, either as standalone (if accessed from the Jump To menu) or embedded within the Employee Editor.
Assigned Assets
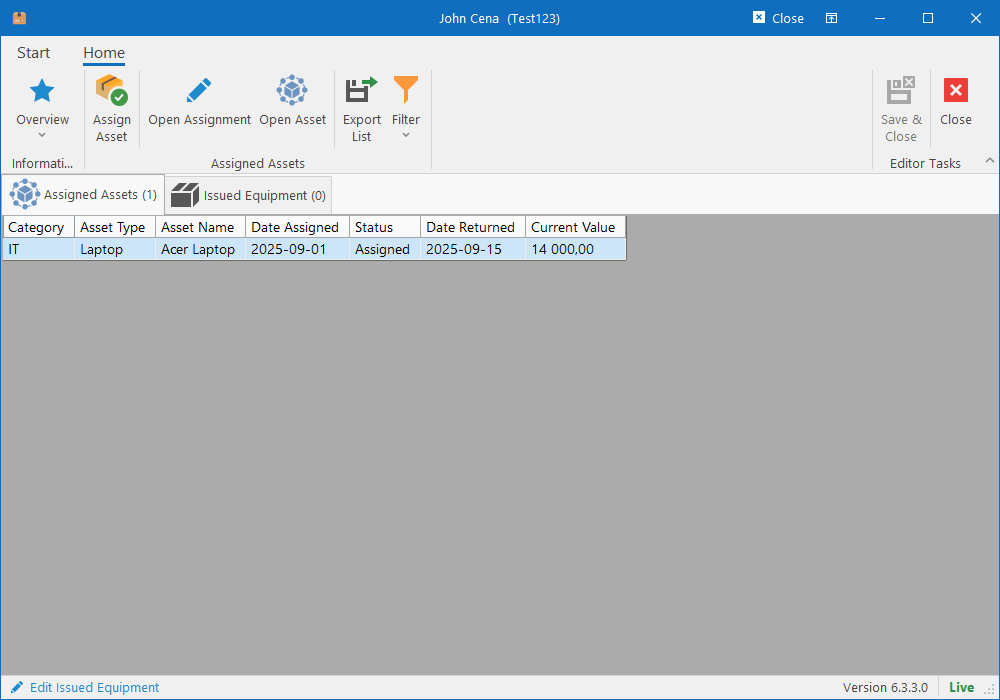
This section contains all the assets from the asset register that are currently assigned to the employee. From here you can assign new assets, open the selected Asset or Asset Assignment, or change the filter to see all assets that have been assigned to the person in the past.
Assigning new assets
To assign new assets to the current person, simply ensure that the “Assigned Assets” tab is open and click on the Assign Asset button on the ribbon bar. This will open the Batch Asset Assignment window.
Selecting the assets
On the first tab (“Select Assets”), simply apply the filter to retrieve the assets that you want to assign. By default, only the assets from the employee’s location is listed, but the filter can be expanded if needed. Also, only assets that are not currently assigned can be selected (Asset Status must be Active).
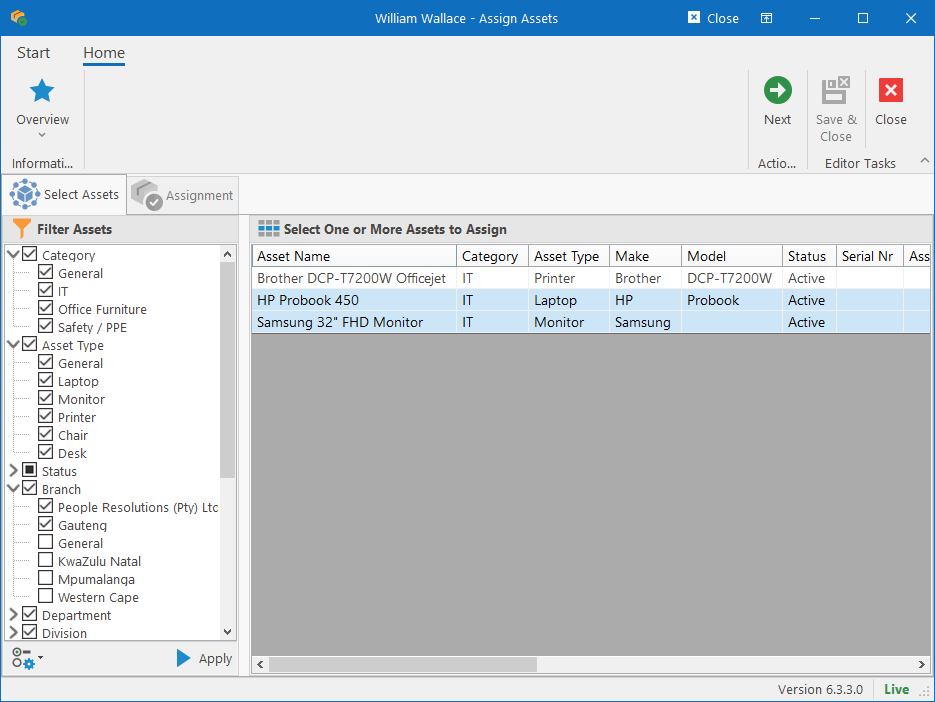
Once the desired assets are selected, click the Next button on the ribbon bar (on the right).
Assignment Details
The assets selected from the first tab will be loaded here. This tab will contain a grid for specifying the Assignment Date, Condition at time of assignment and Comments for each asset. Additionally, if any checklists are defined for the different types of assets, they’ll be listed in the Checklists section and must be completed before everything can be saved.
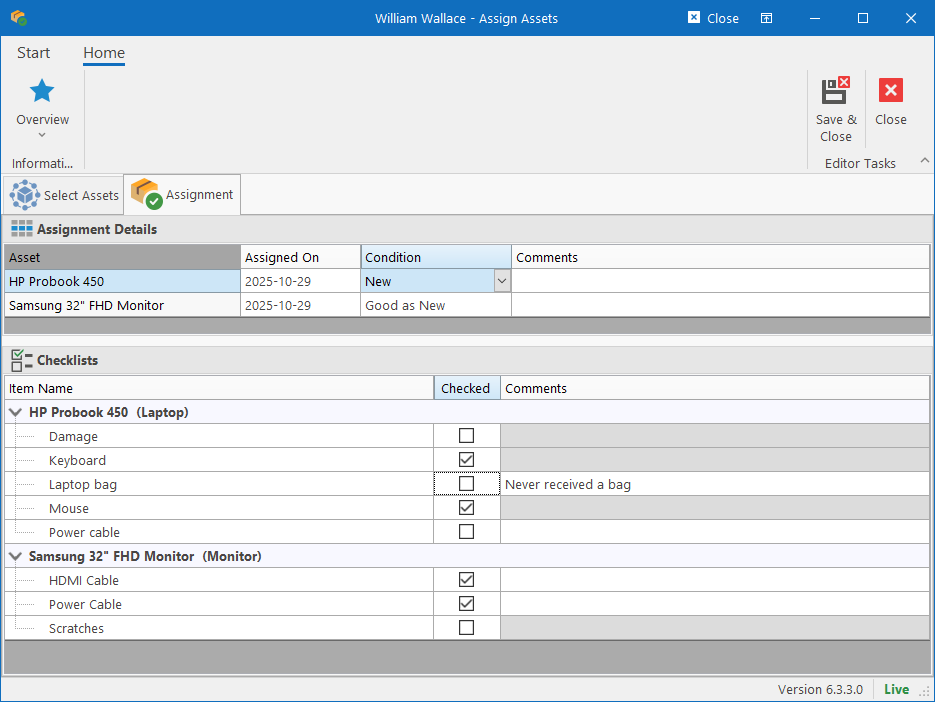
The items in checklists may require additional comments based on whether or not an item is checked and how it was configured in the checklist template on the asset type. If a required comment is not captured, you’ll get this error when trying to save:
Error Saving Asset Assignments
Item 'Item Name' in the 'Asset Name' checklist requires comments based on current state.
Once everything has been completed, click the Save & Close button on the ribbon bar to assign the selected assets to the employee.
Issued Equipment
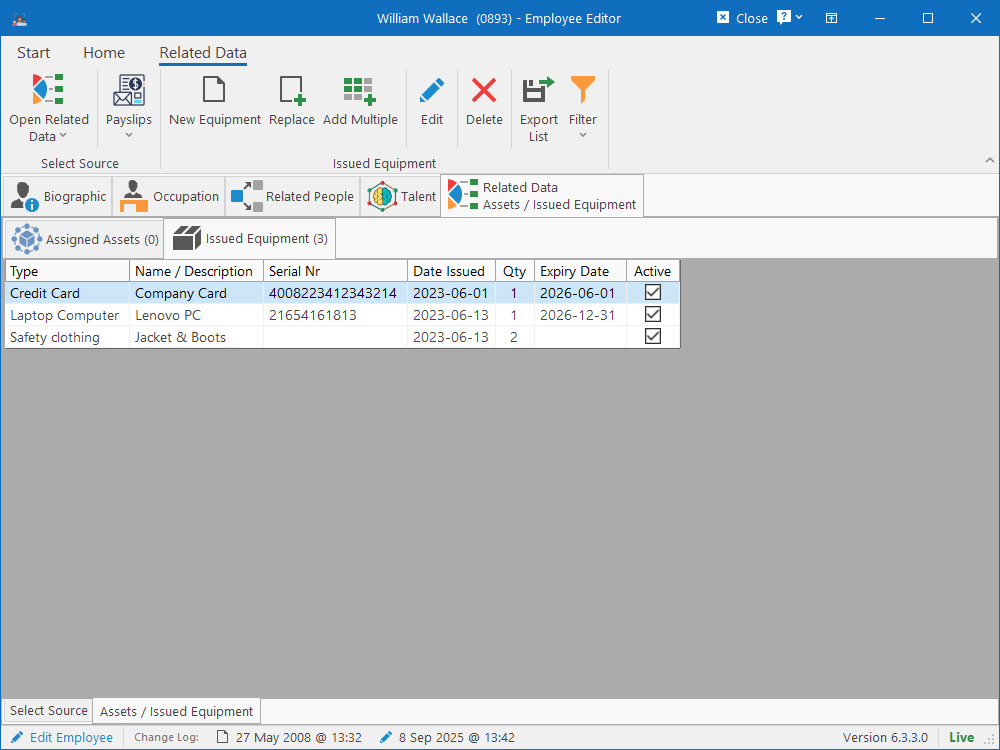
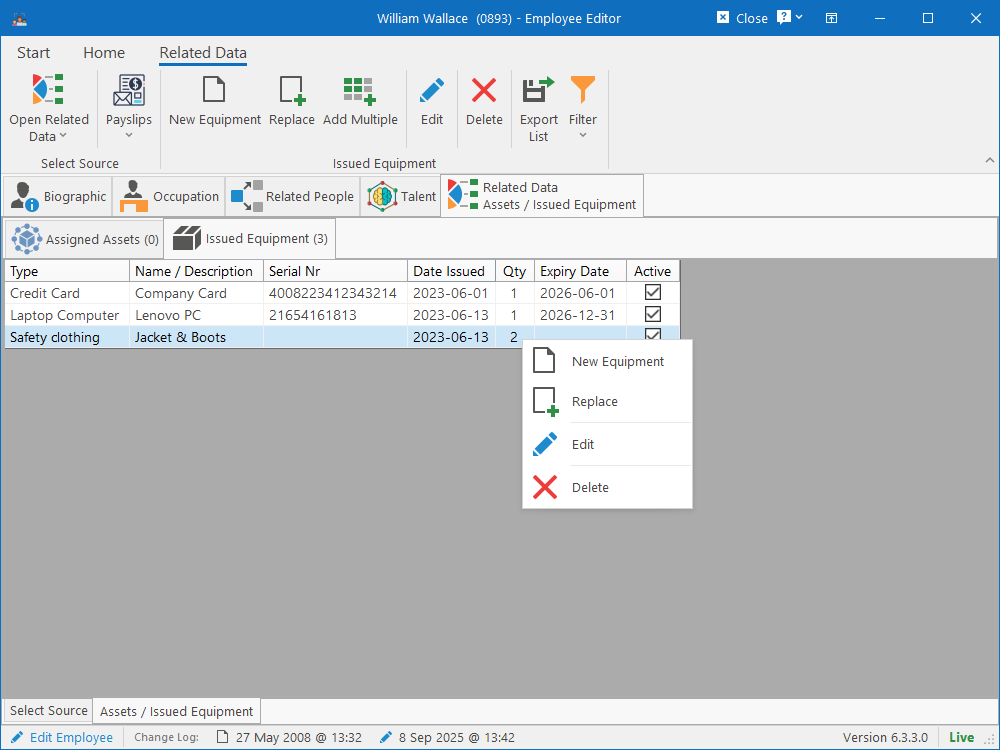
The equipment section lists all the equipment / PPE / etc. that was issued and assigned to an employee. These are created directly on the employee and not part of an overall register like with the Assets.
With the release of the Asset Register module, this functionality is now considered legacy, but we’ll keep the functionality since a number of clients are using it. We do recommend using the Assets module instead.
Creating / Editing Issued Equipment
To create a new equipment record, click the New Equipment button on the ribbon bar.
To replace an existing equipment record (either due to expiry or due to the original being lost / stolen / damaged), select an existing Equipment record and click the Replace button on the ribbon bar. This will also open the New Equipment dialog, but with all the fields from the selected equipment record filled in. When saving the replacement record, the system will automatically set the original equipment record to Inactive.
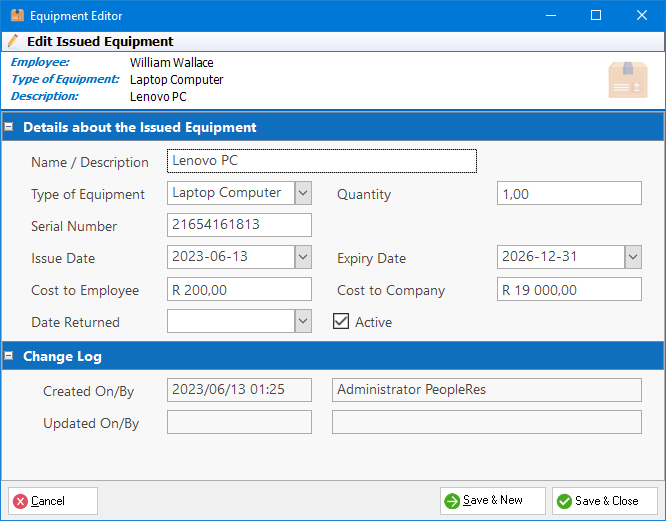
To edit an existing equipment record, simply select the desired Issued Equipment and click the Edit button on the ribbon bar or simply press the Enter key.
All of these options will open the Issued Equipment Editor. Simply complete all the required fields and click the Save & Close button.
Adding Issued Equipment in a batch
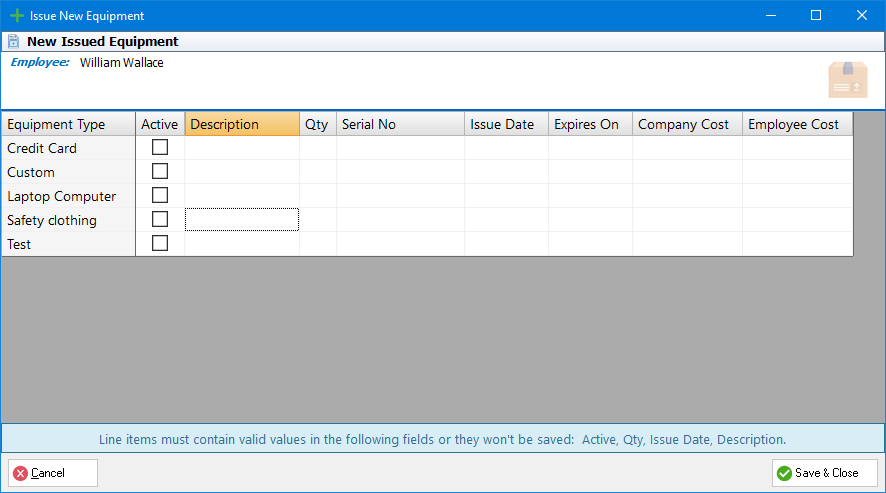
To issue multiple equipment to an employee in a batch, simply click on the Add Multiple button in the ribbon bar. This will open a grid with a line for each type of equipment. Complete the lines for the types of equipment that should be created and click the Save & Close button.