Reporting
Getting Started
HR Manage allows managers and employees to pull leave reports for themselves and their sub-ordinates. The system has 3 built-in customisable reports and support for custom and plugin reports will come soon.
To access the Reporting page, click on the site menu button, expand the Leave / Time-off item and click on the Reporting item in the menu.
Building a Report
On the Reporting page you’ll be presented with various Parameters and Filters that you can customise to generate the report you want. The exact fields and options that will be available depends on the report selected.
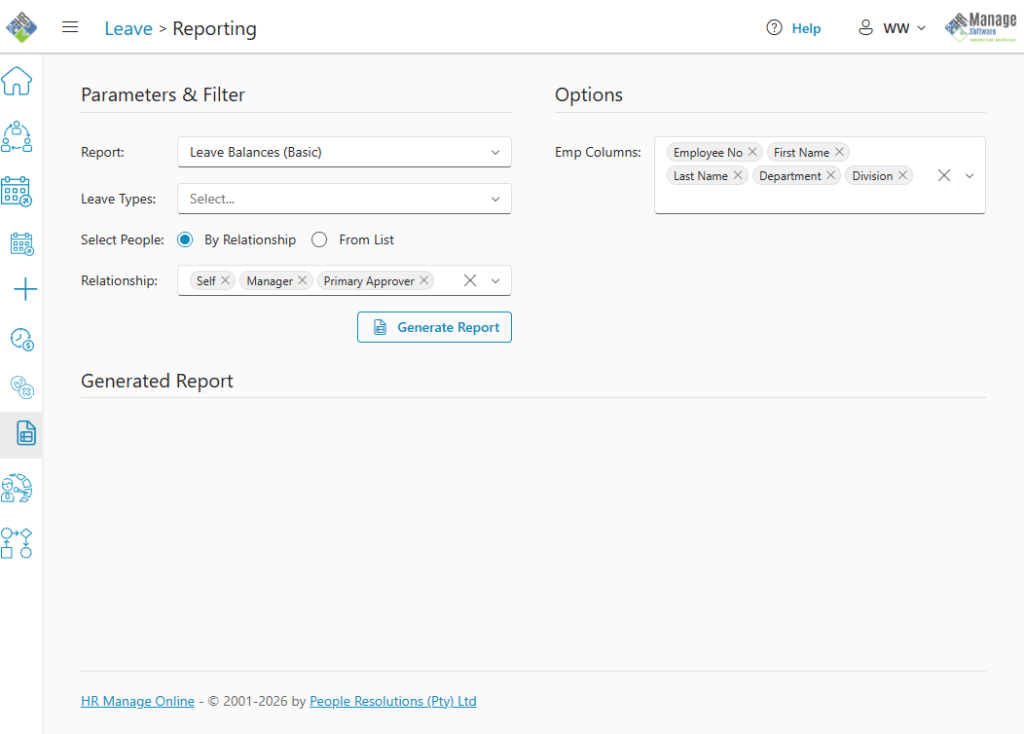
Start by selecting a Report from the first dropdown control.
Common fields
The following fields apply to almost all the different reports.
- Leave Types: Specify which leave types should be included in the report. You can select multiple types.
- Select People: You can choose how you want to select people that must be included in the report. When selecting an option, the next field will change based on the selection. The two options are “By Relationship” and “From List”.
- Relationship: Specify your role / relationship to the people you wish to include on the report. Only applicable when you specify “By Relationship” for the “Select People” field. You can include people where you are their:
- Self (will just include yourself on the report)
- Manager
- Primary Approver
- Secondary Approver
- Org Unit Manager
- Employee Status: If Relationship is selected, you can indicate if you want to see only Active employees (default) or terminated employees as well.
- Employees: Select the employees from the list that should be included in the report. Only the employees that are related to you will be available for selection in the list and grouped by your relationship to them. You can search for specific people by simply typing into the control and you can select multiple people as needed. This field will only be available if you select “From List” in the “Select People” field.
- Emp Columns: Specify which employee-related columns should be included in the report. Examples are names, job title, location, etc.
- Leave Columns: Specify which leave record-specific columns should be included in the report. Examples are leave dates, durations, reasons, etc.
Leave Balances Report (Basic)
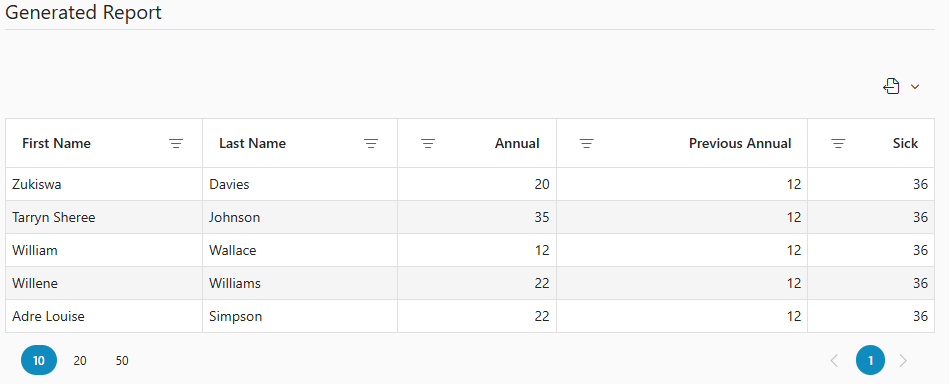
This is a very simple report that only displays the selected columns as well as a column for each selected leave type which will display the balance for each leave type.
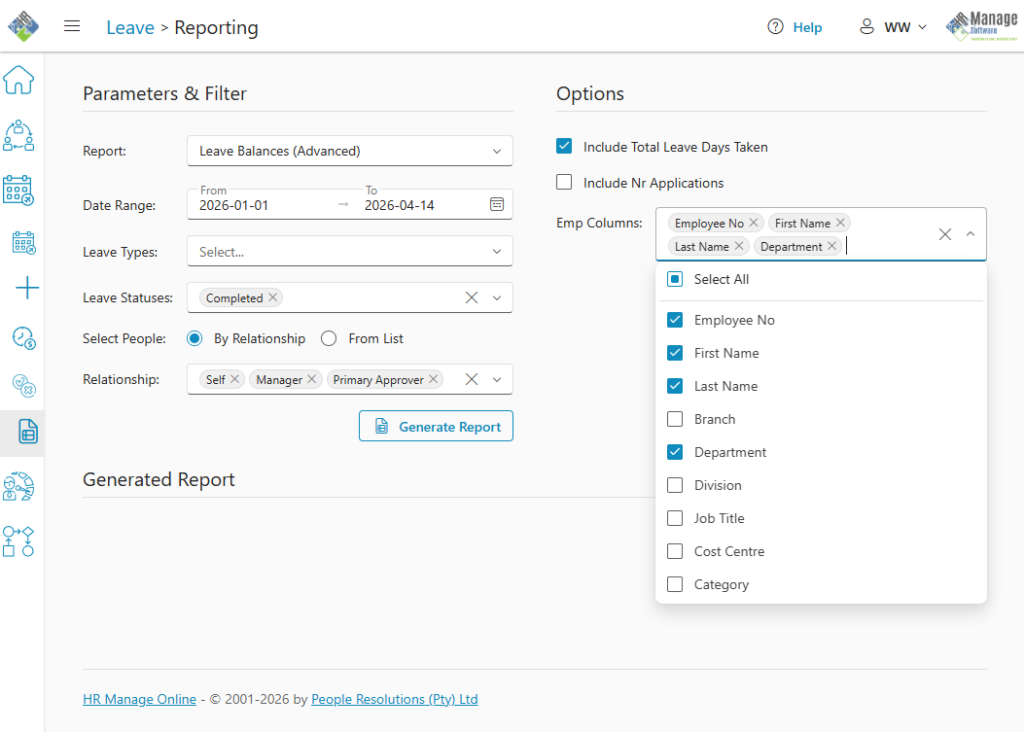
Leave Balances Report (Advanced)
This is an extension of the Basic Leave Balances report. While you’ll still have a column for each leave type that displays the balance, you can include 2 additional columns grouped under each leave type (available for selection under Options). This helps to identify potential abuse or irregularities.
The following options / columns are available.
- Include Total Leave Days Taken: Will include a column called “Nr Days” that shows the total number of leave days that were taken during the specified period.
- Include Nr Applications: Will include a column called “Nr Apps” which will show how many different leave applications of each type was submitted over the period.
Due to the new columns, some additional filters need to be specified in order to determine how the new columns should be calculated:
- Date Range: Specify which date range to check for applications or for calculating total number of days.
- Leave Statuses: Specify which leave statuses should be included in the calculation.

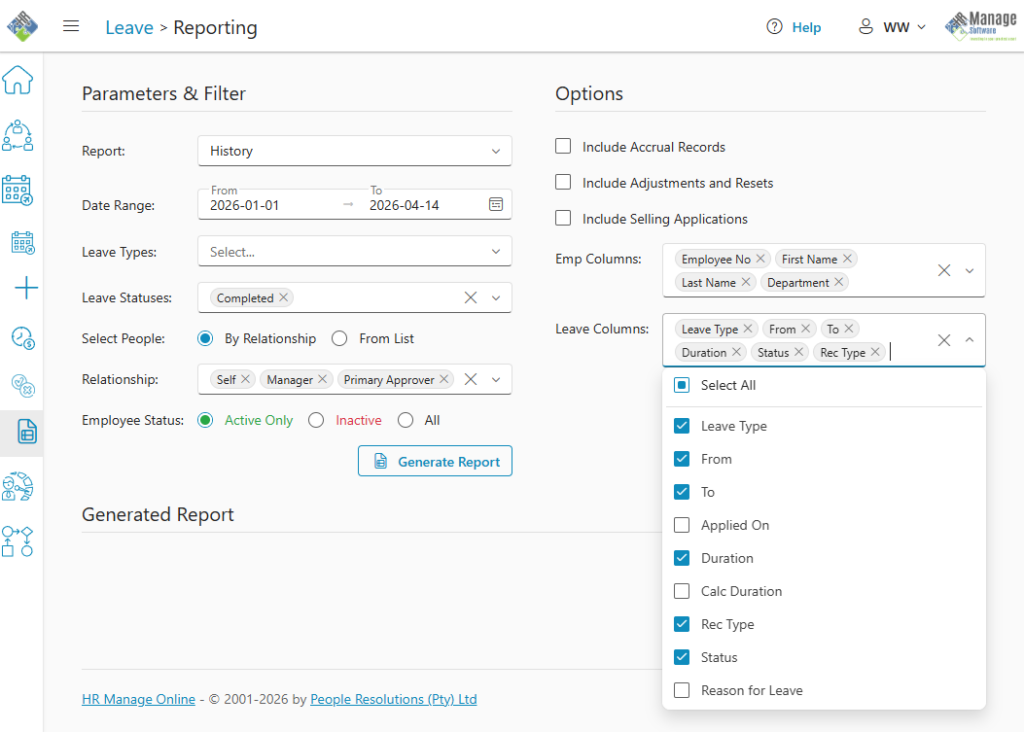
History Report
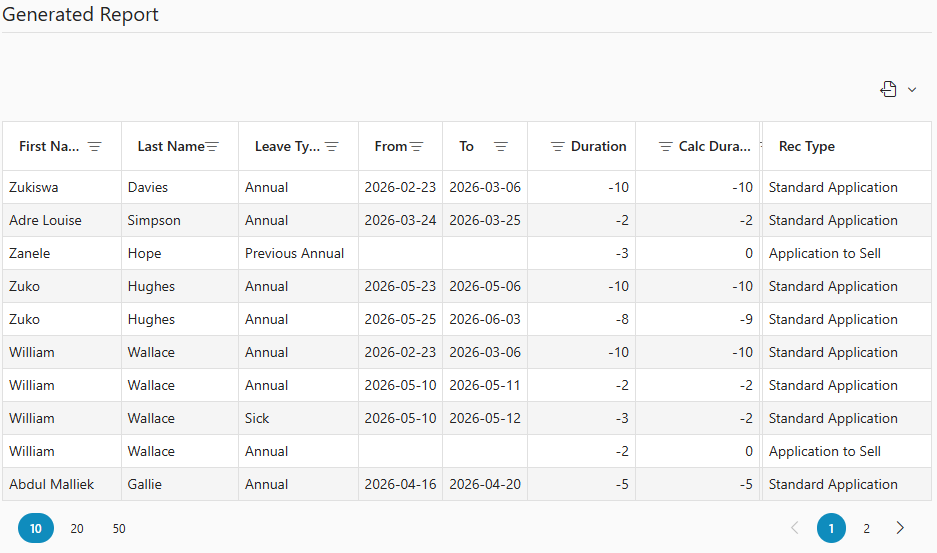
This report allows you to view detailed transactions for the specified period. The following fields are required to be specified:
- Date Range: Specify which date range to check for applications or for calculating total number of days.
- Leave Statuses: Specify which leave statuses should be included in the calculation.
- Options
- If no options are selected, then only leave applications will be included in the report.
- Include Accrual Records: This will include system-generated accrual records in the report.
- Include Adjustments and Resets: This will include balance resets and records created by administrators for adjusting leave balances.
- Include Selling Applications: This will include applications to sell leave in the report.
- Leave Columns: Specify which columns related to leave transactions should be included in the report. If any of the options above has been selected, you should include fields like “Record Type” and maybe even “Reason for Leave”.
Exporting the Report
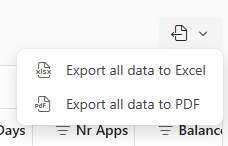
Once you’ve generated your report, you can export it directly to an Excel Workbook or Pdf Document. Simply click on the Export icon in the grid’s top-right corner and choose the format to export to.