
Approve / Reject Applications
Getting Started
In HR Manage Online, click on the site menu button, expand the Leave / Time-off item and click on the Approve Applications item. This will take you to the leave approvals page with a large calendar. Here you can approve or reject applications directly on the calendar or open a leave application for more details.
Interacting with the page
The Approval page consists of two sections:
- A list of applications to approve.
- The Leave Planner / Calendar that shows all the applications as well as people that work with the employees in the list.
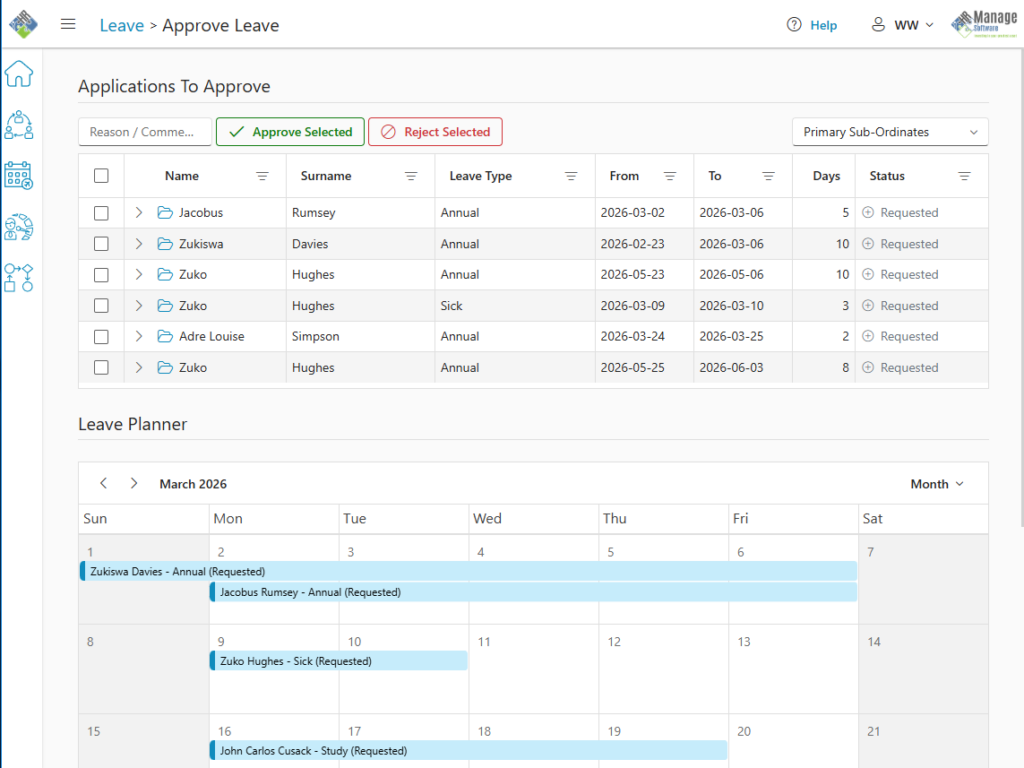
Applications To Approve
This list will contain all the applications that requires your response. By default, only Primary Sub-Ordinates will be listed, but you can choose to list Secondary Sub-Ordinates or Both combined by selecting the appropriate value in the top-right dropdown.
The list supports column filters which allows you to click on the filter icon in the column header and select only the values you wish to filter on.
The list itself contains the bare minimum information about the leave applications, but by simply clicking on an application will expand it and reveal more detailed information.
Opening an application
To open the full leave application, simply click on the Open icon next to the applicant’s first name in the “Name” column. For convenience, you can right-click the icon to open the application in a new tab.
This option will allow the full application view including the whole approval process and access to the attachment (if uploaded).
Expanding an application
To expand an application, click anywhere on the leave application’s row (other than on the Open icon). This action will do two things:
- It will reveal detailed information about the application, and
- It will navigate the Leave Planner / Calendar at the bottom of the page to the date range for the application being expanded. By scrolling down, you can thus immediately see any conflicts.
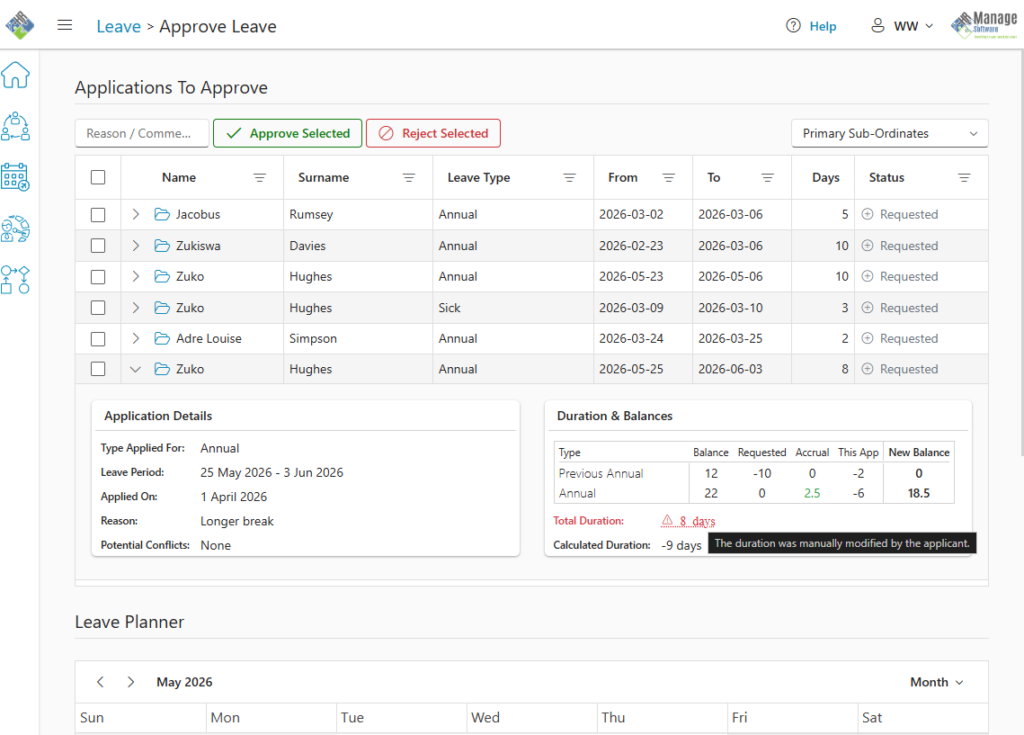
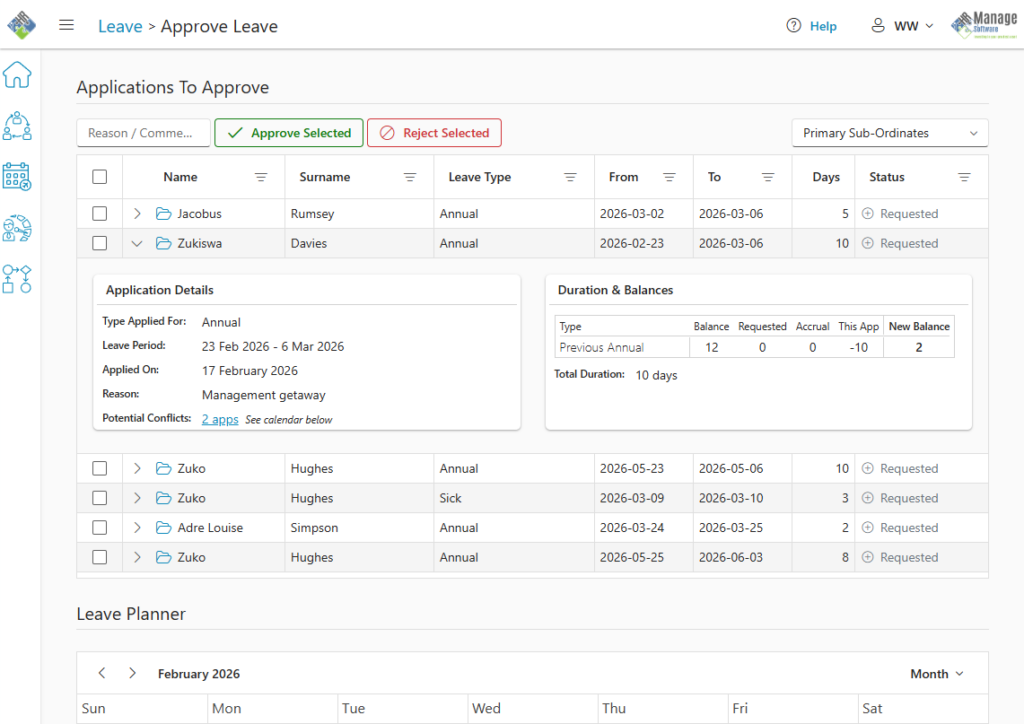
The following information will be displayed:
- Application Details
- Type Applied For: The original leave type that was applied for. Depending on configured rules, this might not always be the same as the type from which credits were deducted (as per the example screen shots).
- Leave Period: Start and End Date for the application.
- Applied On: Date when leave application was submitted.
- Reason: Reason why leave was requested.
- Potential Conflicts: If there are other employee in the approval list or on the calendar with days that overlap the leave application, it will show a number for each application that overlaps. Clicking on the link will simply scroll down to the calendar (that should still be open on the correct month from when the row was expanded).
- Duration & Balances
- Balances table: This shows the leave types from which leave credits were deducted and the balances for each type. The columns are:
- Type: Type of leave balance that was deducted from.
- Balance: Current formal leave balance for the type of leave. (A formal leave balance is the balance that is calculated based on all the Completed leave records in the system)
- Requested: Number of leave applications that are currently Requested, In Progress or Approved, but not yet completed. Excludes the current leave application under consideration.
- Accrual: If the application is in the future for a type of leave that accrues monthly, the system will calculate the future accrual up until the application’s end date.
- This App: The number of days subtracted from the leave type’s balance for the application under consideration.
- New Balance: New balance for the employee for the type of leave after this application has been completed (along with all other open applications) and it will also take any future accrual into account.
- Total Duration: The total number of days that was subtracted from the employee’s leave credits for the application. If the applicant manually changed the duration when applying for leave and it differs from the calculated duration, it will be highlighted in red with a warning sign.
- Calculated Duration: This will display the number of days for the application as calculated by the system. This line will only be visible if the duration was manually modified by the applicant.
- Balances table: This shows the leave types from which leave credits were deducted and the balances for each type. The columns are:
Approving applications
To approve one or more applications, select the checkbox for each row to action. At the top of the grid, there is a textbox that can be used for comments (optional) and then you can simply click the Approve Selected button to approve the selected applications. Upon completion, all successfully updated applications will be removed from the list and will become available on the list of next person to approve.
Rejecting applications
To reject one or more applications, select the checkbox for each row to action. At the top of the grid, there is a textbox where the reason for rejection must be captured (required) and then you can simply click the Reject Selected button to reject the selected applications. Upon completion, all successfully updated applications will be removed from the list.
Leave Planner
The Leave Planner is essentially a calendar that contains all the leave applications for employees either related to the applicants or that work in close proximity to them. Only basic information will be displayed like the Applicant name, type of leave, status of the application and the period.
When expanding a leave application in the above list, the planner will automatically navigate to the application’s date range to make it easier to see conflicts.
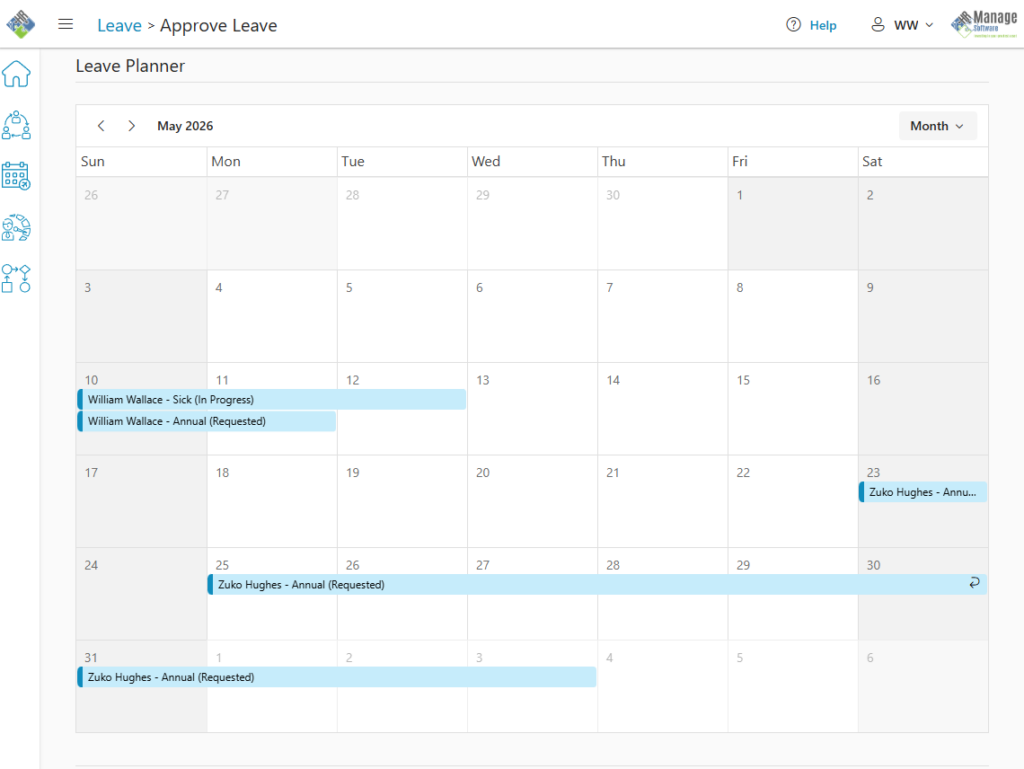
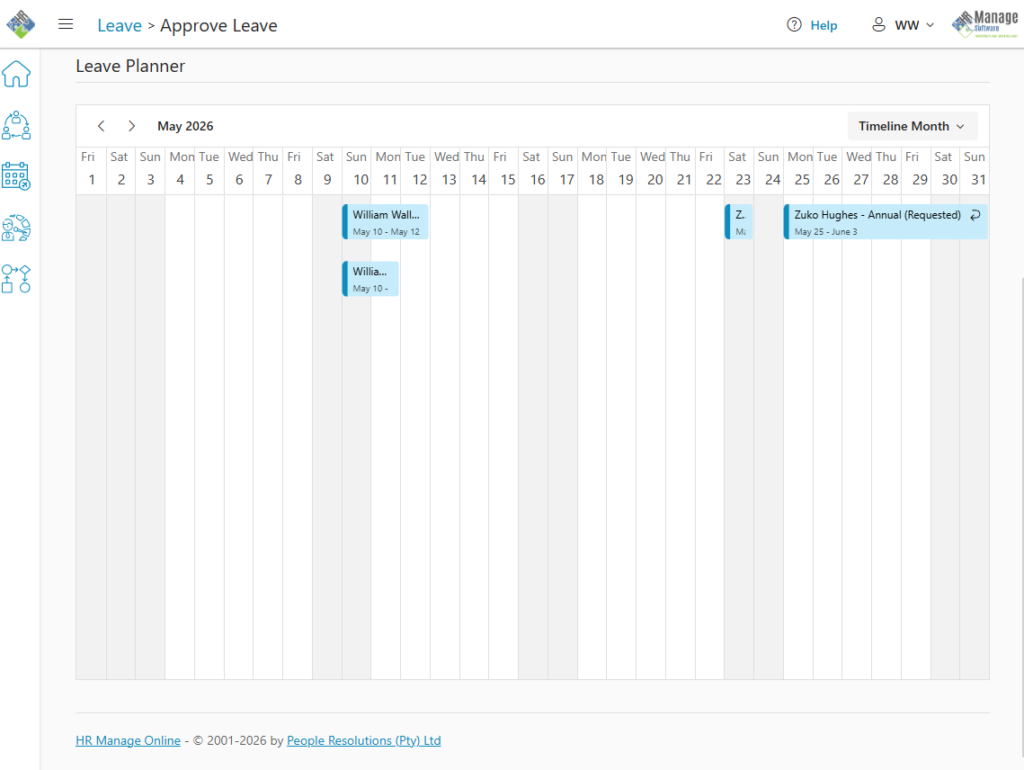
As per usual, it is possible to switch between “Month” view and “Timeline Month” view, but the default will be “Month” view.