Sign Request Editor
Introduction
Creating a New Sign Request
When creating a New Document Sign Request, the system will first prompt for some essential information before continuing to the rest of the editor.
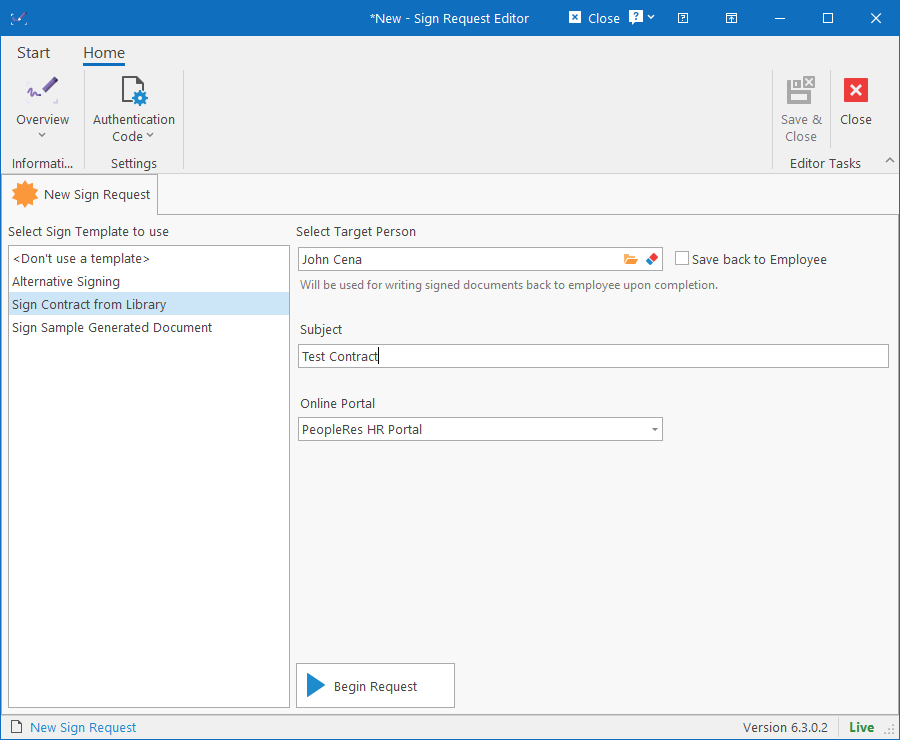
The user must select a Sign Template, specify a Target Person and which Online Portal to use. These fields are crucial in determining what will happen next and the values cannot be changed once selected.
- Sign Template: The user must select a Sign Template to use (or choose not to use a template at all). If specified, the system will retrieve any documents and recipients already configured in the template.
- Target Person: This is the person to use as source (for requirements), who to optionally write the signed documents back to and is used for determining related recipients.
- Save back to employee: If selected, once the document signing has been completed, the signed documents will save to the employee’s Compliance Data.
- Subject: Subject / Purpose of the sign request. Can be changed on the next step as well.
- Online Portal: Specify which online portal to use for document signing. In most cases, there should just be one item in this list that will be automatically selected.
Once all the values are set, click the Begin Request button which will switch to the Sign Request Details tab.
Sign Request Details
When opening an existing Sign Request (or after clicking Begin Request on the New Sign Request tab), the Sign Request Details will display. Most of the fields here will be read-only since it is dynamic information or information already configured upon creation.
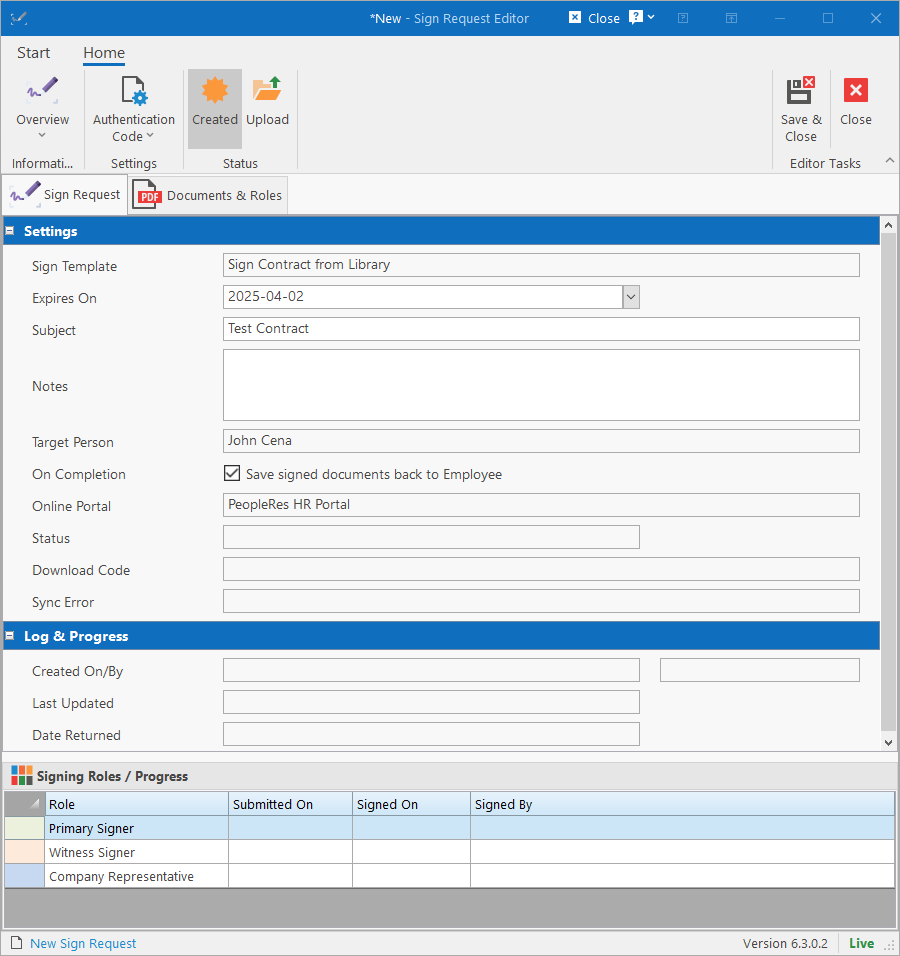
The fields that can be modified are:
- Expires On: Date when request expires. The request will automatically cancel if it still haven’t been completed by this date/time.
- Subject: Subject for the sign request.
- Notes: General internal notes about the request.
- On Completion: Since this request is not created as part of a workflow, specify if the signed documents should be written back to the target employee.
- Authentication Code (ribbon bar): Specify how authentication of the recipient should be handled. Authentication is done by sending a unique code to the recipient that must be entered before signing the documents to ensure that the person opening the document is the one who is signing. The options are:
- Use System Default: The portal is configured with one of the following settings by default. Choosing this option will use whichever option the portal is set to.
- Send Auth Code after opening page (click button): The recipient will click a link in an email which will open a page on the portal where the user must click a button to begin. Clicking the button will send the authentication code to the recipient and ask the user to enter it.
- Send Auth Code when opening page: When the recipient clicks the link in the email, the page will open and immediately send and prompt for the authentication code (without the extra step of needing to click a button).
- Don’t send Auth Code, just sign document: No authentication will be done and the user who clicks the link can just sign the document.
- Signing Roles / Progress: This list is just for monitoring the progress. Roles are automatically added as documents are added and when the sign request is in progress, the fields will be filled in as people are signing.
- Status (ribbon bar): Set the new status for the sign request upon saving. The available statuses are:
- Created: The sign request is only created on HR Manage and hasn’t been submitted to the online portal yet for processing.
- Upload: The sign request has been uploaded to the online portal for signing. Once this status is reached, no further changes can be made to the sign request from the HR Manage side except for cancelling it completely.
- In Progress: The system automatically changes to this status once the first recipient has started signing the document.
- Completed: The system automatically changes to this status once all the recipients have signed the documents.
- Cancelled: The sign request has been cancelled.
- Error: If an error occurred while uploading the sign request to the online portal.
Documents & Roles
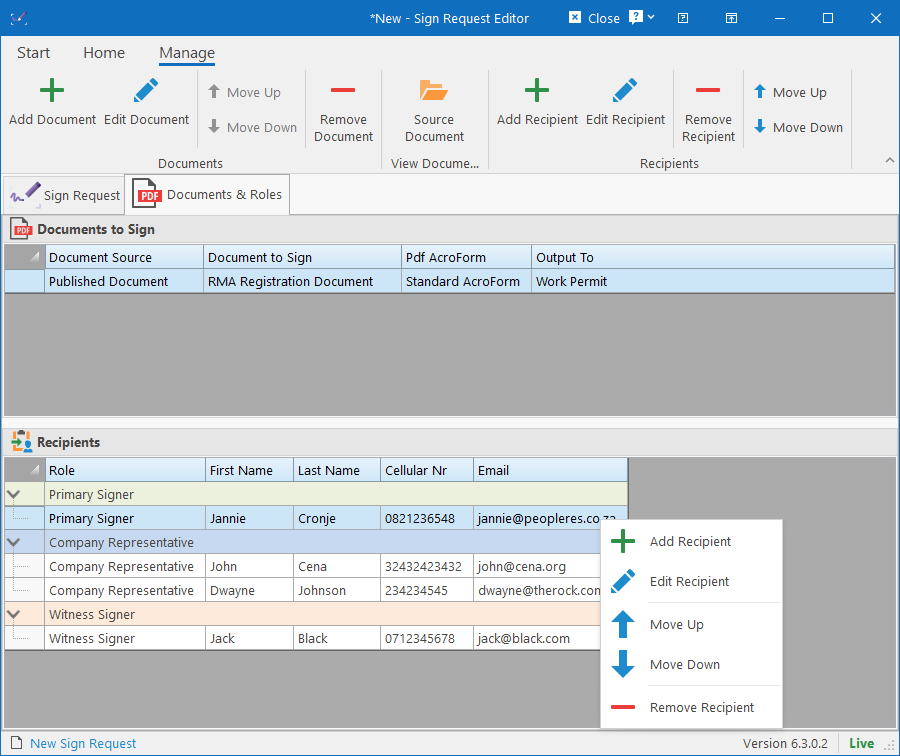
The Documents & Roles tab is where the documents can be added that needs to be signed and the roles must be assigned to people. If a Sign Template was selected at the first step, then this will all be pre-populated already.
Roles will automatically be added as Documents are added to the request (since each document defines its own roles). The roles can then be reordered to set the order in which the people must sign the document.
Adding a Document
To add a document to sign, click on the Add Document button in the ribbon bar. This will open the Document Source Editor which will allow you to specify where the document should come from (Document Library or custom attachment), which Pdf AcroForm to use and to which Requirement Type it must be saved.
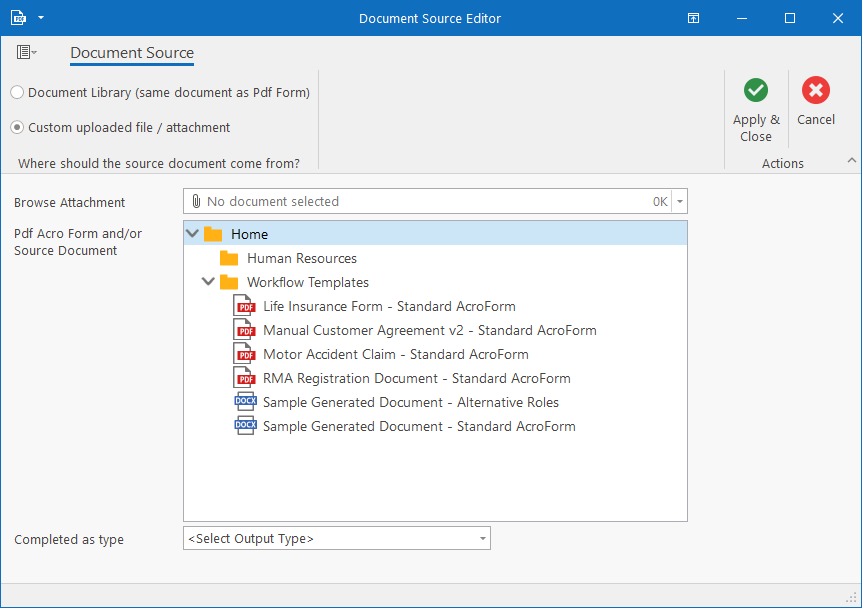
Once completed, click the Apply & Close button to add the document and all of its roles to the Sign Request.
Adding a Recipient
To add a recipient that must sign / complete the documents, do the following:
- Select the Role (bottom Recipients list) that the recipient must be assigned to
- Click the Add Recipient button on the ribbon bar.
This will open the Add Recipients for Role dialog where you can choose who to add:
- Recipient Group
- Related Person
- Specific Position or Person
- Custom / External Person
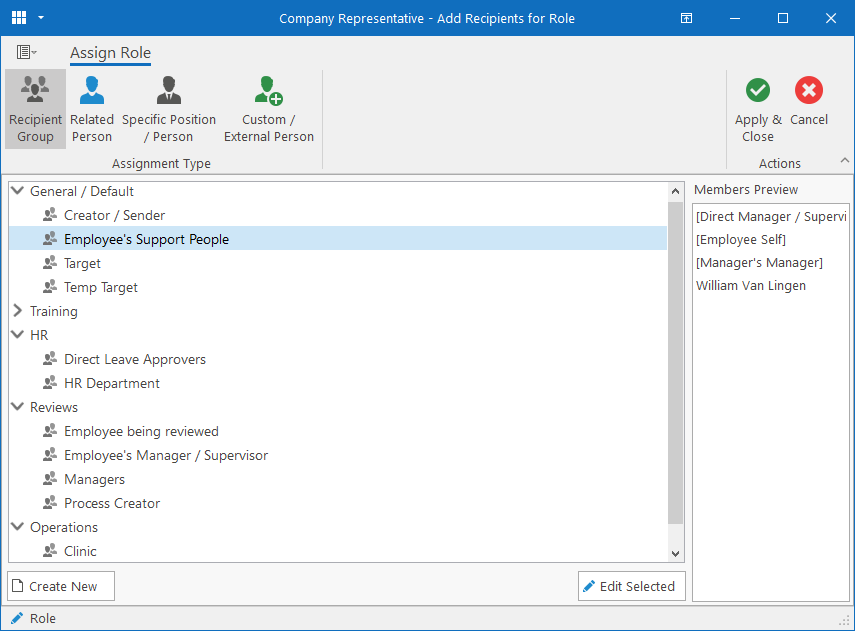

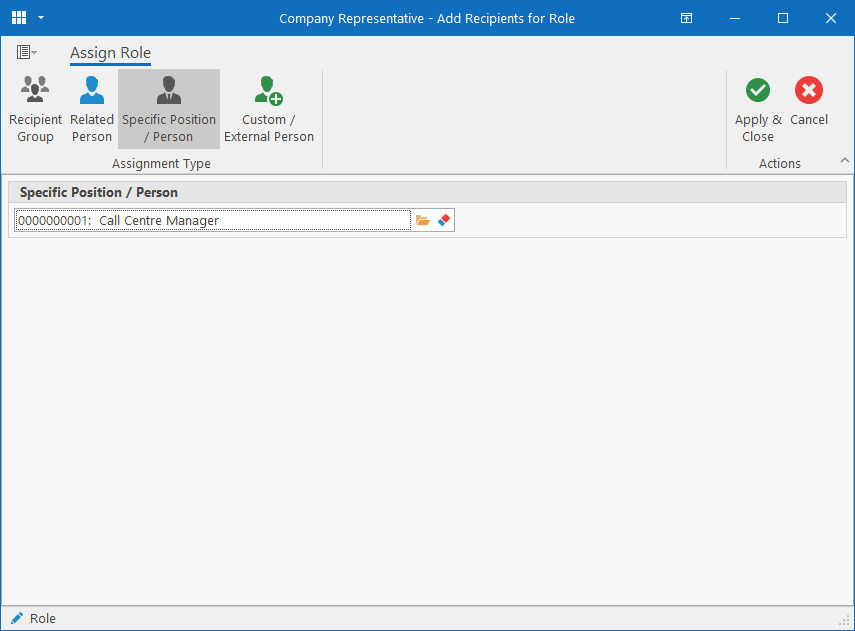
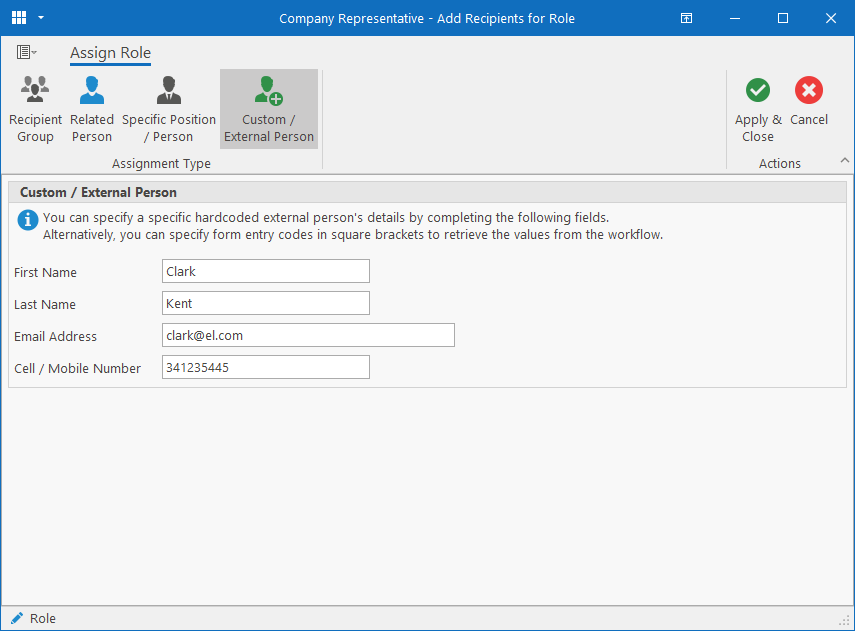
It is possible to have multiple recipients per Role, even though only one person can sign and complete the document. In the case of multiple recipients, it means that any of the recipients can sign and complete the document and once completed, the other recipients will be locked out.
Completed Sign Requests
When opening a Completed Sign Request, some additional options become available in the ribbon bar.
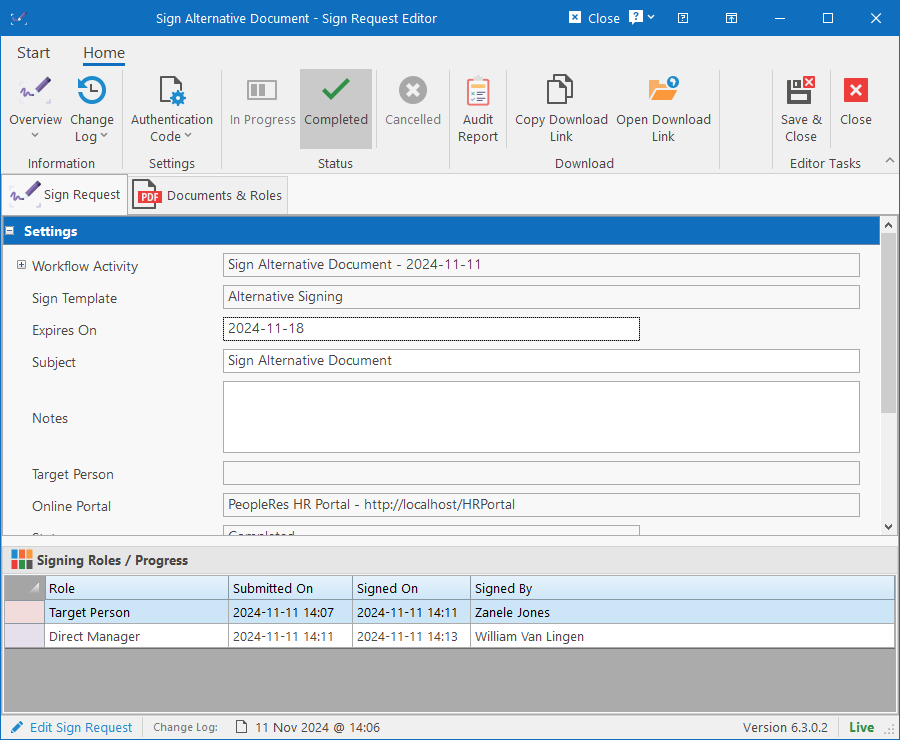
The additional actions are:
- Audit Report: View the audit report that was generated by the online document signing portal. The report shows the user activity with timestamps.
- Copy Download Link: Copies the download link to the clipboard.
- Open Download Link: Open the download link in the default web browser. The link will open on the online document signing portal to download a zip file containing all the signed documents including the audit report. The link will however only remain active for approx. 30 – 60 days after completion of the signing (depending on company settings).
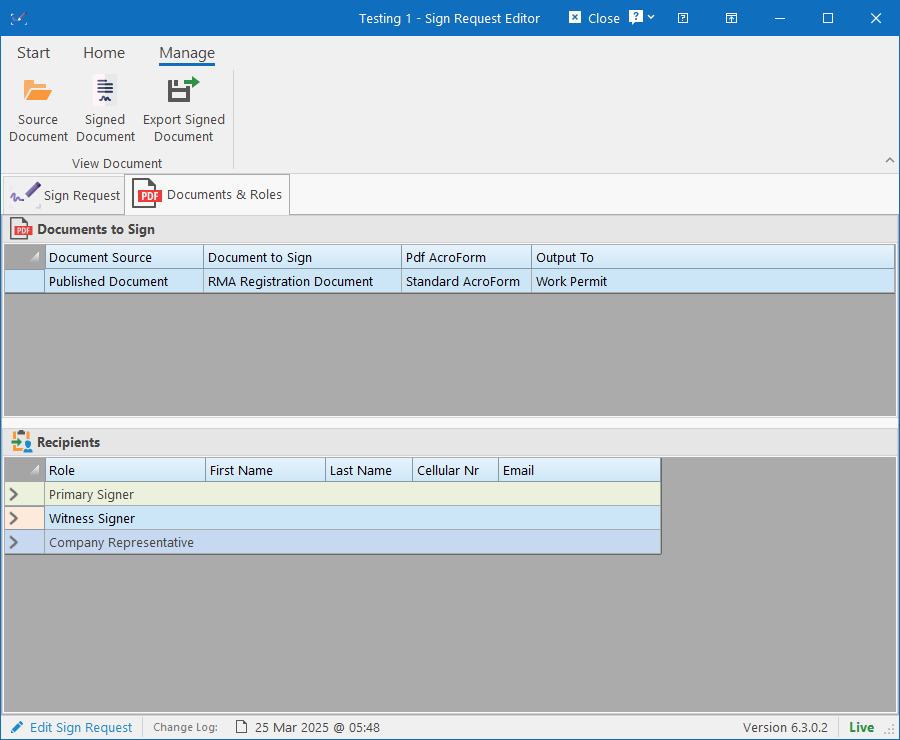
On the “Documents & Roles” tab, it is possible to select the document from the document list and only view or export that signed document.